Saving Tomato Seeds
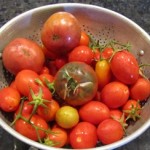
In my Henny Penny Farmette garden this year, I grew different varieties of heirloom tomatoes: German Queen, Mortgage Lifter, Paul Robson (a Russian heirloom), Mt. Vesuvius, San Marzano, and others.
It’s the end of the season and my work now is to save seed and compost other plants that are no longer producing. Over the next couple of months, I’ll turn the soil and add amendments.
Since my tomato plants are open-pollinated, heirloom types (as opposed to patented hybrids), I can have a reasonable expectation of how the seeds will perform once planted in a future garden.
A word of warning about using patented hybrid seeds–growing plants from hybrid seed will not come true in your next year’s garden. They will likely be inferior plants compared to their parents.
However, open-pollinated seeds produce tomato plants that remain true to the parent plants (of course, some slight variation in nature is possible). But you can know with certainty that those seeds will remain true just as they have through generations of gardens.
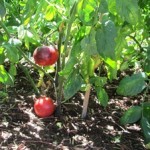
These are heirloom blue tomatoes. Avoid planting tomatoes in the same garden location year after year because of tomato blight and black rot. Let the soil recover for three years–tomatoes are heavy feeders.
When choosing which tomatoes to save seed from, keep two criteria in mind:
1) Choose tomatoes from vigorous plants, free of disease.
2) Select seed from tomatoes with characteristics (like the taste, skin thickness, size, and abundance) that you prefer.
I utilize a simple three-step method for saving my tomato seeds. I always select a prime tomato specimen that has reached its peak to be used for harvesting seed.
1. Use a sheet of paper towel for each type of tomato seed you are saving. Write on one corner of the paper towel the type of tomato seed and the year grown and whether determinate (often called bush) or indeterminate (vine which will keep growing until killed by frost). Most heirloom tomatoes are indeterminate.
2. Cut open the tomato and then scrape out seeds and spread them out across a paper towel. I put these towels on my kitchen counter or in a window to dry for 10-14 days.
3. Fold the paper towel and slip it into a paper envelope to use for your next year’s garden. I use one envelope per paper towel to ensure air circulation for good drying.
Come spring, these seeds can be planted into cell packs to become seedlings. Or, you can plant them directly into the garden after all danger of frost has passed.
___________________________________________________________________
If you enjoy reading about garden topics and like mysteries, check out my Henny Penny Farmette series of cozy mysteries, including A BEELINE TO MURDER, THE MURDER OF A QUEEN BEE, and A HIVE OF HOMICIDES (Kensington Publishing, NY).
I’ve also written dozens of health and wellness and spirituality books, all available online and everywhere books are sold.

More than 150 rituals for sound mind, strong body, and meaningful connections to the people around you
How to Grow a Fruit Tree from a Pit
Nothing beats a breakfast of summer fruit picked fresh from a patio or backyard tree. I’m referring to fruit trees such as apricots, peaches, and nectarines. Cherries and plums are also among my favorites. The fruit from these trees is often referred to as stone fruit because of the hard pits (holding the seed) around which the fruit forms.
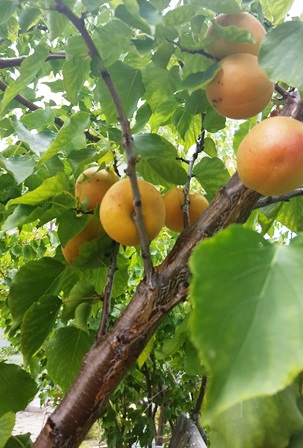
By mid-May, ripe apricots hanging on the trees in my backyard don’t last long–they’re eaten fresh, made into jams, and dried
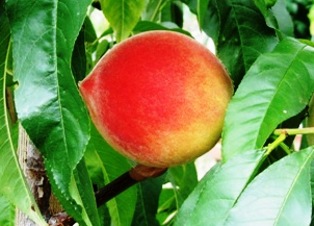
Apricots in the Bay Area ripen in mid-May and peaches often ripen a bit later during the three months of summer (depending on the cultivar). If you love eating the fruit, don’t toss the pits. Consider that an apricot or peach grafted onto rootstock might cost upwards of $20 during bare-root season but $35 to $50 if sold in a pot. Growing from seed costs nothing.
Planting the seed extracted from the pit of your favorite apricot or peach variety can generate a tree with a very good chance of carrying the parent trees’ traits and producing fruit within three to five years. In fact, I’ve found that pits of my apricot, cherry, wild plum, peach, and nectarines that are left on the ground or discarded by the squirrels who’ve eaten the fruit will often sprout on their own.
Use this ten-step method to grow a peach or apricot tree from seed.
1. Choose a pit from a locally grown ripe fruit that tastes juicy and delicious.
2. Dry the seed on a paper towel in your kitchen window for several days.
3. Carefully crack open the hard shell of the pit to reveal the seed inside (it will resemble an almond).
4. Put the seed (or several seeds) in a sealed container in your refrigerator and let it chill for up to three months. The cool temperature exposure helps the seed get ready to sprout.
5. Time your removal of the seed from the refrigerator to a month before the last frost date in your area.
6. Cover the seed in water overnight and in the morning plant it a clear glass jar of potting soil (no lid on the jar).
7. Return the jar to the refrigerator and keep the seed moist until it has sprouted (about one month).
8. When the outside weather conditions are right (no more frost and the soil begins to warm), plant the seedling in your garden in fertile, well-drained soil.
9. Dig a basin around the planting hole for watering.
10. Mulch to keep down weeds and ensure the roots stay cool. In three years, watch for blossoms in the spring with fruit to follow.
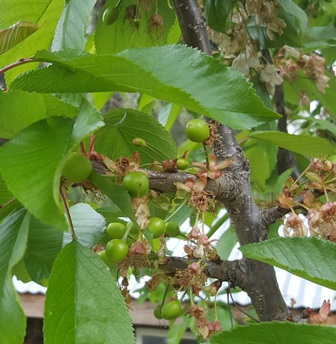
Cherry pits are much smaller than other stone fruit; pits of sour cherries (and also wild plums) may self-seed but sweet cherries less so. Cherries must have a period of cold to germinate
* * *
If you enjoy farmette topics like gardening heirloom vegetables, herbs, and fruits as well as keeping chickens and bees, check out my Henny Penny Farmette series of cozy mysteries from Kensington Publishing–A Beeline to Murder, The Murder of a Queen Bee, and A Hive of Homicides.
You’ll find in the Henny Penny Farmette series
-
Delicious recipes
-
Farm quips and quotes
-
Tips for gardening and keeping chickens and bees
-
An exciting whodunnit mystery
Also, check out MY POCKET MEDITATIONS, my newest forthcoming nonfiction title from Adams Media/Simon & Schuster, at http://tinyurl.com/l6lzorq
![My Pocket Meditations: Anytime Exercises for Peace, Clarity, and Focus by [Lester, Meera]](https://images-na.ssl-images-amazon.com/images/I/51GH%2BXEPc6L.jpg)
Yellow-Rumped Warbler and Other Songbirds Act Like It’s Spring
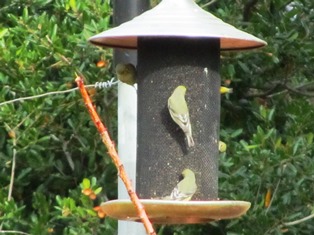
It’s the middle of January but tell that to Mother Nature whose songbirds are singing like it is spring. With our temperatures expected to exceed 70 degrees Fahrenheit in parts of the Bay Area today, the birds are gathering around feeders and fountains and the bees are buzzing about, too.
While having coffee on the patio this morning, I had the privilege of being visited by a variety of winged friends, some seemingly oblivious to me and my camera.
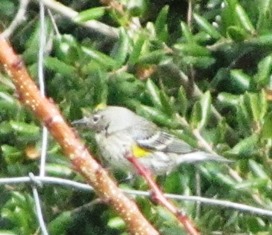
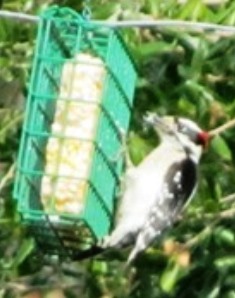
The woodpecker announces himself with the familiar rat-ta-tat-tat while the yellow-rumped warbler and other songbirds hang out in the firethorn bush, in the oak trees, and at several fountains we’ve placed at the rear of our farmette.
There’s a lot of bee traffic today. With warm days forecast for the next week or two, the bees could get the wrong idea and swarm. That would undoubtedly surprise the local backyard bee hobbyists.
So while I love the warm weather–especially when I read about the polar temperatures causing such misery in the Midwest and along the East Coast–like many Californians, I am beginning to worry about the looming possibility of a drought this year and mandatory water rationing.
But, then again, there’s something magical about hearing songbirds trilling in the dead of winter when the fruit trees in the orchard and the roses lining the path to the front door remain soundly asleep. I think I’ll have another cup of coffee and sit for a while longer.
Harvesting Onions and Saving the Seeds
This year I grew Red Baron (red) onions from tiny sets. I pretty much just laid the thin little onion strings on the ground and sprinkled a little soil over them. I kept them wet and those little strings turned into really fat bulbs of purplish red onion with tall green stalks.
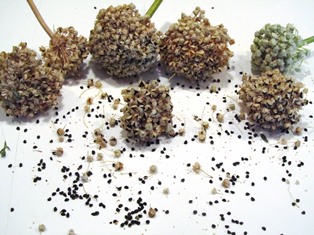
However, when the plant shot up some stalks that were two to three feet in height and sprouted a globe type bloom, I wasn’t sure what to do.Well, now I realize that those globes hold tiny black seeds that will turn into my next crop of onions.
When the bulbs started to turn a little dry, I clipped them and let them dry a bit more on my patio table. Then I laid them onto some white poster board and shook them vigorously to release the tiny black seeds (about the size of mustard seeds).
I put the seeds into a white paper envelope and then labeled the envelope with the name of the onion and the date the seeds were harvested. I can’t wait now until fall when I can sow the seeds into flats and then plant the new sets.
I got a lot of onions this year that I used in soups and salads. I can only hope that next year’s spring crop will be as bountiful.
Harvesting and Saving Sunflower Seed for Replanting
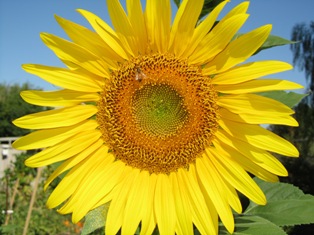
Last year, my sunflowers were gigantic and gorgeous. I removed heads as large as dinner plates for drying so I could plant the seeds again this year. Some of the smaller heads contained seeds that were totally black. I figured the bees had done some magic with cross pollination of other sunflowers from the neighborhood.
I stored the heads in my garden shed over the winter, but never got around to removing the seed for replanting. When I went into the shed to retrieve them for planting last month, I discovered with dismay that something had devoured most of the seeds. A few seeds were left so I optimistically tucked them into the ground. Alas, none germinated.
Determined not to let that ever happen again, I recently bought four packets of open-pollinated, heirloom sunflower seed. After they grow, I’ll harvest and preserve the seed correctly at the end of summer so I’ll have plenty to plant next year. When you use open-pollinated, heirloom seed, next year’s plants will come true to the characteristics of the parent. This is not the case, however, with hybrid seed.
In case you might be interested in harvesting and storing sunflower seeds, too, here are the steps.
1. When the sunflower heads have turned from green to brown, remove the head from the stalk with a knife.
2. Let the head dry for a few weeks to a month in a dry place, safe from marauding squirrels and racoons. You can tie the heads with string and hang them from the ceiling in a drying shed or place them on paper.
3. Shake or gently bang or otherwise extract the seed onto paper from the dried heads.
4. Store the seed in paper envelopes and label them with the date and type of seed.
 Facebook
 Goodreads
 LinkedIn
 Meera Lester
 Twitter


