Archive for the 'Soil' Category
Tis the time for Cool Season Planting
If you love the cool season plants like lettuce, spinach, kale, onions, leeks, sugar snap peas, and artichokes, Valentine’s Day weekend is the time to start planting cool season crops in the Bay Area and other warmer climates.
I put in onions throughout the cool season and am rewarded with burlap bags of red onions, yellow, white, and the walla walla variety for kitchen soups and other culinary creations during the first months of the year.
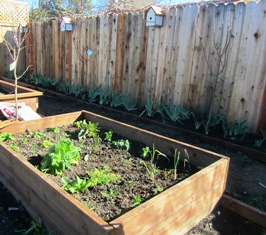
My husband is building more growing boxes (4 x 4 x 3) in which we shovel amended soil, some planting mix, bone meal, blood meal, compost, and chicken manure. The soil will grow almost anything.
This weekend, we’re moving a couple of citrus trees and three rose bushes. I’ll feed and water and watch for the new shoots to show within a week or two if the weather stays warm. So, you see, Valentine’s Day isn’t just for lovers but also people who love to garden.
How to Repay the Thoughtful Gift of a Truckload of Manure
I begin obsessing about soil and manure this time of year after the summer garden is gone. The old adage of: take care of the soil and it will take care of you (via your plants) is really true. Out here on the farmette, the clay soil is so heavy that it cracks open in fissures during summer, so we are always working to improve it.
Recently, a generous friend brought us a truckload of horse manure. It was no small truck either. The manure seemed mostly aged and I could easily rake it into our flower beds and little lawn. Some of though is still relatively green, not aged, and I worry about using it to grow my winter crop of vegetables for fear of E-coli contamination.
There’s a new area where we are debating or not to put down a stone floor and just grow trees and flowers in a container wall on two sides. It might be the perfect place to use some of that horse dung.
In the meantime, on the property behind ours, the horse manure has been spread out with a bobcat to keep the growing areas fertile for the trees that were planted there nearly four or five decades ago.
There are all kinds of manures one can use in the garden, from bat guano and worm casings to animal waste products–horse, cow, sheep, steer, turkey, rabbit, and chicken, for example.
You can get manure tested, much like you can soil, to detect levels of nitrogen, phosphorus, and potassium. Not all manures are high in nitrogen, which is loved by many gardeners for that sudden growth and burst of bloom. Some manures, like cow and horse, also can carry seeds of weeds or whatever the animal has grazed on, which can emerge in your garden.
Most manures can be made into a fertilizer “tea” by mixing with water. Whether you apply aged manure or manure tea, always wash your fruits and vegetables well before eating to reduce the risk of consuming contaminated fruit or produce.
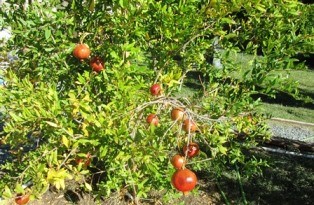
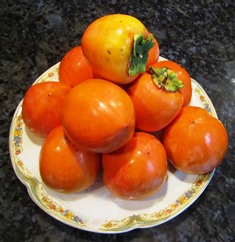
We appreciate our friend’s gift. Now . . . we wonder how to repay his kindness. I’m thinking a basket of persimmons and pomegranates, a French sugar pumpkin, a dozen organic eggs, and jars of jam and honey.
Preparing for an Early Spring
It’s winter. The nights are cold and the early mornings even colder. But here on the farmette, daytime temps are still unseasonably warm for this time of year in Northern California. That makes doing all the winter cleanup and spring preparation chores not only tolerable, but enjoyable.
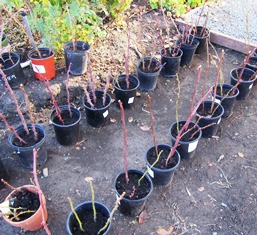
We’ve pruned all the roses and taken cuttings for propagation of new bushes that we’ll plant around our property. We’ve divided the irises and planted the babies in new beds. Finally, we tackled pruning the fruit trees and imagine how shocked we were to find our Desert Gold peach trees with buds ready to open. The reason must be the warm weather.
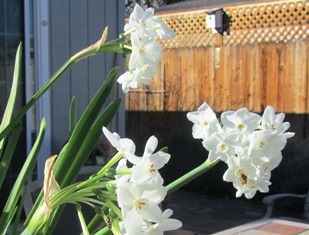
The honeybees are searching for blossoms and finding none, they’re exploring the papaperwhite narcissus on my patio table
The honeybees are searching for flowers in bloom. They’ve flown to the citrus trees that I’ve covered against nighttime freezing temps and are wandering about on the blankets. The French perfume lavender still has some blooms but the bees seem also interested in the paperwhite narcissus blooms that I forced in water between Christmas and New Years Day.
We’ve moved the strawberries to a newly prepared bed in two planter boxes and are revitalizing the soil in the old boxes. Bare root season is around the corner and my husband and I are feeling the pressure to get the garden ready for a new growing season. The days are lengthening and we don’t want an early spring to catch us unprepared. Technically, winter has only just begun but the birds and bees and buds on the trees are suggesting it could be a short winter.
Remind Me Again, What Good Are Gophers?
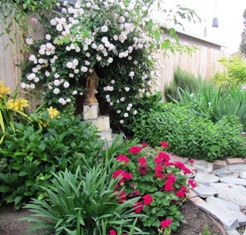
Cecile Brunner forms an arch over a statue of the Virgin Mary in one of the prettiest and most peaceful areas of my garden
The lovely Cecile Brunner rose that serves as the anchor for a small meditation garden on the northwest side of my little farmhouse suddenly appears yellowed, leafless, and lifeless. Honest to goodness, she looks like she’s croaked. It’s certainly a strange turn of events, since she had numerous new canes and the leaves were shiny and healthy only a week ago.
There is a small eruption of new dirt nearby–suggestive of moles (insect eaters) and gophers (vegetarians) and maybe voles–(voles eat roots but don’t leave mounds). So my rose problem might actually be two-fold–either way–it’s underground.
I could dig and back fill those tunnels with dirt and maybe I should. I’ve heard you can break a leg stepping into a gopher hole and I’m not talking livestock here. I wonder if the vole and gopher are sharing a network of tunnels down there dead-ending in the gopher’s bunker.
I gave the poor rose a big drink of water as soon as I discovered her condition, not knowing what else to do. As I stood there, watering with hose in hand, I saw the earth around the rose’s root cave in. Seriously?
So I’m thinking there must be a one heck of a big tunnel. This is war! I decide to stick the hose right into the tunnel and fill it with as much water as that hole will hold . . . and then some.
Strangely, while I’m dealing with the rose problem, I look past the fresh dirt mound and notice that one of the Dutch purple irises in a bed of a hundred or more has broken into full bloom. What gives? Those beauties normally bloom around Easter. I wonder why the voles haven’t attacked the rhizomes of the irises.
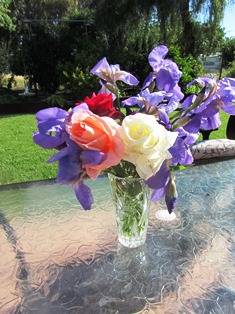
The condition of the Cecile Brunner climbing rose breaks my heart. Maybe she’ll spring back to life to bloom again next spring. For now, I’ll clip the beautiful iris and tuck it into a vase with some roses from other bushes on the farmette. That done, I’ll put an all-out effort into finding out how to get rid of those underground buck-tooth bandits . . . for good. Feel free to leave me your ideas. I’ve tried almost everything I’ve read on the Internet.
Harvesting Onions and Saving the Seeds
This year I grew Red Baron (red) onions from tiny sets. I pretty much just laid the thin little onion strings on the ground and sprinkled a little soil over them. I kept them wet and those little strings turned into really fat bulbs of purplish red onion with tall green stalks.
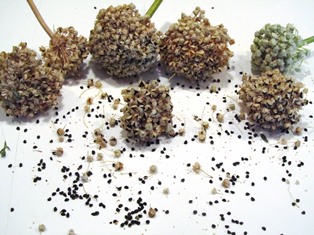
However, when the plant shot up some stalks that were two to three feet in height and sprouted a globe type bloom, I wasn’t sure what to do.Well, now I realize that those globes hold tiny black seeds that will turn into my next crop of onions.
When the bulbs started to turn a little dry, I clipped them and let them dry a bit more on my patio table. Then I laid them onto some white poster board and shook them vigorously to release the tiny black seeds (about the size of mustard seeds).
I put the seeds into a white paper envelope and then labeled the envelope with the name of the onion and the date the seeds were harvested. I can’t wait now until fall when I can sow the seeds into flats and then plant the new sets.
I got a lot of onions this year that I used in soups and salads. I can only hope that next year’s spring crop will be as bountiful.
The BGW of Composting
Perhaps you’ve wanted to try composting but are concerned about not knowing the ABCs. Forget the ABCs. Try remembering three other letters: B for brown, G for green, and W for water. Those are the three key ingredients of any successful compost pile.
The B (brown waste) includes twigs, branches, and dead leaves. The G (green material) is made up of fruit and vegetable scraps, grass clippings, and coffee grounds, among other things. The W (water) adds the necessary moisture.
The brown material provides carbon, the green material provides nitrogen, and the water creates the magic, turning that brown and green stuff to turn into that dark, crumbly, earthy compost that worms and garden plants love.
If you are like many gardeners, you might pay for compost purchased in bags at local nurseries. But keep in mind that food scraps and yard waste make up about one-third of the material that goes into landfills. Put that material into a compost pile and it saves you money in several ways.
Using compost in your garden reduces water usage because the compost keeps the roots of plants moist and cool. Reduced water usage lowers your water bill and leaves more money in your pocket. Your compost material enhances the richness of your soil while keeping down weeds. Your garden thrives, meaning you won’t have to spend as much on fresh produce if you are growing your own.
You can make a simple bin out of galvanized chicken wire. Stretch the chicken wire into a cylinder shape. Stick some posts in around the circle to hold the wire up and in position. And start throwing in the brown and the green waste, plus some water. Turn every so often.
Once you know the BGWs of composting, there’s really no reason not to try it. Composting not only saves you money, it helps our planet.
Mulching Do’s and Don’ts
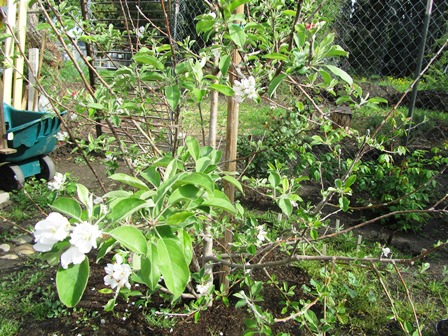
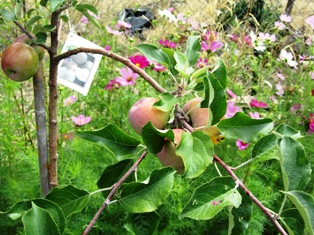
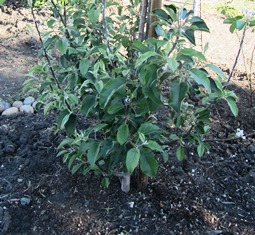
An area of the garden where we planted apple trees two years ago had become so overgrown with weeds that it required many hours of weeding.
Following the weeding, we added organic mulch. I like to create an area as large as the canopy of the tree around the base of the tree (free of any plants or weeds) so that I can easily feed and water our fruit trees throughout the growing season. Then I reapply the mulch.
Mulching with organic material makes it easier to prevent the germination of weeds, facilitate watering and feeding of the fruit trees, encourages the proliferation and activities of earthworms (good for improving the soil), and keeps the soil moist (reducing the amount of water needed).
When adding organic mulch to the top of the soil, the keep in mind the following tips.
1. Do dig in high-nitrogen products such as chicken manure, blood meal, or cottonseed meal into the soil around the plant or tree before layering atop the soil low-nitrogen mulch such as bark, wood chips, or decayed sawdust material.
2. Do pull mulch back from over bulbs and perennials in the spring to facilitate a faster start to their warming and growth cycle.
3. Be aware of snails and slugs that can hide in damp mulch. Try placing a layer of newspaper where you think the snails and slugs might be proliferating. Put the paper down on the soil at night and retrieve it before sunup when you can turn it over to see the pests clinging to it. Dispose of the newspaper in the garbage.
3. Don’t mulch too close to the stems of shrubs or trees s since wet mulch and cause stem rot; ensure that the mulch is at least an six inches away from a shrub stem or tree trunk.
4. Don’t pile mulch too deep; doing so encourages rodents such as voles, rats, and mice to use the mulch for nests.
Moving Dirt
Moving wet and damp dirt is not easy. Worse, it’s dirty work. However, we are working a master plan for the landscape that includes a sitting area, a back yard in two levels, and an area that includes fruit trees, raised planting boxes for flowers, and a large vegetable garden.
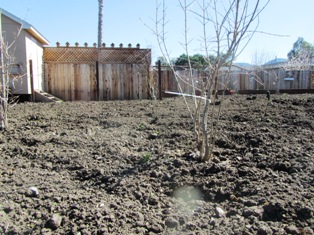
The window of opportunity has opened for improving the soil before planting our summer garden. The soil is not too wet, nor too dry. Right now, this clay soil can be worked by hand and by machine.
My neighbor has already turned the earth in his garden several times. A couple of days ago, he pushed his rototiller through the gate dividing our respective properties and offered to till the soil in the area where I’m going to plant my summer garden.
The turning of the soil exposed not only a huge amount of rocks but also gravel. The previous owner of my property had at one time used the area for a gravel driveway. That meant compacted soil and lots of stone and broken pieces of granite and marble (the former owner was a building contractor), which I set about removing by the bucket. I recycled that rock onto a pathway in the garden.
Come summer, I know I’ll be glad I did all that dirty work, reintegrated the rock and gravel, and amended the soil. Good soil will grow just about anything you put into it. And I’ve already started dozens of open-pollinated vegetables in seed flats in my kitchen.
Organic Amendments to Benefit Soil
There are many ways to improve soil composition to grow healthy plants. Healthy plants produce more abundant and bigger yields.
The soil on the Henny Penny Farmette is mostly heavy clay. After a rain, its sticks together like solid, cold mass of margarine. In the summer, it hardens like concrete and also cracks.
To make soil more porous, it is necessary to add amendments that permit air circulation and water penetration and retention.
There are basically two different types of amendments. The mineral amendments such as vermiculite, pumice, and perlite are generally used in sandy soil to create aeration and water retention. Types of organic amendments for soil such as our clay soil include manure, leaf mold, ground bark, peat moss, and sawdust. These rely on bacterial action to break down into a soft, crumbly humus.
In our vegetable growing boxes that are 4 feet by 6 feet, we include 25 percent organic amendments to 75 percent soil. Sometimes we even up the percentage of amendment material. We turn it thoroughly.
The clay soil immediately benefits from the tilling (adding air) and also from the blending of organic material into the soil to change its density, nutrient value, and permeability to water.
Raised beds, which I first saw on farms in villages along the Volga in Russia, allow us to control the soil and makes it easier to add amendments and mulch. However, we also have garden beds, too, that benefit from organic amendments.
Transitioning between the Seasons
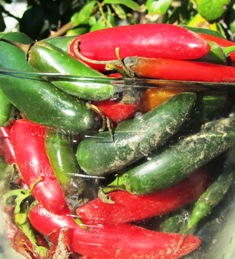
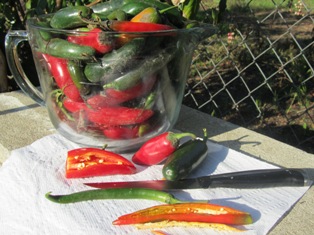
Now that we’ve entered a new year and a new season, I’ve reluctantly pulled the last of the chili pepper plants from my garden. This past summer I grew Anaheim, ancho, chiles de arbol (hot and related to cayenne), banana (also known as yellow wax peppers), and jalapeno (called chipotle whenever the chilies are smoked). I save the seeds in white paper envelopes for replanting and use the chilies in cooking my Hispanic, Caribbean, Indian, Southwestern, and Thai dishes.
Cooks the world over love chilies for the flavors they add to their cuisines, however, chilies contain oils that can irritate skin and eyes. When harvesting seeds from chili peppers, I wear latex gloves (like surgeons wear). The gloves protect my fingers and hands from the oils but allow me to easily work with the chilies.
A little tip about gauging the heat of chilies is to look at the top (shoulder) and tip (pointed end). If the top is wide and the tip is blunt, the chili will be milder than a chili with a narrow top and a pointed end. See, http://whatscookingamerica.net/chilepep.htm.
I opted not to put in winter season crops this year. The clay soil needs turning (with a rototiller) and more amendments. With the vegetable garden devoid of plants now except for vagrant lettuces, carrots, and potatoes, I do winter clean-up chores such as composting, pruning, and preparing beds for spring.
The Bay Area forecast for the inland valleys last night predicted plunging temperatures and a hard freeze. I covered the citrus trees with blankets and a heavy sheet of black plastic. At sunup, the temperatures still hovered around 30 degrees Fahrenheit, and white hoar frost covered everything in the garden, including the sheeting.
A garden needs winter–a time of rest, dormancy, and chill. Some plants require many hours of chilling to perform well. Freezes also eliminate some garden pests.
Our neighbor graciously gave us some bulbs a year ago that we planted in the fall. Now they’ve sprouted and are blooming. These white jonquil blooms are similar to those grown in my mother and grandmother’s gardens (although their jonquils were yellow with orange-yellow centers). The blooms add welcome color to the otherwise monochromatic winter landscape. These and other bulbs we’ve planted will eventually render some color in the garden and hopefully a little pollen for the honeybees while we wait for winter to transition into spring.
 Facebook
 Goodreads
 LinkedIn
 Meera Lester
 Twitter


