Archive for May, 2015
Farmette Chores, the Writing Discipline, and Landscapes
Each day on my farmette starts with chores involving plants and animals . . . and writing. The latter might seem a bit strange until you understand that my farmette–with its organic heirloom vegetables, eggs, and honey–has evolved into a brand that includes my forthcoming Henny Penny Farmette novels. It’s business. I have to write three novels in three years. I’ve already written two.
Like any business that involves regular tasks for keeping the enterprise thriving, my farmette novels require a daily commitment to writing. Excellence in my writing endeavors is just as important to me as the quality of my Henny Penny Farmette jams, honey, eggs, and this blog.
I rise early, at 4:00 AM, to get a jump on my day. The roosters start crowing around that hour, but the sleepy hens remain on the roost until daylight. I like to stroll outside, see the edges of the black sky turning lighter at the eastern horizon, observe the position of the moon and stars, feel the cool predawn air on my face, and notice the silent vapor of fog receding like gray shroud being tugged upon.
I enjoy the scent of pine and orange blossoms (when the trees are in bloom), and take note of the occasional spritzing of a skunk or cat marking its territory while out prowling. These observations become notes in my journal.
At bedtime and when I awaken during the night, I practice yoga nidra, a state of deep relaxation and lucid dreaming. Often, though, the lucidity may be nudged aside as sleep and dreams in which I am not aware of my physical environment take over. Still, I sometimes work through problems in my life or my stories and awaken with a solution . . . sometimes, but not always.
During the morning hours before sunrise, following a good night’s sleep, I feel sharpest and most in tune with nature and my deepest, inner Self. One of my favorite writers John O’Donohue observed the profound and numinous presence of nature and wrote in his book Anam Cara: “Landscape is not all external, some has crept inside the soul. Human presence is infused with landscape.”
The Henny Penny Farmette landscape has echoes from the past in it. I’ve re-created my grandmother’s farm garden where I spent happy hours of my childhood. But also, I’ve got my own personal stamp on this landscape. It’s a lot of work, but I embrace the daily chores and the discipline needed to keep the farmette and a book series going. It’s an ongoing journey to a new horizon.
Peaches Add Flavor to a Slow-Sippping Summer Drink
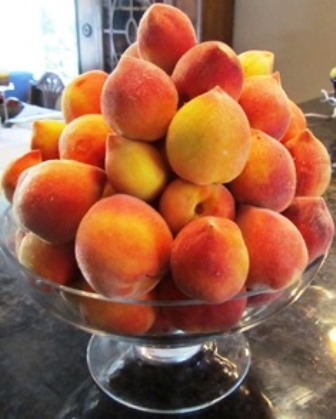
Desert Gold is an early ripening peach cultivar that grows well in the southwest and in western gardens
Summer remains weeks away but already the Northern California farmers’ markets are in full swing, selling apricots, cherries, strawberries, and early-ripening peaches. The early peaches I grow on the farmette are Desert Gold.
Peaches taste great eaten fresh, prepared in cobblers, and added to homemade ice cream. But you can also use fresh peaches to make a lovely, slow-sipping brandy-and-wine drink.
Eau de vie is French for “water of life.” Basically, it is a brandy made of fruit with no added sweetener and not aged. It is best consumed chilled and sipped after a meal as a dessert or digestive drink.
Making your own eau de vie is fairly straightforward and you’ll find many easy recipes. Don’t be afraid to experiment with fruit flavors. Basically, just add prepared fruit to pure grain alcohol and then distill it. Or, mash fresh fruit, ferment, and distill it. Here’s an easy recipe for a summer drink that combines purchased eau de vie with white wine and peaches.
PEACHY SUMMER SIPPER RECIPE
Ingredients:
6 ripe peaches
4 cups dry white wine
1 cup superfine sugar
1/4 cup Eau de Vie (brandy made of fruits)
Directions:
Skin the peaches and slice each peach in half.
Pour the wine into a stainless steel pan.
Gently simmer the fruit in the white wine until tender (about 15 minutes).
Cover the fruit and let stand overnight to impart its full flavor to the wine.
Remove the peaches from the wine.
Strain the wine through a fine sieve or paper filter.
Add the eau de vie to the peach-flavored wine.
Add the sugar and stir well to dissolve.
Pour the blended beverage into sterilized dry bottles and cap or cork.
Keep refrigerated. Use within two weeks.
Scientific Studies Show Negative Effects of NeoNics
Neonicotinoids, commonly referred to as neonics, are a new class of pesticides that are closely related to nicotine. As the U.S. government debates the use of these controversial chemicals and studies go on, the European Union has voted to ban bee-harming pesticides. See, http://www.theguardian.com/environment/2013/apr/29/bee-harming-pesticides-banned-europe.
There’s no question that the bee population has been in decline in the last decade. Many beekeepers and experts alike have been vocal in their suspicions that exposure to neonicotinoid pesticides is a likely culprit. The journal Nature published a study that revealed significant negative effects on the wild bumble bee foraging on plants sprayed with the new class of pesticides.
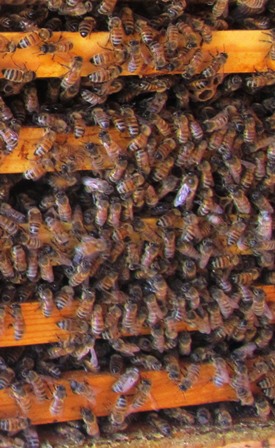
Pollinators of all types are important to our food crops, but especially the bumble bees and honeybees. The latter are trucked around to farms and orchards (particularly the almond orchards) in early spring to pollinate the blossoms.
Exposure to neonicotinoid pesticides resulted in wild bees doing less reproducing, having smaller colonies, and having colonies that didn’t grow as compared to wild bees not exposed to the neonics.
One of the studies was the result of research done in the wild, using 16 patches of land divided into two parcels of eight patches each. One area used canola seeds coated with the pesticide containing neonics. The seeds were not coated in the other area.
Scientists then compared the bees exposed to the pesticide with bees not exposed. The treated side had half as many bees per square meter as the untreated side. The bees in the pesticide patches also had negligible weight gain, but the bees in the untreated area gained roughly one pound.
Neonicotinoids are now the world’s most widely used pesticides. Isn’t it time farmers of the world found other options and chemical companies put less money into lobbying for these bee-dangerous chemicals and instead searched for good alternatives to help farmers deal with pests in their fields and orchards?
Fire Blight Can Ravage a Pear Tree or Take Down an Orchard
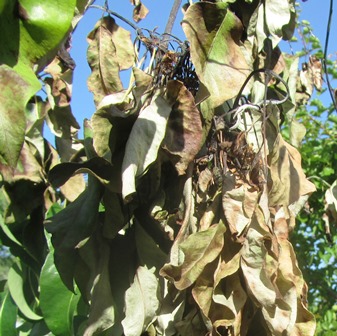
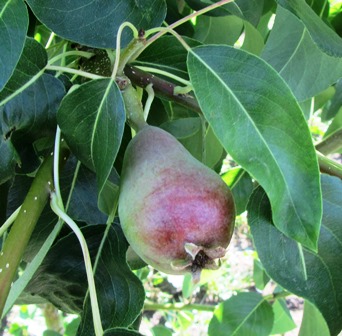
I’ve discovered limb tips, fruit, and blossoms blackened by fire blight in my Bartlett pear tree. That means dealing with the disease quickly or losing tree.
While there are dozens of other types of fruit trees on the farmette, there are no other pear trees. Sadly, this one is in bad shape because of a widespread infection by the bacteria Erwinia amylovora.
The blight started last summer and, despite spraying to control it, the disease has overwintered in the bark of the tree to reappear with the emergence of blossoms this year. Disease spread is helped along by the bees.
Fire blight’s vicious cycle and must be broken if the tree is to survive. The life cycle of blight can be seen at a glance at http://nysipm.cornell.edu/factsheets/treefruit/diseases/fb/fb_cycle.gif
Treatment starts with a vigorous pruning of the affected limbs. That means cutting back twelve inches from the site of the blackened area of fire blight. The disease is highly contagious, so the cuttings must not be recycled or composted. Burning them is recommended.
Also, minimizing the amount of tree blight inoculum in the orchard is important as this disease can also spread to other pear trees, apples, quince, raspberries, and fire-thorn bushes. Cornell recommends a regular spraying program using an appropriate bacteriocide to save fruit trees infected with fire blight.
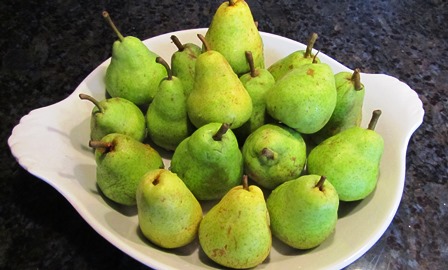
The saddest thing of all for me is that the tree was once beautiful and healthy and (even now) is loaded with fruit. I hate to think of not being able to save this lovely pear tree. Since most pear cultivars are susceptible to fire blight, it might make sense for me to plant a Seckel Pear tree since it is less susceptible to this highly contagious disease that can destroy a single tree or ravage the entire orchard.
From Garden to Table, Easy-to-Grow Squash
I love summer squash, tossed into rosemary potatoes and served up with eggs and sausage on a Sunday morning; or, grilled with fish, or added to a freshly-made pasta sauce. Best of all, you can have it fresh, from your kitchen garden to your table, as squash is one of the easiest vegetables to grow. Squash is a super food, high in antioxidants, fiber, and Vitamin A.
Squash is one of the Three Sisters (corn and climbing beans being the other two), grown together as companion plants in the tradition of certain groups of Native Americans who planted these vegetables. A fourth sister might be the Cleome serrulata, the Rocky Mountain bee plant to attract pollinators for the beans and squash.
There is a scientific basis for growing these three together. The squash grows fairly large and spreads out, blocking weeds. The beans provide nitrogen to the soil. The corn shoots up a stalk that provides the support the beans need to climb. The three plants benefit each other.
Each year, I plant both summer squash and winter varieties such as butternut and pumpkin that have hard shells and store longer. All types of squash are easy to grow. They just need sun, water, and room. They aren’t fussy about soil.
Summer squash includes zucchini, yellow squash, and scalloped (or round) squash. Autumn/winter varieties require a longer growing period (up to 120 days) and include butternut, acorn, hubbard, and pumpkin.
Growing Tips:
Choose a well-drained, sunny spot in the garden for your squash.
Plant three seeds to a hill (roughly six inches apart).
When the squash are about a foot tall, thin to the healthiest seedling.
Water two to three times each week.
Harvest summer squash when still young; if left on the vine, the squash becomes tough.
 Facebook
 Goodreads
 LinkedIn
 Meera Lester
 Twitter


