Succulents, Easy to Grow Plants for Holiday Gift-Giving
It’s winter, the time when many plants (including succulents) go dormant. But that doesn’t mean you cannot propagate new plants from your existing succulents. You don’t need any special tricks to get a cutting to root (you can often just pluck a fleshy leaf or stem and ease it into soil or suspend in water and it will root). However, root hormone powder is a great way to get roots started on just about everything, including succulents.
Root hormone powder makes short work of getting new roots on your succulent cutting. You just dip the cleanly cut edge of a fleshy leaf into the powder and shallowly plant in a succulent planting mix or potting soil (a half leaf or one not cleanly detached should not be used). Gently water directly, give lots of light exposure, rotate often, and mist regularly to keep the soil moist and the plant happy.
Succulents planted in attractive pots make lovely living gifts for the holidays. For friends with garden windows that offer lots of light, why not group three pots of succulents on a tray? Find a variety of pots and succulents in a diy center or local nursery.
Diverse succulents in a range of sizes (tall, medium, and short heights) are particularly striking when grouped together a a round shallow pot or long rectangular container.
- Combine different types of succulents in a single pot
They’re not just for winter holiday gift-giving, succulents are appreciated all year long. They love light, but not a blazing hot sun. They appreciate a soak and dry method of watering. And some prefer the outdoors. Some even reward your efforts with a bloom. To give a succulent as a holiday gift, all you need is a healthy plant in a pretty pot. Just add a ribbon and a gift card. The plants are so easy to grow, propagate, and care for, that everyone loves them.
_____________________________________________________________________________
If you enjoy reading about gardening, country living, and health and wellness, check out my various books on these topics. They include THE SELF-CARE PLANNER, HOW TO LIVE WITH INTENTION, MY POCKET MEDITATIONS, and many more. All are available online and in traditional bookstores everywhere.
Also check out my series of cozy mysteries. These are also available in many formats online and in bookstores.

Start at any point in your year or life with this self-guided planner packed with inspiring quotes, self-directed activities, and motivational tips
How to Grow a Fruit Tree from a Pit
Nothing beats a breakfast of summer fruit picked fresh from a patio or backyard tree. I’m referring to fruit trees such as apricots, peaches, and nectarines. Cherries and plums are also among my favorites. The fruit from these trees is often referred to as stone fruit because of the hard pits (holding the seed) around which the fruit forms.

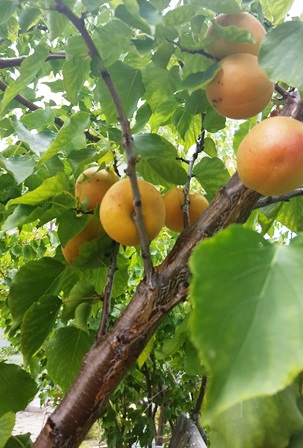
By mid-May, ripe apricots hanging on the trees in my backyard don’t last long–they’re eaten fresh, made into jams, and dried
Apricots in the Bay Area ripen in mid-May and peaches often ripen a bit later during the three months of summer (depending on the cultivar). If you love eating the fruit, don’t toss the pits. Consider that an apricot or peach grafted onto rootstock might cost upwards of $20 during bare-root season but $35 to $50 if sold in a pot. Growing from seed costs nothing.
Planting the seed extracted from the pit of your favorite apricot or peach variety can generate a tree with a very good chance of carrying the parent trees’ traits and producing fruit within three to five years. In fact, I’ve found that pits of my apricot, cherry, wild plum, peach, and nectarines that are left on the ground or discarded by the squirrels who’ve eaten the fruit will often sprout on their own.
Use this ten-step method to grow a peach or apricot tree from seed.
1. Choose a pit from a locally grown ripe fruit that tastes juicy and delicious.
2. Dry the seed on a paper towel in your kitchen window for several days.
3. Carefully crack open the hard shell of the pit to reveal the seed inside (it will resemble an almond).
4. Put the seed (or several seeds) in a sealed container in your refrigerator and let it chill for up to three months. The cool temperature exposure helps the seed get ready to sprout.
5. Time your removal of the seed from the refrigerator to a month before the last frost date in your area.
6. Cover the seed in water overnight and in the morning plant it a clear glass jar of potting soil (no lid on the jar).
7. Return the jar to the refrigerator and keep the seed moist until it has sprouted (about one month).
8. When the outside weather conditions are right (no more frost and the soil begins to warm), plant the seedling in your garden in fertile, well-drained soil.
9. Dig a basin around the planting hole for watering.
10. Mulch to keep down weeds and ensure the roots stay cool. In three years, watch for blossoms in the spring with fruit to follow.

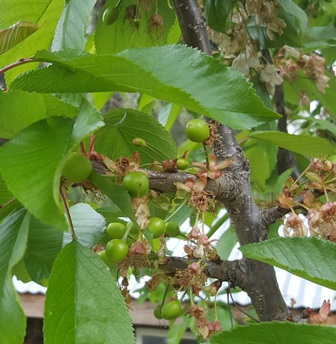
Cherry pits are much smaller than other stone fruit; pits of sour cherries (and also wild plums) may self-seed but sweet cherries less so. Cherries must have a period of cold to germinate
* * *
If you enjoy farmette topics like gardening heirloom vegetables, herbs, and fruits as well as keeping chickens and bees, check out my Henny Penny Farmette series of cozy mysteries from Kensington Publishing–A Beeline to Murder, The Murder of a Queen Bee, and A Hive of Homicides.
You’ll find in the Henny Penny Farmette series
-
Delicious recipes
-
Farm quips and quotes
-
Tips for gardening and keeping chickens and bees
-
An exciting whodunnit mystery
Also, check out MY POCKET MEDITATIONS, my newest forthcoming nonfiction title from Adams Media/Simon & Schuster, at http://tinyurl.com/l6lzorq
![My Pocket Meditations: Anytime Exercises for Peace, Clarity, and Focus by [Lester, Meera]](https://images-na.ssl-images-amazon.com/images/I/51GH%2BXEPc6L.jpg)
 Facebook
 Goodreads
 LinkedIn
 Meera Lester
 Twitter


