How to Grow a Fruit Tree from a Pit
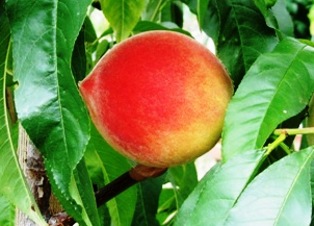
Nothing beats a breakfast of summer fruit picked fresh from a patio or backyard tree. I’m referring to fruit trees such as apricots, peaches, and nectarines. Cherries and plums are also among my favorites. The fruit from these trees is often referred to as stone fruit because of the hard pits (holding the seed) around which the fruit forms.
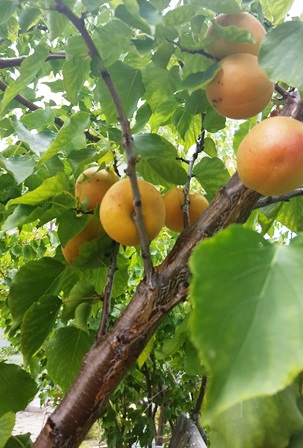
By mid-May, ripe apricots hanging on the trees in my backyard don’t last long–they’re eaten fresh, made into jams, and dried
Apricots in the Bay Area ripen in mid-May and peaches often ripen a bit later during the three months of summer (depending on the cultivar). If you love eating the fruit, don’t toss the pits. Consider that an apricot or peach grafted onto rootstock might cost upwards of $20 during bare-root season but $35 to $50 if sold in a pot. Growing from seed costs nothing.
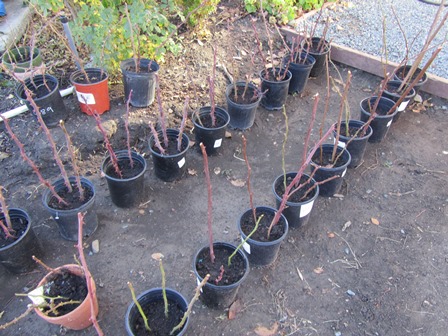
Planting the seed extracted from the pit of your favorite apricot or peach variety can generate a tree with a very good chance of carrying the parent trees’ traits and producing fruit within three to five years. In fact, I’ve found that pits of my apricot, cherry, wild plum, peach, and nectarines that are left on the ground or discarded by the squirrels who’ve eaten the fruit will often sprout on their own.
Use this ten-step method to grow a peach or apricot tree from seed.
1. Choose a pit from a locally grown ripe fruit that tastes juicy and delicious.
2. Dry the seed on a paper towel in your kitchen window for several days.
3. Carefully crack open the hard shell of the pit to reveal the seed inside (it will resemble an almond).
4. Put the seed (or several seeds) in a sealed container in your refrigerator and let it chill for up to three months. The cool temperature exposure helps the seed get ready to sprout.
5. Time your removal of the seed from the refrigerator to a month before the last frost date in your area.
6. Cover the seed in water overnight and in the morning plant it a clear glass jar of potting soil (no lid on the jar).
7. Return the jar to the refrigerator and keep the seed moist until it has sprouted (about one month).
8. When the outside weather conditions are right (no more frost and the soil begins to warm), plant the seedling in your garden in fertile, well-drained soil.
9. Dig a basin around the planting hole for watering.
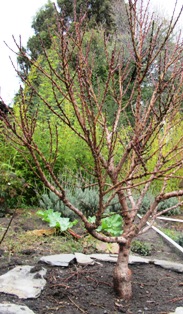
10. Mulch to keep down weeds and ensure the roots stay cool. In three years, watch for blossoms in the spring with fruit to follow.
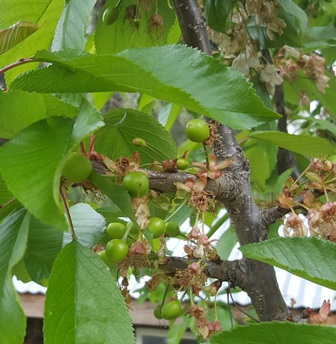
Cherry pits are much smaller than other stone fruit; pits of sour cherries (and also wild plums) may self-seed but sweet cherries less so. Cherries must have a period of cold to germinate
* * *
If you enjoy farmette topics like gardening heirloom vegetables, herbs, and fruits as well as keeping chickens and bees, check out my Henny Penny Farmette series of cozy mysteries from Kensington Publishing–A Beeline to Murder, The Murder of a Queen Bee, and A Hive of Homicides.
You’ll find in the Henny Penny Farmette series
-
Delicious recipes
-
Farm quips and quotes
-
Tips for gardening and keeping chickens and bees
-
An exciting whodunnit mystery
Also, check out MY POCKET MEDITATIONS, my newest forthcoming nonfiction title from Adams Media/Simon & Schuster, at http://tinyurl.com/l6lzorq
![My Pocket Meditations: Anytime Exercises for Peace, Clarity, and Focus by [Lester, Meera]](https://images-na.ssl-images-amazon.com/images/I/51GH%2BXEPc6L.jpg)
Pruning between Storms
The roses, fruit trees, vines, and bushes need pruning, I’ve been itching to get to them, but it’s been raining. Storms have been moving through but with breaks. With rain predicted well into February and March, I don’t think it’s a good idea to put off the pruning. Warm weather will start everything sprouting.
A Level 2 storm moved through today with high winds and rain. I waited until almost lunch time before venturing out. The winds are still fierce, but there are patches of blue in the sky. I filled pots with soil, took cuttings of my roses, dipped them into root hormone, and inserted several in each pot. These will become new bushes for the flower gardens out front of the house.
I love this time of year when the stack of seed catalogs grows daily and nurseries are gearing up for the bare-root season. Already my family is asking when can we plant spring peas, pointing out that the onions and garlic are up and the rhubarb root has set up new leaves.
I did a walk around recently and noticed that with all the rain and warm temperatures, my Desert Gold peach trees and the Bing and Black Tartarian cherries are covered with buds. The buds are swelling but no blossoms yet.
Grass and weeds are up nearly eight inches and growing like crazy. My lavender and the earliest bulbs are blooming. All this lovely growth seems weird after four long years of intense drought.
Even songbirds and honeybees seem happy as they flit around the farmette between the storms. Surely, these signs are harbingers for the glorious spring to come. All the more reason to get busy pruning between these storms.
Drying Fruits Naturally
I love dried apricots, but don’t tolerate well the ones treated with sulfur dioxide(used to prevent oxidation and loss of color). With so many apricots on our property coming ripe at once, I have decided in addition to making jam this year to also dry some of the fruit.
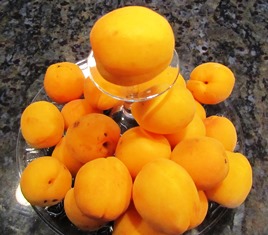
Apricots, so plentiful this time of year, are easy to dry and make great snacks when the season is over
Apricots dried but not treated with sulfur dioxide will turn a natural brown color. Some stores sell them this way. They are usually priced the same or similar to the treated apricots with the bright orange hue.
Besides apricots, other fruits that dry well include apples, bananas, cherries, grapes, nectarines, peaches, pears, plum, rhubarb, and even strawberries. You can use a drying machine
Quick Tips for Drying Fruit
1. Choose to dry only the freshest picked fruits, without bruises, scale, sun scald, or other blight.
2. Spray nonstick vegetable spray on drying pans or trays to make it easier to remove the dried fruit
3. Lay out the fruit to dry in a single layer on trays. Remember to rotate the trays occasionally and turn the pieces from time to time.
4. Destroy any insects (miniscule or otherwise) by freezing or baking the fruit. Simply take the tray and stick it into an oven heated to 175 degrees Fahrenheit for about 15 minutes. Alternatively, pack the dried fruit in freezer bags and freeze for at least 2 days.
5. Freezing dried fruit in resealable freezer bags will preserve its shelf life.
 Facebook
 Goodreads
 LinkedIn
 Meera Lester
 Twitter


