How to Make Marmalade from Blood Oranges
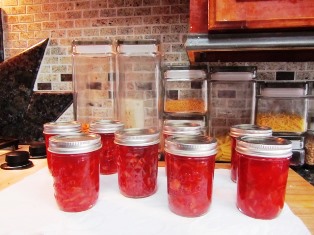
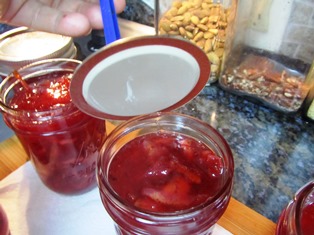
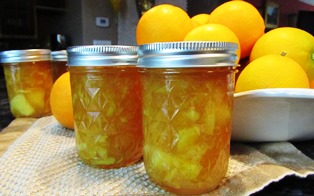
Jars of freshly made blood-orange marmalade are a festive red currant color and perfect for holiday gift-giving
On Christmas Eve this year, I made marmalade from our blood oranges to tuck into our holiday gift baskets.
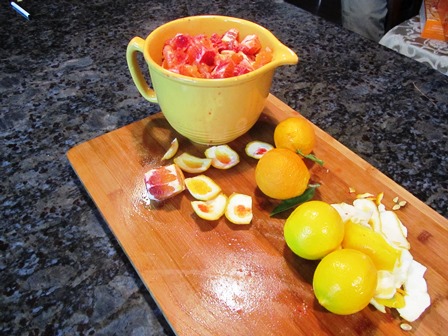
Our citrus trees are still young and the crop, though ripe, was not yet bountiful. I used almost our entire crop of 20 oranges to make 8 jars (4 ounces each) of the blood orange marmalade.
My recipe is straightforward and the steps are simple. The finished marmalade is a lovely currant color, has a sweet/tangy taste, and possesses an interesting texture made so by the inclusion of rind.
Ingredients:
2 cups orange peel (washed and thinly sliced); roughly 10 medium oranges
1 quart of chopped orange pulp; about 10-15 medium oranges
1 cup lemon (cut into thin slices and seeded); roughly 2 medium lemons
7 cups granulated sugar (the amount of sugar depends on how many cups of citrus mixture you have)
5 Tablespoons of classic pectin
Water to cover the jars by 2 inches for hot water bath processing
Directions:
Place oranges and lemon into a large pot and simmer for 5 minutes.
Remove from heat, cover, and let rest for 12 to 18 hours (I place my citrus mixture in the refrigerator overnight).
Measure by cupfuls the amount of fruit mixture. Add one cup of sugar per cup of fruit mixture.
Over high heat, boil fruit and sugar for approximately 20 minutes, stirring constantly to prevent sticking.
Turn down heat and stir in 5 Tablespoons of classic pectin. Return to boil and stir until mixture thickens and gels when a small amount in placed on a frozen plate.
Remove freshly washed heated jars from the dishwasher.
Simmer lids and rings in shallow pan until ready to use.
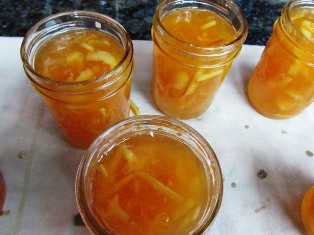
Remove from heat and skim off any foam from the jam and then fill the jars, leaving 1/4 inch head space in each jar.
Attach the lids and rings to the jars with a finger tight seal before submerging in the hot water canner of boiling water.
Process jars for 15 minutes before removing them to a place where they can sit undisturbed to cool.
Easy Orange Marmalade
Who can resist the flavors of homemade jams? Whether it embellishes an appetizer of grilled fig and melted goat cheese or is spread upon a fat slice of fresh-baked bread, jam has power to elevate any meal to another level.
Using the seedless oranges growing on our farmette trees, I’m making marmalade. Marmalade made with the oranges ripening this time of year make great additions to holiday gift baskets. I like to add jars of honey, fresh tangerines, nuts, summer jams, and homemade treats.
RECIPE FOR ORANGE MARMALADE
Ingredients:
4 large oranges (preferably a seedless variety)
2 medium lemons
1/2 teaspoon butter (to reduce foaming)
1/8 teaspoon baking soda
6 Tablespoons dry classic pectin
5 1/2 cups sugar
Directions for Preparing the Jars and Canner:
Wash pint jars in the dishwasher or wash the jars and screw rings in hot soapy water, rinse, and drain upside down on paper towels.
Remove the wire rack from the canner and set aside; then, fill the canner half full of water and bring to a simmer.
Directions for Making the Fruit Mixture:
Wash the oranges and lemons.
Peel the fruit, using a vegetable peeler or a sharp paring knife. Discard any seeds and the pithiest parts of the inner peeling as the pith tastes bitter.
Cut the peeled skins into narrow strips.
Pour water into a saucepan.
Add baking soda and strips of peel.
Bring to boil and then reduce the heat, simmering for 20 minutes and stirring as needed.
Cut the fruit into thin quarters.
Add the fruit and juice to the saucepan of simmering peelings, cover, and allow everything to simmer for 10 minutes.
Remove 4 cups of the fruit/peeling/juice mixture and pour into a large saucepan (6 or 8 quart) or stock pot.
Stir in the pectin and add the butter and sugar, mixing well.
Bring to a roiling boil, stirring constantly, for a full minute and then remove from heat, skimming off any foam.
How to Can the Marmalade:
Ladle the fruit mixture into the warm, clean jars, leaving between 1/4 and 1/8 inch space from the top.
Wipe the jar rims before placing the jars on the wire rack of the canner.
Lower the wire rack of jars into the simmering water in the canner.
Make sure the jars are covered by 2 inches of water (add boiling water if necessary).
Cover with lid and boil for 15 to 20 minutes.
Turn off flame, remove the jars of marmalade, and set them onto a towel to cool.
Listen for the popping sound that signals the lids have sealed. Check lids for seal once the jars have cooled by pushing against the center of the lid. If it springs, the jar has not sealed and must be refrigerated. The marmalade will still be good to eat.
Sun Drying Apricots
My husband supports my obsession for making jam and otherwise preserving summer’s bounty. Two weeks ago he brought home five cases of organic apricots and cherries from the farmers market and cases of canning jars. Yesterday he brought me seven more cases of canning jars with rings and lids.
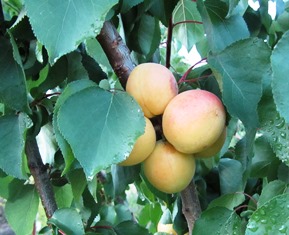
The fruit on the apricot trees here on the farmette is ripening now. So are the yellow and small red plums. The figs and apples will come later but the trees are already heavily laden. I have canned dozens of jars of jam. I think I will dry some apricots.
Sun drying apricots requires 2 to 4 days of hot sun (preferably above 98 degrees) for the fruit to lose its moisture and turn leathery. Luckily, our local weather forecast is temperatures at the end of next week to hover in the mid- to upper 90 degrees Fahrenheit. High temps and low humidity are key to successful sun drying of fruit.
Here’s the process I use.
Step 1. Gather together the equipment such as a drying table; trays to hold the fruit; and cheese cloth or a screen to protect from insects, flying leaves, dust, birds, and the like.
Step 2. Wash the fruit, cut into two pieces, and remove the pits.
Step 3. Dip fruit into crystalline ascorbic acid–1 teaspoon to 1 cup of water to prevent fruit browning. Or, dip fruit for 3-5 minutes in lemon, lime, or orange juice. But after two batches are dipped, replace with fresh juice. Drain well after dipping.
Caveat: Sulfuring of apricots and other dried fruits produces an excellent product, but is to be avoided if you suffer from asthma because it can trigger an asthma attack. I stay away from sulfured products precisely because of this reason.
Step 3. Place fruit in a single layer. Similar size pieces of apricot will dry in approximately the same length of time.
Step 4. Cover trays with cheesecloth or a screen. Test for perfectly dried fruit–no moisture present when an edge is cut. The fruit will be pliable.
 Facebook
 Goodreads
 LinkedIn
 Meera Lester
 Twitter


