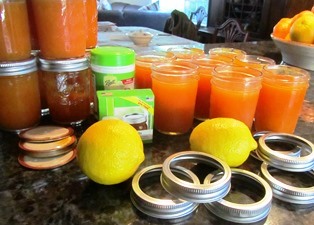
How to Make Wild Plum Jam
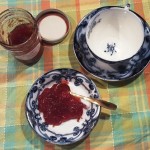
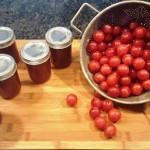
A favorite breakfast on our farmette includes hot bread (like biscuits or popovers), slathered in butter and spread with homemade jam. We have many fruit trees from which to make jam but we love the sweet tartness of wild plums. These wild plums are smaller than regular plums or apricots, so you’ll need to pick enough to fill about a gallon-size bucket.
You’ll love this delicious jam spread on almost any kind of bread, roll, or cracker. Serve it alongside some firm breakfast cheese or your favorite goat cheese. Because of the balance between sweet and tart flavors, it greatly enhances the taste of roast pork or chicken, too.
Making wild plum jam doesn’t require a lot of skill. But you will need some simple kitchen tools like a tall pan (like a soup pot), a large bowl, measuring spoons, a colander, long-handle wooden spoon (for stirring hot jam), and a paring knife.
Required items include a hot-water canner, six or seven preserving jars with lids and rings, and a jar-filling cup, a jar lifter, a foam skimmer, and a magnetized ring lifter. If you don’t already have them, purchased these items in a hardware or diy store where canning jars and utensils are sold.
The PREP steps:
1. Start by picking the fruit and sorting out those plums with blemishes or bird pecked holes.
2. Wash the fruit.
3. Remove the stones. (I use a big bowl for this so I can save the pitted plums along with their juice to make the jam).
The JAM COOKING process.
1. Place 5 cups pitted plums with their juice in a large, deep pot.
2. Squeeze juice of one-half lemon into the pot.
3. Add 4 cups sugar. Stir to mix the ingredients.
4. Bring to a boil and stir constantly for 15 to 20 minutes or until the gel stage is reached. Skim off foam, if necessary.
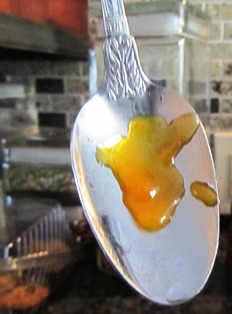
5. Slowly and carefully stir in five tablespoons of Classic Pectin powder. Mix well. (You can test the gel consistency using a metal spoon chilled in the freezer. The jam should slowly roll to the edge and hang together instead of running off like water.) Remove jam pot from heat.
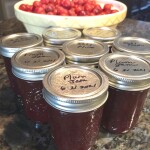
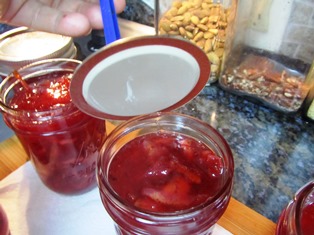
6. Ladle the hot jam into sterilized jars. Place a lid on each jar and then screw on the rings.
7. Place in the boiling water of a hot-water canner and process for 15 minutes.
8. Remove each jar of jam and listen for the pop of each lid. Let cool in a draft-free area. Label and store.
_____________________________________________________________________
Enjoy reading about country living and farm topics? Check out my cozy mystery novels that include tips and strategies for successful, country living or my nonfiction books on health and spiritual wholeness.
All are available with a search of my name–Meera Lester–on Amazon.com, barnesandnoble.com, and other online and brick-and-mortar bookstores everywhere.
Also, take a look at my wellness and spirituality books for living your best life now. All are available online and wherever books are sold.

More than 150 rituals for sound mind, strong body, and meaningful connections to the people around you
See, https://www.amazon.com/Rituals-Life-Meaning-Everyday-Moments/dp/1507205244
Springtime Projects on the Farmette
After weeks of rain, Mother Nature has put on a robe of splendor. Warm weather has arrived. Already, my beekeeper neighbor has had his honeybee hives send out three swarms.
My own bee population seems to be swelling. I’ve fished out my swarm catcher, primed it with scented lemon oil, and placed in among the blossoms in a nearby apricot tree. I may be blessed with a swarm as well.
There are plenty of other springtime projects to attend to here on my farmette. I’ve got to reassemble my temporary grape arbor. Each year, I think we’ll build a permanent structure, but there never seems to be enough time.
My cell flats have organic plants up now and ready for placing in my garden or raised beds. I’d like to add some more chicken manure to the strawberries since they are rapidly growing and producing small fruit.
Other plants need a spring feeding–the citrus, apples, and apricots, for example. I usually do the feeding before the trees break bud, so I’m a little late.
This candy-stripe rose was a gift from a friend–a cutting from her rose that became a large bush in my care
I will be turning the compost pile and mulching all my rose bushes (which have already leafed out and are setting buds). Finally, I’d like to put up a couple more bird houses (mating is already in the air) and fill my hummingbird feeders.
- This–my original flock–was massacred by a wild predator, fox or coyote, last year
I need to purchase baby chicks from the feedstore to start my new flock. Hubby and I will build a new, reinforced chicken run and expand the existing hen house.
Then, there’s the side walkway that needs pavers. Painting of the fences. Building a new porch. Widening the patio…the projects are seemingly endless, but that’s fine. We’ll have a lovely six months (maybe an occasional storm). The dry season is upon us.
And I’m ready for the Adirondack chair…oh, that’s right…we have to build it first!
_________________________________________________________________
If you enjoy reading about farming topics and you love a good cozy mystery, check out my novels from Kensington Publishing–A BEELINE TO MURDER, THE MURDER OF A QUEEN BEE, and A HIVE OF HOMICIDES. All are available on Amazon.com, Barnes & Noble.com, and other online retailers as well as in bookstores everywhere.
How to Attract Birds to Make Your Garden a Sanctuary
A Chinese proverb states that “If I keep a green bough in my heart, then the singing bird will come.” I think I was born with that green bough in my heart because I have always loved birds–and not only the songbirds.
By offering food, water, and safe and dry housing as well as blooms for every season (flowering annuals, perennials, herbs, bulbs, and fruits and berries), I am able to attract many different birds into my garden.When birds are present, especially the songbirds, the garden becomes a special sanctuary.

A hummer’s iridescent feathers shimmer as it perches in sunlight at the end of an apricot tree branch
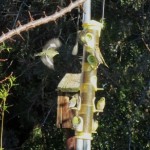
I hang feeders and fill them with various types of seed and suet cakes as well as syrup for hummingbirds. Food attracts local and migratory birds flying through this time of year. It’s best to choose a wide sampling of foods such as seeds, nuts,hulled sunflower, safflower, Nyjer thistle, peanut, millet, fruit, berries, raisins, and meal worms to draw interesting bird traffic.
Some of the birds we regularly see include scrub jays, wrens, finches, sparrows, red-tail hawks, mockingbirds, quail, mourning doves, robins, barn owls, hummingbirds, and crows.
With food scarce in the wild, the birds visit the hanging and platform feeders. For ground feeders like mourning doves, I put out a large saucer under the apple tree and, yes, I leave a few apples on the tree for the birds to peck. For a list of birds and the types of seed and other foods they consume, see, https://www.wild-bird-watching.com/Bird_Seed.html

Mourning doves mate for life; these two are joined at the feeder by a third who has lost his or her partner
Some of our winged visitors stick around to mate and build nests in climbing rose bushes, brush piles, trees, or one of the many birdhouses we’ve hung. Only the owl basket high in the pepper tree remains empty, but we’ve heard a lot of hooting at night so we’re optimistic that owls will take up residence here. We live close to designated agricultural lands and the empty field behind us has a lot of mice–their favorite food.
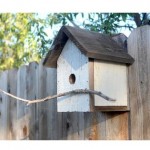
My hubby built this birdhouse from a fence board. Not all birds will take up residence in a house, but many will.
Birds build nests in backyard birdhouses and brush piles as well as in trees, shrubs like climbing roses, and under the protected eaves of buildings (mourning doves especially seem to like these). Hummingbirds will build their tiny cup-like nests in shrubs (we found one in our Cecil Brunner climbing rose bush) and trees, from 10 feet and up in locations where wind isn’t a threat.
A water source is important for attracting birds since they both drink and bathe in the water fountains and bird baths of backyards and gardens.
If you provide food, water, and a safe and dry shelter for the birds to eat, breed, and nest, you will be rewarded for not only the singing birds will come but other interesting species as well.
_______________________________________________________
If you enjoy reading about living close to the earth and a good yarn, check out my Henny Penny Farmette series of cozy mysteries: A BEELINE TO MURDER, THE MURDER OF A QUEEN BEE, and my latest, A HIVE OF HOMICIDES.
These mysteries are chock-full of tips for keeping chickens and bees, growing heirloom fruits and vegetables, and backyard DIY projects. For more information, click on the URL.
A HIVE OF HOMICIDES
Swimming in Fruit
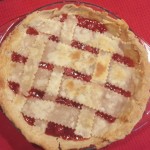
Our cherry trees became so heavily laden with fruit this year I couldn’t work fast enough to make the fruit into cookies and pies and jars of jam, conserve, and chutney.
What fruit the birds and squirrels didn’t devour ended up drying on the trees and looking like ornaments. I’m heartened that at least the wildlife will have something to forage on through fall and winter.
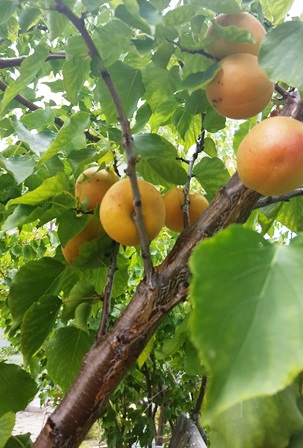
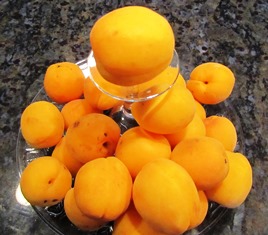
The apricot trees did a massive drop of their fruit and seemingly all at once. I made more jam than we’ll probably eat, dried some, and gave away more than a few full buckets of cots to neighbors and friends. I also had to do a messy cleanup of fruit on the ground.
In the cycle now are the summer peaches; so, here I go again . . swimming in fruit.
Next year, I’m going to get my act together early with teams of backyard pickers who can help me remove the fruit, divide it, and distribute it. Right now, however, I’ve got peaches to pick and preserve. The summer pears and figs will be next.
I’m not complaining; I’m enthralled that all this bounty is due to the work of our industrious little honeybees. All this fruit and I haven’t even mentioned finding time to harvest honey. Yet, the bees don’t stop, so neither will I.
________________________________________________________________
If you enjoy reading about farmette topics like keeping bees and chickens, caring for an orchard, or growing heirloom herbs and vegetables, check out my mystery series from Kensington Publishing (due out September 26, 2017).
These novels feature a whodunnit for you to solve and are filled with farming facts, trivia, and delicious recipes. The novels and my other books are available in traditional and online bookstores everywhere. See, http://tinyurl.com/yb42zd2d
Pomegranate Seeds–A Sweet Explosion on the Tongue
Strolling through our small orchard today, I cut into a pomegranate to check on the seeds–the edible part of the fruit. To my surprise, they had turned ripe. Inside, the seeds were gorgeous red jewels, plump and juicy. The sweet juice in the seeds carries a powerful antioxidant punch, too; it’s loaded with Vitamin C, Vitamin K, fiber, potassium, protein, and folate.
You might wonder about ways of cooking with pomegranate seeds. How about tossing them into citrus or a green salad, pairing them with goat cheese on a crostini, or sprinkling a few on poached pears dipped in chocolate, or incorporate them into a Mediterranean couscous with cashews or pistachios?
I think I’ll make some pomegranate jelly–it tastes great on toast, makes an excellent foil for goat cheese, and also creates a moist and delicious glaze for chicken.
The hardest part of making the jelly is separating the seeds from the white pith that holds the seeds in place inside the leathery peel.
The jelly recipe consists of few ingredients: pomegranate juice, sugar, water, and classic pectin. Here’s how I make the jelly.
POMEGRANATE JELLY RECIPE
Ingredients:
3 1/2 cups pomegranate juice (well strained to remove all the particles)
5 cups granulated sugar
6 tablespoons classic pectin
Directions:
Prepare boiling water canner and wash eight to ten half-pint jars in the dishwasher.
Place rings and lids in a pan of simmering hot water.
Cut one end of the pomegranate off to expose the membranes and seeds.
Section the pomegranate and scrape the seeds out into a medium to large bowl.
Repeat the process until you had several cups of seeds.
Rinse well and then run the seeds through a juice extractor.
Strain out the juice through a jelly bag or multiple layers of cheesecloth. Note: The juice stains, so take care to protect kitchen counters and clothing.
Put the juice and pectin into a large pot and bring to a boil, carefully stirring to blend in the pectin.
Add sugar and stir until completely dissolved and boil for one minute at a roiling boil that cannot be stirred down. Ladle off foam, if necessary.
Ladle jam into clean, hot jars leaving one-quarter inch head space. Attach hot lids and then the rings. Tighten to finger tight.
Lower the filled and sealed jars into the canner. Process for 10 minutes at a roiling boil. Remove and let cool.
* * *
If you enjoy reading about farmette topics (including gardening, beekeeping, and delicious recipes), check out my cozy mysteries A BEELINE TO MURDER and also THE MURDER OF A QUEEN BEE in the Henny Penny Farmette series (from Kensington Publishing).
These novels are available through online retailers such as Amazon, Barnes & Noble, Kobo Books, and Walmart as well as from traditional bookstores everywhere.
See, http://tinyurl.com/hxy3s8q
Now available in mass market paperback, this debut novel launched the Henny Penny Farmette series of mysteries and sold out its first press run.
See, http://tinyurl.com/h4kou4g
The second cozy mystery in the Henny Penny Farmette series, available Sept. 27, 2016, is now available on Net Galley (netgalley.com) for professionals and readers who write reviews. The book may be pre-ordered as well. Click on the link under the image.
Time Spent in a Potager Garden Renews the Spirit
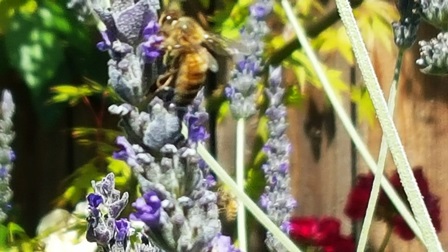
With the official start of summer a few days away, I find myself leaving my computer and the scene I’m writing on my third novel to take a break in the garden. Alive with honeybees, bumblebees, butterflies, and hummingbirds, the garden is perfect place for a respite and a cup of tea.
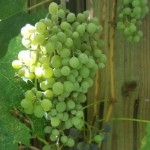
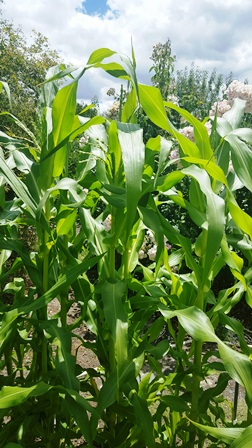
Quite like a potager garden that includes flowers, herbs, trees, vegetables, berries, and grapes, mine also includes a patch of corn.
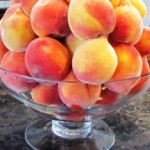
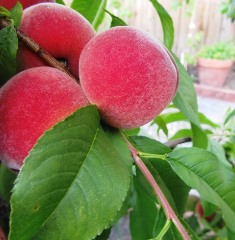
Embroidered around the edges of the garden, there are climbing roses, fruit trees, and lots of lavender. Along the rows of lavender, there are peach trees with fruit the size of softballs and five pomegranate trees, laden with blooms and new fruit.
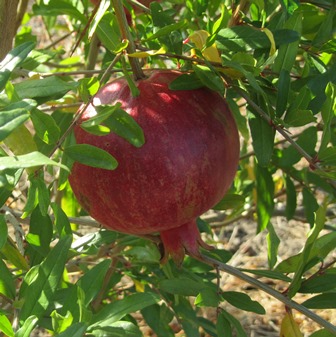
The pomegranates aren’t quite this large yet, but the trees have so much fruit, they’ll have to be thinned.
As I meander, I discover the trees of red and yellow plums have begun to drop their ripe fruit. I’ve got to make those plums into jelly or jam and ditto on the apricots.
But that work will have to wait until my late afternoon tea break. My novel won’t write itself. Still, the time I spend in the garden revitalizes my spirit and refreshes my brain cells, enabling me to return to the computer and the scene I’m writing with renewed vision and vigor.
* * *
If you enjoy reading about gardening, keeping bees, raising chickens, and creating delicious recipes, check out my novels from Kensington Publishing.
The Henny Penny Farmette series of cozy mysteries are available at Amazon, Barnes and Noble, Kobo Books, Walmart, and other online and traditional bookstores everywhere. Available in hardcover, Kindle, and mass market paperback formats.
Plum and Prune Trees Reward with Foliage, Blooms, and Fruit
We are growing several plum and prune trees here on the farmette, but because some were given to us as shoots from other people’s trees we don’t know the exact identity of some of our trees. However, the fruit from them is delicious.
A plum we are growing along the back fence of our property produces tons of bloom and lots of small-to-medium fruit with deep red coloring. The tree is self-fertile. Fruit aside, the tree has lovely dark reddish-purple leaves, spring to summer. We like the foliage so much that when it sprouted (plums love to sprout new shoots), we culled a couple of sprouts for new trees. Now we have three of those plums on our property and believe the cultivar to be a European Damson.
Another plum given to us is a yellow variety. The first year we lived here, that plum tree gave us a large-size crock bowl full of sweet, yellow, good-quality fruit. We believe it is self-fertile (although we keep honeybees and our neighbor’s have plum trees that quite possibly pollinate ours).
We are aware of a couple of yellow plums. One is a Japanese cultivar–Shiro–that produces a golden yellow plum with yellow flesh. Another is a European variety–Yellow Egg–that is self-fertile and produces large, oval, yellow-fleshed fruit. I do not know if the tree we are growing belongs to either of these types.
Last spring, we planted a self-fertile French prune–Agen. The fruit is small, red to purplish black with a sweet taste. It’s a late producer but is the standard drying prune for California. It can also be canned.
Plum and prune trees aren’t too fussy about soil, but they do respond to a feeding now and then. Japanese plums can easily take one to three pounds of nitrogen annually, while European plums will do well with one to two pounds of nitrogen.
Pruning is required. Japanese plums benefit from severe pruning at all stages (prune to a vase shape). European plums should also be trained to the vase shape and benefit from an annual pruning when the trees are mature to thin out shoots.
Thinning fruits (one fruit for every four inches) as soon as they form will yield stronger trees and larger fruit. As for pest, use an organic dormant spray for pests that winter over. Otherwise, plum and prune trees are joy to grow in the garden for their foliage, blooms, shade, and fruit.
Backyard Fruit Compote
Who feels like eating when the shorts and sandals weather has turned hot enough to warrant wearing bikini bottoms and thin cotton T-shirt for doing your household chores? Bring on the cool summer salads.
When the temperatures hit 105 on the farmette yesterday, we opted for a simple supper of cold chicken, orzo with Italian vinegar and oil dressing, and cold potato salad.
With nectarines and peaches ripening now on our trees, blueberries finally sweet enough to eat, and strawberries available at our local farmers’ market, what could be better for a dessert on a hot summer’s evening than a fruit compote.
Recipe for Backyard Fruit Compote
Gather the fruit, including nectarines, peaches, plums, strawberries, blueberries, kiwi, and melon.
Wash, and slice the nectarines, peaches, plums, and strawberries.
If including melon in the compote, scoop the melon into ball shapes using a melon baller or cut pieces of melon into cubes.
Peel and slice the kiwi.
Toss all into a bowl, adding the blueberries.
Sprinkle lightly with a scented sugar, or a super fine sugar, or honey.
Or, make a dressing: mix together 1/4 cup of lime juice, 1/4 cup of honey, 1 teaspoon of orange zest, 1 teaspoon of lime zest, and 1/2 teaspoon finely grated ginger. Pour over the fruit. Chill for about 1 hour and add springs of mint before serving.
How to Make Marmalade from Blood Oranges
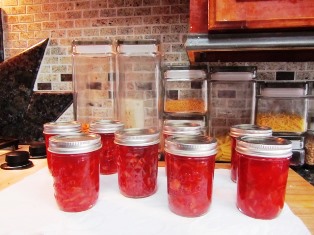
Jars of freshly made blood-orange marmalade are a festive red currant color and perfect for holiday gift-giving
On Christmas Eve this year, I made marmalade from our blood oranges to tuck into our holiday gift baskets.
Our citrus trees are still young and the crop, though ripe, was not yet bountiful. I used almost our entire crop of 20 oranges to make 8 jars (4 ounces each) of the blood orange marmalade.
My recipe is straightforward and the steps are simple. The finished marmalade is a lovely currant color, has a sweet/tangy taste, and possesses an interesting texture made so by the inclusion of rind.
Ingredients:
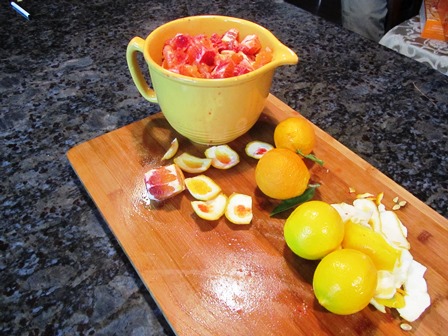
2 cups orange peel (washed and thinly sliced); roughly 10 medium oranges
1 quart of chopped orange pulp; about 10-15 medium oranges
1 cup lemon (cut into thin slices and seeded); roughly 2 medium lemons
7 cups granulated sugar (the amount of sugar depends on how many cups of citrus mixture you have)
5 Tablespoons of classic pectin
Water to cover the jars by 2 inches for hot water bath processing
Directions:
Place oranges and lemon into a large pot and simmer for 5 minutes.
Remove from heat, cover, and let rest for 12 to 18 hours (I place my citrus mixture in the refrigerator overnight).
Measure by cupfuls the amount of fruit mixture. Add one cup of sugar per cup of fruit mixture.
Over high heat, boil fruit and sugar for approximately 20 minutes, stirring constantly to prevent sticking.
Turn down heat and stir in 5 Tablespoons of classic pectin. Return to boil and stir until mixture thickens and gels when a small amount in placed on a frozen plate.
Remove freshly washed heated jars from the dishwasher.
Simmer lids and rings in shallow pan until ready to use.
Remove from heat and skim off any foam from the jam and then fill the jars, leaving 1/4 inch head space in each jar.
Attach the lids and rings to the jars with a finger tight seal before submerging in the hot water canner of boiling water.
Process jars for 15 minutes before removing them to a place where they can sit undisturbed to cool.
Fixing Jam that Won’t Jell
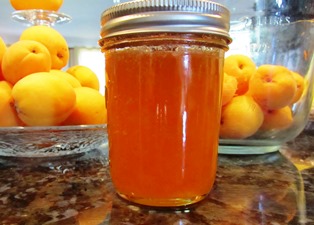
It happens in jam-making. You do everything right and the jam has a lovely color, flavor, and texture but remains runny long after the jars have cooled following the boiling water process. What to do?
Reprocess the jam in small batches (a quart at a time). A quart of jam fills four (8-ounce jars) or eight (4-ounce jars). Jam needs sugar, pectin, and lemon (acid) to properly jell. A batch I recently made turned out runny and I figured the fruit probably didn’t have enough pectin.
Overripe fruit has lower amounts of naturally occurring pectin whereas unripened fruit has higher amounts of pectin. Go figure!
If the fruit is super ripe (like the lug of apricots I used), the jam will need more pectin to properly jell. It should be reprocessed within 24 to 48 hours. Beyond that time frame, consider other options like using the runny jam as ice cream topping.
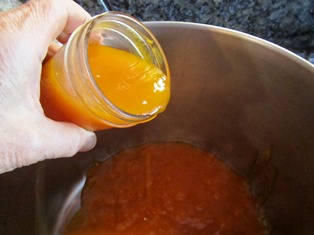
The initial step in the reprocessing is to remove the rubber-seal lids and pour all the jam into a pot. Rewash the jars (they will need to be hot when you put jam back into them. You’ll want use new lids, but you can reuse the rings. Heat the rings and new lids with rubber seals in a pot of simmering water.
When the jars are ready to come out of the dishwasher) and the lids are simmering under water in a shallow pan, then prepare the sugar/lemon juice/pectin mixture. Also, place a metal spoon into a glass with water and ice cubes to test the jam after repairing it.
For each quart-size batch of jam, you will need 1/4 cup of sugar, 2 Tablespoons of lemon juice, 4 teaspoons of powdered pectin and about 1/4 cup of water to dissolve everything. Stir well.
Add the sugar/acid/pectin mixture to the runny jam and cook until it reaches a roiling boil, stirring with a long wooden spoon. Boil for one minute. Remove the jam from the heat.
Test the jam for right consistency by placing some onto the stainless steel cold spoon. If it clumps and hangs, not running off, it will jell correctly.
Pour the jam into the hot jars. Wipe the mouths, if necessary to ensure a good seal. Cap each jar with a lid and ring. Process the jars submerged in a boiling water bath for 15 minutes, or according to your recipe.
I’d love to hear from you. Leave a comment letting me know if you’ve tried this process and how it worked for you. Don’t forget to tell me what kind of jam you repaired.
 Facebook
 Goodreads
 LinkedIn
 Meera Lester
 Twitter


