Time to Harvest Seeds from Annuals
If you are like me, you hate to see anything wasted. Case in point, seeds from a summer flower garden.
Walking around my farmette this time of year, I see many seed pods on flowers that I can take off, dry, and store. Scores of my flowering plants are perennials that come back again next year, but may others are annuals, grown throughout one season.
Just because they are annuals doesn’t mean that I have to buy new seed in order to grow them next year. No. I will gather their seeds (found in flower heads or seedpods or the calyx, located at the base of the flower on the plant). I can then pull the annual and toss the plant biomass into compost pile. The seeds I’ve collected will be further dried and stored in paper envelopes labeled with the date collected and the plant’s name and color.
In the plant store you’ll find hybridized plants along with those NOT MARKED as F1 hybrids. Seeds you collect from the non-hybridized plants will come back true to their parents the next year. Non-hybrids include heirloom, open-pollinated plants that some gardeners (myself included) prefer for their gardens.
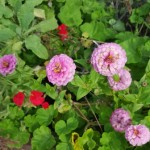
This year, I sowed zinnia seeds that I had collected two years ago. Tossing them into a bare area of the garden, I forgot about them. When they not only grew but bloomed profusely, I felt immensely pleased with myself for taking the time to collect that seed.
Zinnias are annuals. Their tiny seeds are located in the flower heads. They can be removed once the plant has finished blooming and dried.
Nasturtiums are annuals that drop their seeds (the size of a pinto bean) and will often re-seed where they’ve grown before. I like to collect these into paper envelopes and label according to color and whether they grow as a vine or bush. They actually prefer poor soil and bloom well in full sun (less so, in shade). Nasturtiums are also edible flowers–just wash, dry, and toss into a salad or use as a garnish.
Petunias are lovely annuals that carry their seed in the calyx (just under the flower). The calyx swells with seeds so you’ll want to remove the dead flowers along with the part of the stem that includes the calyx (top of stem) . Pull off the petals. When the calyx dries and splits open, you’ll see the seeds. Save these for planting.
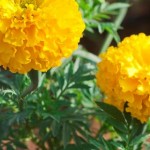
Marigolds add splashes of bright yellow color to your garden. Remove the dead flowers and save part of the thickened stem beneath the flower head (the calyx). Split open the calyx at the top of the stem to find the long, slender seeds. Dry and save these for your next year’s flower garden.
There are lots of other annuals that you can grow in a flower garden if you take the time to harvest and dry their seeds. Consult a gardening guide or plant grower’s catalog to learn more about the annuals you might want to grow. Then give seed harvesting a try so that you’ll get all your favorite blooms in a future garden.
____________________________________________________
If you enjoy reading about gardening and other farming topics, check out my newest novel, A HIVE OF HOMICIDES. It contains not only an entertaining mystery but also tips for growing plants and trees, keeping chickens and bees, and making delicious farm-wholesome foods.
Click here to see more: http://tinyurl.com/ya5vhhpm
Gather Dry Seedpods Now for Next Year’s Garden
When I notice the seedpods of my favorite flowers beginning to dry, I start carrying a felt-tip pen and paper bags around the garden for collection and labeling. Also when my favorite varieties of heirloom pumpkins and squash are ripe, I’ll cut open the plants, collect the seeds, clean and dry them, and store in paper envelopes or glass jars.
Throughout the summer, I do the same with the best specimens of my heritage tomatoes and beans.
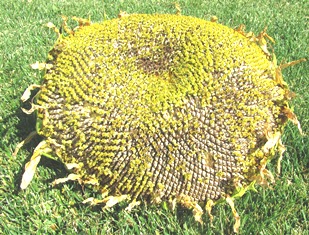
Gather the seeds of your favorite plants when the flowering (or production) is over and the pods are drying. On my patio harvest table, a long metal table with a tiled top, I place giant sunflower heads to finish drying. I then save some seed for replanting, the rest for eating. But I always share some with the squirrels and birds.
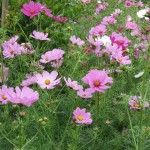
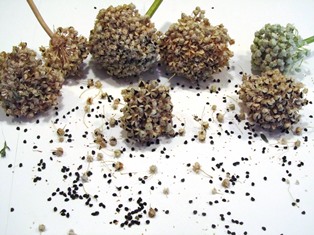
There are multiple bowls, buckets, and glass jars on the table, too. These hold the papery pods of lobelia’s tiny seeds and the onion seed heads that only need a good shaking onto a paper towel to remove the tiny black seeds. I’ve got containers of cosmos and also zinnia seeds, too, collected during early morning walks around my farmette.
When you plant open-pollinated heritage plants, it’s easy to keep a steady supply of seeds for next year’s garden. You can get an early jump on spring by sowing these seeds into seed flats or wait until the danger of frost has passed to sow them directly into prepared beds. The process of collecting, saving, and replanting seeds is how our ancestors did it, and it still works.
* * *
If you enjoy reading about farmette topics (including gardening, beekeeping, and delicious recipes), check out my cozy mysteries A BEELINE TO MURDER and also THE MURDER OF A QUEEN BEE in the Henny Penny Farmette series (from Kensington Publishing). These novels are chocked full of recipes, farming tips, and sayings as well as a charming cozy mystery.
The books are available through online retailers such as Amazon, Barnes & Noble, Kobo Books, and Walmart as well as from traditional bookstores everywhere.
See, http://tinyurl.com/hxy3s8q
This debut novel launched the Henny Penny Farmette series of mysteries and sold out its first press run. It’s now available in mass market paperback and other formats.
See, http://tinyurl.com/h4kou4g
Release date is September 27 for this, the second cozy mystery in the Henny Penny Farmette series. It’s available free on Net Galley (netgalley.com) for readers, bloggers, and other professionals who write reviews.
Harvesting Seeds from Onion Heads
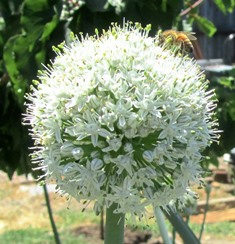
The red and yellow onions I planted during winter here on the farmette have produced lots of fat bulbs. Now that warm weather has arrived, the plants have sent up spikes with a flower head in a process called bolting.
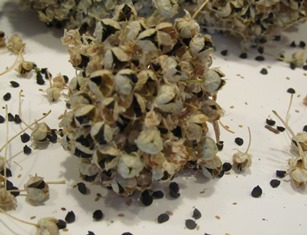
I’ve been using the onions in culinary creations. Now that they are bolting, I’m saving the seed heads for my next round of planting (when the weather gets cooler again).
When the seed heads I’ve collected have dried a bit, black seeds will spill out. I shake them onto paper and then store them in paper envelopes where they can dry out even more.
The benefits of growing onions from seed rather than sets (also called seedlings) is that they perform better, are less susceptible to disease, bulb up somewhat quicker than seedlings, and store better. The seeds germinate quickly (7 to 10 days) and may be eaten in as early as 8 to 10 weeks.
Growing onions is easy. Broadcast your seed in a prepared bed when the weather is warm and all danger of frost has passed. Barely cover with soil (roughly 1/4 inch) and keep damp until seeds have germinated. If you prefer, start some onion seeds in flats to set out in the garden as seedlings.
Harvest bulbs throughout the growing season or wait until the tops flop over. Store onions in the refrigerator in a nylon stocking wrapped individually between onions to maintain freshness. The National Gardening Association has some good tips for harvesting and storing onions. See http://www.garden.org/foodguide/browse/veggie/onions_harvesting/501.
With so many onion types from which to choose, decide how you’ll use each in the kitchen and then grow various heirloom types, depending on purpose and flavor. And . . . don’t worry if next spring, you discover your onions bolting. It’s a good thing to have a seed source for such an important kitchen staple.
 Facebook
 Goodreads
 LinkedIn
 Meera Lester
 Twitter


