Three Reasons to Plant Bare Root
If you are someone like me who loves to garden, you have the first day of spring circled on your calendar. For 2020, spring arrives on March 19.

Plant bare root fragrant roses and engage in mindfulness practice. Both will have you stopping to smell the roses
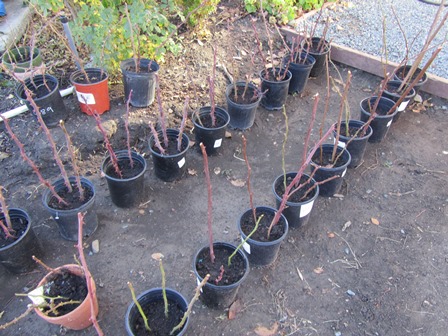
Bare-root season (when fruit trees, roses, and other plants are dormant and sap is not flowing) is now. Here in the Bay Area, the soil is currently soft and makes for easy turning with a spade. Now is the time to incorporate some roses or other bare root plants into your garden. There are several reasons to do so.
1. Planting bare root saves you money. If you are buying from a local nursery or a seller who ships, you’ll find the cost cheaper because you’re not paying for soil or containers.
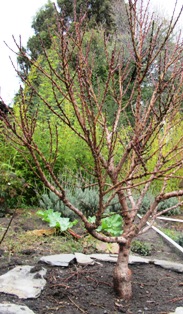
2. Better selection. You can purchase heirloom varieties of deciduous trees and shrubs from all over the world when you buy bare root. Bare root fruit trees are popular with back yard gardeners but you might also consider artichokes, rhubarb, strawberries, grapes, asparagus, and many other plants that are sold as bare root.
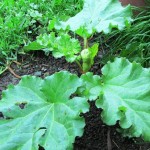
Rhubarb is a bare root plant that flourishes in rich soil with some protection against direct overhead sun
3. You have flexibility. Planting in February just before spring means the ground has thawed in areas where freezing temperatures are the norm. When the ground is growing warmer and is workable is the time to tuck your bare root plants into the soil.
________________________________________________________________________
If you enjoy reading about country living topics, check out my Henny Penny Farmette series of cozy mysteries, including A BEELINE TO MURDER, THE MURDER OF A QUEEN BEE, and A HIVE OF HOMICIDES (Kensington Publishing). These mysteries also include farm to-do lists and delicious recipes.
I’ve also written over two dozen self-help and wellness books, including THE SELF-CARE PLANNER, HOW TO LIVE WITH INTENTION, and MY POCKET MEDITATIONS (Adams Media/Simon and Schuster).
Find Meera Lester’s books online and in traditional bookstores everywhere. Barnes & Noble will be featuring THE SELF-CARE PLANNER on its self-care table for the New Year, New You promo, starting Dec. 31 and running through March 2020, in select stores.
https://www.simonandschuster.com/books/The-Self-Care-Planner/Meera-Lester/9781507211649?utm_source=author_post&utm_medium=adams_outlet&utm_campaign=adams_lead_fall&utm_content=
Great Pie Begins with a Buttery, Flaky Crust
My stalwart Scots-Irish grandmother was thrifty and talented when it came to food preparation. She made delicious pies from cherry, rhubarb, peaches, apples, pears, and sweet berries of every kind, including gooseberries. Her pies were my childhood delight when I lived with her and my grandfather on their Boone County, Missouri farm.
She made delicious meat pies from meats she’d preserved by canning. Missouri winters could be harsh. Those meat pies nourished me when the snow piled up outside the windows, and it was too cold to make a trek to the smoke house where her prized Boone County hams hung from hooks.
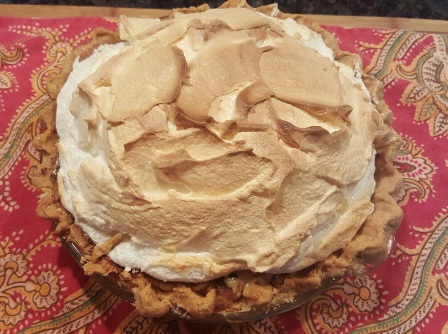
Sometimes, my grandmother combined fruits or berries in a rustic pie (today, we call it a galette) and on other occasions, she made a raisin, pecan, pumpkin, coconut, or a custard pie. And meringue, if used, was high and sweet and just the right shade of golden brown. But it was the pie crust that I loved.
For the top of a peach pie, she’d cut in a large curve shaped like a branch. Then two or three other lines would curve from it. Lastly, she cut teardrop shapes along the arch lines so the top crust art would suggest a peach tree branch. When she worked crisscross strips atop a cherry pie, it was both beautiful and delicious.
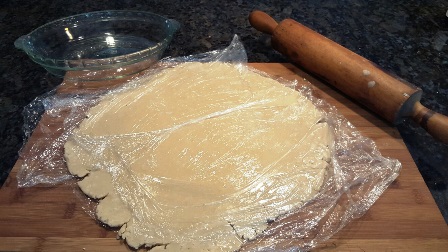
Storing or rolling the crust between sheets of plastic wraps is a good way to avoid handling the crust with your hands.
The secret to her buttery, flaky crust was not to handle it too much. Today, I make the same recipe but in my food processor. Like her, I use chilled or ice water, adding only drops at at time as the food processor is pulsing the dough–only enough to get the dough clinging together. The point is to move the dough from dry and crumbly to clumping into a ball.
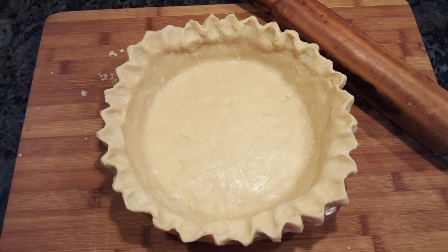
This fluted crust is ready for almost any kind of filling. I will prick the bottom and sides with a fork before filling and baking.
After the dough is made, I dump it from the food processor bowl onto aluminum foil or plastic wrap and work it into a ball (without touching it). The dough goes into the fridge for a chill over an hour and up to 24 hours. The recipe makes enough for a pie top and bottom or a couple of pies requiring only the bottom crust.
Ingredients:
2 1/2 cups flour
1/2 teaspoon salt
1 teaspoon granulated sugar
1 cup chilled unsalted butter, cut into pieces
1/4 (plus a few tablespoons more if necessary) cold or ice water
Directions:
Add the dry ingredients (flour, salt, and sugar) in the food processor bowl.
Cut the butter into small chunks and drop the pieces in. Pulse into a crumbly, dry meal.
Add ice water to the mixture in the bowl by dropping spoonfuls through the feeding tube and pulsing after each addition.
Remove the dough when it clings together–neither too wet nor too dry–by dumping it out on a large sheet of aluminum foil or plastic wrap.
Mold the dough into a ball and flatten into a thick disk to make it easier to roll out.
Chill for an hour or up to 24 hours.
Makes two buttery, flaky crusts.
* * *
If you enjoy reading about farmette topics (including gardening, beekeeping, and delicious recipes), check out my cozy mysteries A BEELINE TO MURDER and also THE MURDER OF A QUEEN BEE in the Henny Penny Farmette series (from Kensington Publishing).
These novels are available through online retailers such as Amazon, Barnes & Noble, Kobo Books, and Walmart as well as from traditional bookstores everywhere.
See, http://tinyurl.com/hxy3s8q
Now available in mass market paperback, this debut novel launched the Henny Penny Farmette series of mysteries and sold out its first press run.
See, http://tinyurl.com/h4kou4g
The second cozy mystery in the Henny Penny Farmette series, available Sept. 27, 2016, is now available on Net Galley (netgalley.com) for professionals and readers who write reviews.
Pruning between Storms
The roses, fruit trees, vines, and bushes need pruning, I’ve been itching to get to them, but it’s been raining. Storms have been moving through but with breaks. With rain predicted well into February and March, I don’t think it’s a good idea to put off the pruning. Warm weather will start everything sprouting.
A Level 2 storm moved through today with high winds and rain. I waited until almost lunch time before venturing out. The winds are still fierce, but there are patches of blue in the sky. I filled pots with soil, took cuttings of my roses, dipped them into root hormone, and inserted several in each pot. These will become new bushes for the flower gardens out front of the house.
I love this time of year when the stack of seed catalogs grows daily and nurseries are gearing up for the bare-root season. Already my family is asking when can we plant spring peas, pointing out that the onions and garlic are up and the rhubarb root has set up new leaves.
I did a walk around recently and noticed that with all the rain and warm temperatures, my Desert Gold peach trees and the Bing and Black Tartarian cherries are covered with buds. The buds are swelling but no blossoms yet.
Grass and weeds are up nearly eight inches and growing like crazy. My lavender and the earliest bulbs are blooming. All this lovely growth seems weird after four long years of intense drought.
Even songbirds and honeybees seem happy as they flit around the farmette between the storms. Surely, these signs are harbingers for the glorious spring to come. All the more reason to get busy pruning between these storms.
Drying Fruits Naturally
I love dried apricots, but don’t tolerate well the ones treated with sulfur dioxide(used to prevent oxidation and loss of color). With so many apricots on our property coming ripe at once, I have decided in addition to making jam this year to also dry some of the fruit.
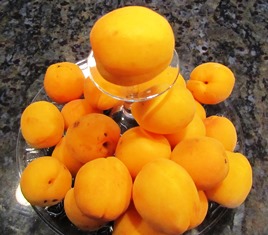
Apricots, so plentiful this time of year, are easy to dry and make great snacks when the season is over
Apricots dried but not treated with sulfur dioxide will turn a natural brown color. Some stores sell them this way. They are usually priced the same or similar to the treated apricots with the bright orange hue.
Besides apricots, other fruits that dry well include apples, bananas, cherries, grapes, nectarines, peaches, pears, plum, rhubarb, and even strawberries. You can use a drying machine
Quick Tips for Drying Fruit
1. Choose to dry only the freshest picked fruits, without bruises, scale, sun scald, or other blight.
2. Spray nonstick vegetable spray on drying pans or trays to make it easier to remove the dried fruit
3. Lay out the fruit to dry in a single layer on trays. Remember to rotate the trays occasionally and turn the pieces from time to time.
4. Destroy any insects (miniscule or otherwise) by freezing or baking the fruit. Simply take the tray and stick it into an oven heated to 175 degrees Fahrenheit for about 15 minutes. Alternatively, pack the dried fruit in freezer bags and freeze for at least 2 days.
5. Freezing dried fruit in resealable freezer bags will preserve its shelf life.
Easy Strawberry-Rhubarb Jam
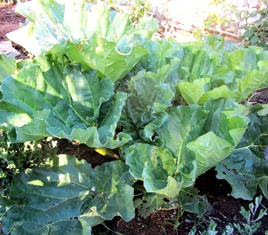
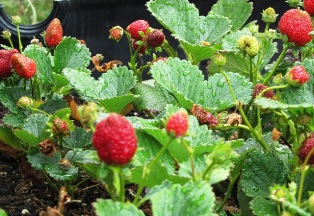
Rhubarb takes up a lot of garden because of its big leaves but the canes pair well with strawberries
Rhubarb and strawberries just seem to go together. Their flavors blend nicely, whether in a compote, trifle, pie, or jam. The following is a simple recipe for strawberry-rhubarb jam and uses the boiling hot water bath to preserve the jars of jam.
Make extra to tuck into holiday gift baskets or for gift-giving throughout the year.
Ingredients:
2 cups strawberries (washed, hulled, and crushed)
2 cups rhubarb (roughly four stalks, chopped)
1/4 cup lemon juice
6 Tablespoons Classic Pectin
5 1/2 cups sugar
Directions:
Combine the first four ingredients (strawberries, rhubarb, lemon juice, pectin) in a large pot.
Bring to a boil.
Add the sugar, stirring to blend completely.
Return the mixture to a roiling boil.
Time for one minute, stirring constantly.
Remove the pot from heat.
Skim away the foam.
Ladle the jam into hot, clean jars, leaving 1/4 inch head space.
Apply and tighten the two-piece ring/lid caps.
Place jars into the boiling water bath canner.
Process for 10 minutes.
 Facebook
 Goodreads
 LinkedIn
 Meera Lester
 Twitter


