 Facebook
 Goodreads
 LinkedIn
 Meera Lester
 Twitter


How We’re Turning a Bedroom into an Office/Guest Room
Our farmette house has a small bedroom that we’ve always intended to reconfigure into an office where I can have more space to write my books. Since we borrowed some space for our master bedroom walk-in closet, the other bedroom (already small) lost two more feet. The new reconfiguration meant erecting two new walls and a closet.
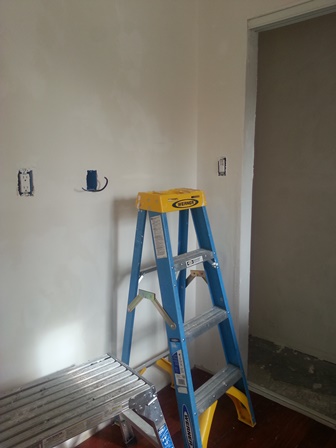
The plaster is drying on this wall next to the newly created closet
New walls, after framing and hanging the drywall to create them, must have the seams taped, holes filled, and drywall screws covered. That was done around Thanksgiving. Since then, it’s taken us several weeks to apply the joint compound plaster, letting each coat dry for 24 hours before we apply the next. We only work when we can find an hour or two free after our other work obligations.
While I’ve been mixing and applying small batches of the stuff that reminds me of pancake batter, my husband does it like a pro–mixing large batches in a five-gallon can. He’s also much faster and neater with the application process. I was doing the ceiling of the bathroom and got huge gobs of it in my hair. But already, I feel the energy of the room has shifted. It’s light and bright and clean. The space is neatly defined.
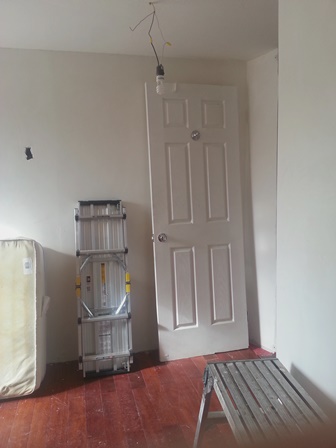
I want a bookcase on either side of a built-in desk on this wall
Before we can choose base boards and crown molding or the electrical materials for lighting, we still have to go through the sanding, cleanup, and priming for paint. We’ve decided to build bookcases, a built-in desk with good lighting over it, and a Murphy bed (so the room can double as a guestroom, when necessary) to maximize the space.
I love home renovation projects, and this office/guest room for the New Year is no exception. It’s taken a lot of patience. That noted, the payoff will be worth every minute we’ve spent on it.
For more tips on farmette projects, crafts, and delicious recipes, check out my newest mystery. It’s available on Amazon.com, Barnesandnoble.com, and other online and traditional bookstores everywhere.

Harvesting Honey the Old-Fashioned Way
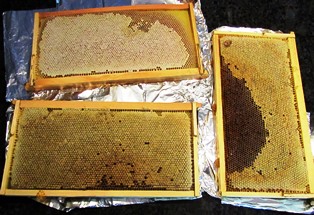
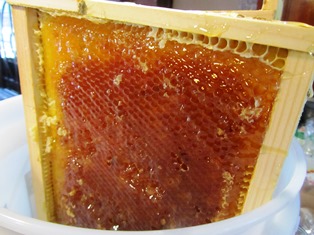
Frames of honey, fresh from the hives
Last weekend, my beekeeper neighbor and I harvested three frames of honey from my hives. I took the frames into my house and, with a hot knife, cut open the wax cells to permit the honey to drain.
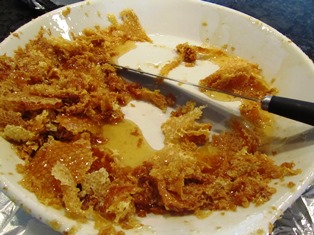
Opening the capped cells is easily accomplished with a hot knife
I drained off one-half gallon of honey from two frames.
Two frames drain simultaneously in a five-gallon bucket; another option is to use large, flat plastic tubs
I wrapped the extra frame in foil and froze it until I am ready to drain that frame as well. Then, I will let it thaw for 24 hours before draining off the honey.
Once all the honey is out of the frames, I take the frames outside and hang them in the tree near the hives. The honeybees will do the cleanup, foraging all the honey and leaving only clean wax that I can melt for candle- or soap-making projects.
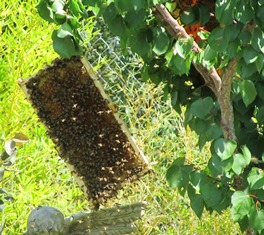
A frame of wax and residual honey is hung in a tree so the bees can clean it, hopefully before the ants find it
Draining honey from frames is a lengthy process and I have to do it twice: once to remove the honey and the second time to strain out any tiny particles of wax, before bottling it.
Last time, I took 20 frames and my neighbor, who was harvesting too, ran those 20 frames through his motorized extractor in his honey room.
Extractors are a modern convenience that saves untold hours extracting honey. But until I begin to sell my honey and other farm products, I won’t be able to afford such an energy-efficient tool.
I’ve discovered that beekeeping can be quite the expensive hobby. There are uncapping tubs, melters, comb cutting pans, heated knives, thermal plastic shrink bands for jars, uncapping needle rollers, and myriad other items used in honey extraction.
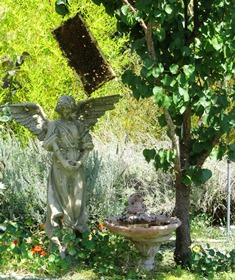
The tree near the hives holds two frames and a strainer of wax/honey from the uncapping of the cells that I also drained
Radial extractors can save time and preserves the honeycomb. The frames are placed between the guides of the stainless steel tank and the reel spins. The centrifugal force created throws honey against the sides of the tank. Honey is drained off through spigot. For now, the old-fashioned way works fine, too.
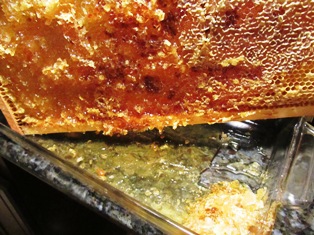
Golden honey draining from a frame
into a glass dish