Late to Ripen But Oh, So Yummy!
Following the historic long seasonal deluge of rain, our fruit trees are loaded with peaches, apricots, plums (the cherries are gone now). While there is plenty of stone fruit, it’s all ripening late this year.
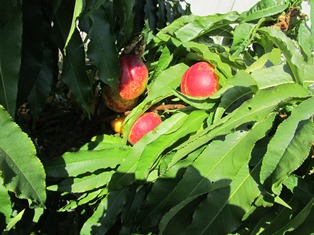
Our Blenheim apricots were ready to pick, dry, and make into jam in late May of 2018. On this last day in June, I plucked an apricot that was ripe on the side facing the sun but the opposite side was green and hard.
The cherries, too, ripened late this year. We picked about 8 gallons of cherries from our two Bing and Stella trees. I dried some and we gave away a lot.
The Black Tartarian cherries didn’t produce as heavily this year as last. By the time we discovered the ripe cherries, the birds had already beaten us to the super-sweet fruit. I don’t mind sharing with the local wildlife, but would have loved a bowl of these for snacking.
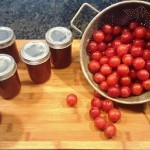
The yellow and red plums are finally ripe now. Today, I’m making plum jam. Nothing beats hot toast with spreadable summer jams and marmalade for breakfast on a winter’s day. In a normal year, most of my jam-making of stone fruits would be finished by now.
The early Desert Gold peaches are gone now, a tasty memory, from a month ago. However, we still have summer peaches clinging to the tree. I check them daily. Fresh peach pie for the fourth of July is a favorite at my house.
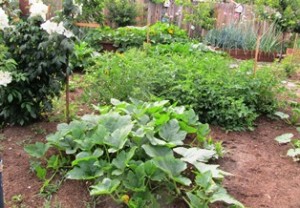
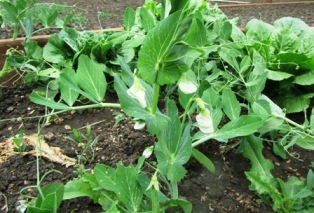
While the fruits and berries seem to ripen more slowly this year, my vegetable garden is blowing my mind. I have several raised beds in a fenced-off area so wild animals won’t bother it. Most of the raised beds were used for composting (think, tons of chicken manure, yard clippings, and cardboard). Still, I added other organic amendments. Boy, is that soil paying off.
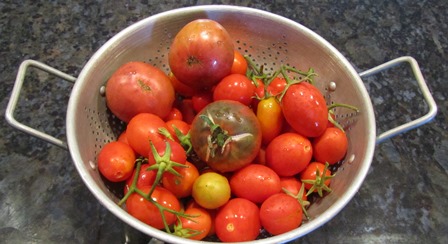
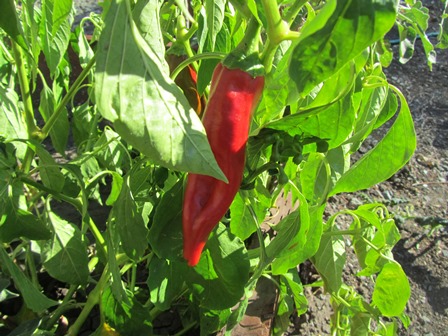
It’s a banner year for vegetables on the farmette. Most will be eaten fresh but the sugar pumpkins won’t ripen until autumn. Love them in pie.
_____________________________________________________________________________________
I’ve been told I’m living a “charmed life” on my Henny Penny Farmette. And so it is. But this chapter of my life didn’t happen by accident. I once lived in Silicon Valley and was part of life in the fast lane, which I enjoyed. But I grew up on a farm. I missed time in nature, eating foods that I knew were healthy and wholesome and pesticide-free, and the slower pace of life. I set an intention to manifest the life I have now. You can, too.
FIND ME ALSO at Meera-lester.com (don’t forget that hyphen…very important.)
If you enjoy reading about gardening, keeping chicken and bees, and other farm topics, pick up copies of my Henny Penny Farmette series of cozy mysteries. The books are chocked full of farm and craft trivia as well as delicious recipes and, of course, intriguing mysteries.
Autumn Brings A Honey Harvest and Hive Treatment
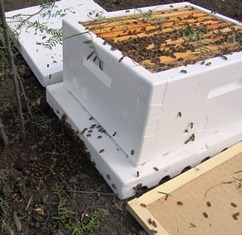
Harvesting sweet-tasting, amber-colored honey from my hives has become an autumn ritual. This past Sunday, my beekeeper neighbor and I opened, inspected, and removed ten frames of honey from the one hive I have left.
The other hive succumbed to stress, a hive beetle infestation, and a steady march of ants. This despite me keeping my hives (and the apiary) pristine, dry, and facing the sun.
I found a beetle (no larvae) in the super we removed from the hive box when I scraped the frames clean of wax and bee glue. The tiny black insect had established itself in a crack under a plug of wax. Bees can’t sting through the beetle’s hard shell.
Without a powerful way of combating an infestation of beetles, the hive becomes stressed.Thank goodness, my neighbor had just the treatment to eliminate any other unseen beetles from my hive box.
Beetle Bee Gone sheets are an all natural and chemical-free method for treating hive beetle. Bees munch on the sheet that then becomes a fuzzy trap that ensnares the beetles. The beetles die.
In cool weather, which is what we have now, the hive beetle moves to the interior, above the brood, and/or under the hive cover. When the weather gets warmer, the pests move downward and so the placement of the sheets must be moved down.
My neighbor also inserted under the hive box lid a small plastic trough (as long as a pencil) with holes. He poured vegetable oil into the trough until it was half full. This, too, is a natural treatment against the hive beetle. The pests drown.
I’m optimistic that these treatments (along with others I’m using for mites) will keep the hive protected over winter so that in spring, I’ll get a new swarm to grow my diminished colony.
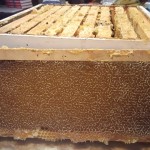
With the bees tended to, I turned my attention to the honey harvest. In all, the single super of ten frames produced roughly three gallons of honey once I’d prepped the frames and put them in the extractor. That’s more than enough honey to get my family through the winter and to present as gifts to friends along with jars of fruit jams and homemade sweets come Christmas.
_________________________________________________________________
If you enjoy reading about backyard beekeeping, caring for chickens, or growing organic vegetables, check out my Henny Penny Farmette series of books. All are available through traditional and online bookstores. To see more, click on the link.
Preparing Honeybee Hives for Spring
Recently, I conducted a mid-winter check of my honeybee hives. With my beekeeper neighbor’s help, we opened my Henny Penny Farmette Hives A and B to search for signs of an increase in the mite population, the presence of other pests, and evidence of mold. Inspecting and treating bees with medicines when necessary are important bee management practices.
We found one bug that I couldn’t identify but my neighbor explained it lays a narrow worm and must be removed before its numbers increase. This we did. We also found three frames in Hive B that had a few spots of mold. We threw away the frames and replaced them with wax-covered frames in the lower hive box where the queen had already produced lots of bee babies.
There appeared to be adequate stores of honey, baby bee food, and lots of baby bees. In fact, we removed a few frames of honey from both hives. In their place, we inserted frames that previously had the honey drained off but wax left intact (these I always freeze before putting back into hives since freezing kills mites, larvae, and wax moth), making it easier for the bees to start building comb.
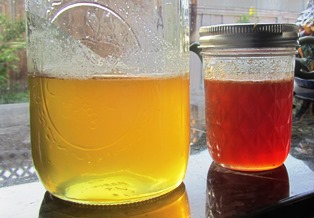
The honey I harvested is dark-colored and earthy tasting, typical of autumn honey when the bees collect pollen from eucalyptus, star thistle, and other sources available in autumn. In contrast, spring honey is light-colored and slightly citrus tasting from pollen gathered from blooming citrus trees and wildflowers.
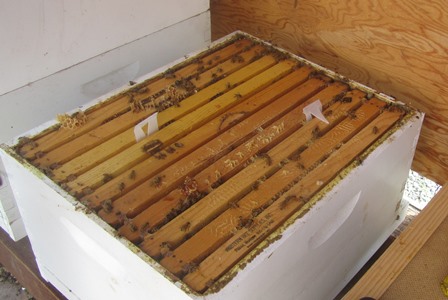
Hang medicated miticide strips between frames inward from the edge of the hive box for mite control.
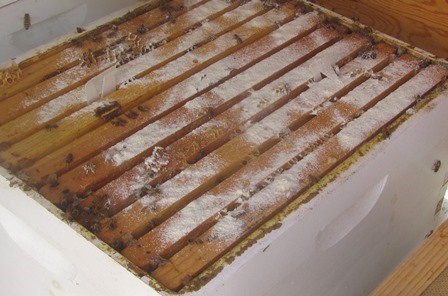
Since we found evidence of mites, we hung miticide strips between frames to combat tracheal and Varroa mites. Also, we sprinkled powdered sugar medicine (Tetra-Bee Mix 2X Medicated) over the frames to control risk of American foulbrood. Treating the hives thus will enable the bees to remain robust. I expect their numbers to swell with warmer weather which, in turn, translates to new swarms in the spring.
*Apivar is an effective treatment of Varroa mites. One strip per four to five frames works through contact and should be placed in high bee activity areas. Not to be used when honey supers (top hive boxes with frames of honey) are on.
*Tetra-Bee Mix 2 X Medicated is recommended for control of American foulbrood caused by paenibacillus larvae and European foulbrood caused by streptococcus pluton susceptible to oxytetracycline in bees when used as directed.
For more beekeeping tips, delicious recipes, and a wholesome whodunnit, check out my Henny Penny Farmette cozy mysteries: A BEELINE TO MURDER (paperback release in October 2016), MURDER OF A QUEEN BEE (hardcover October 2016), and HIVE OF HOMICIDES (October 2017). Find them on Amazon.com, Barnesandnoble.com and other online and conventional bookstores everywhere.
Finding Treasures in the Seed Catalogs
As a member of the grow-your-own-food movement, I pore over seed catalogs this time of year to search for heirloom vegetables that I want to grow on my farmette. If you’ve ever been inspired by the heirlooms (and not just tomatoes) displayed at a farmer’s market, you know what I mean.
Some wonderful heirlooms have fallen out of favor over the years and through generations. That’s a shame for those of us interested in maintaining the widest possible plant diversity. Gardeners often can find lots of heirloom tomatoes such as Cherokee Purple, Brandywine, Mortgage Lifter, and the “blue” tomatoes, including Indigo Apple. However, finding a great variety of heirloom vegetable seedlings might not be as easy as locating the tomatoes. That’s where rare seeds come in to play.
Seed companies that offer myriad heirloom varieties of vegetables and herbs send out their catalogs around mid-January each year. But their seed offerings can be perused and purchased online as well. Some of my favorite seed companies and their websites include:
Territorial Seed Company, http://www.territorialseed.com/
Baker Creek Heirloom Seeds, http://www.rareseeds.com/
Heirloom Seeds, http://heirloomseeds.com
Sustainable Seed Company, http://sustainableseedco.com/
Annie’s Heirloom Seeds, http://www.anniesheirloomseeds.com/
High Mowing Organic Seeds, http://www.highmowingseeds.com/
Eden Brothers Seed,nhttp://www.edenbrothers.com/store/heirloom_seeds.htm
Victory Seeds,http://www.victoryseeds.com/main_vegies.html
I’ve already removed empty cell packs, potting soil, and ice cream sticks(for plant labels) and placed them on the patio in preparation for starting my own seedlings from seed.
Once the seeds are planted in the cells, I’ll nurture along the seedlings until they are ready to go in the garden (after all chance of frost has passed). Then, Mother Nature will take over. I’ll enjoy sampling new varieties and saving seeds from those I want to grow again.
Buying Fair Trade Generates More than Good Taste
We all love our local farmers’ markets where the freshest organic ingredients–direct from the farm to our tables–are easy to find and purchase. And they taste so good. But sometimes, we consumers desire something grown beyond America’s borders, such as tea, coffee, exotic spices, and chocolate. And this is where choice and purchasing power has consequences.
When you choose to buy products displaying a FAIR TRADE certification logo, your action directly and positively impacts the lives of farmers, growers, artisan craftspeople, commodities producers, and their workers in communities in developing nations.
As consumers demand better products and better working conditions for workers, the Fair Trade movement has more clout to lobby on behalf of commodity farmers, impoverished workers, and child laborers.
If you love chocolate, consider this: seventy percent of the world’s cocoa beans is produced in Cote d’Ivoire and other Western African countries. Pay is nominal at $2 USD/per dieum and, according to UNICEF, more than a half million children labor under dire working conditions in the cocoa fields in these bean-producing countries even though child labor is illegal in the cocoa industry.
Coffee was one of the first Fair Trade certified products but today’s consumers can now also find Fair Trade certified cocoa, wine, cotton, fruit, tea, red palm oil, coconut oil and associated products, chocolate, honey, quinoa and other ancient grains, beans, sugar, and bananas, to name a few items.
The Fair Trade Movement has been around since mid last century. It began as a mainly North American/European social movement to aid poor farmers, commodity producers, and laborers in developing nations to achieve more favorable trading conditions. Fair Trade also promotes sustainability.
Choosing to buy a product carrying the Fair Trade certification label means your consumer decision will impact more than your taste buds–it will have positive ramifications for workers, commodity producers, and their communities beyond America’s borders.
Twelve Reasons to Grow Your Own Food
Doctors tell us we should eat fruits and vegetables for our health. Fresh is best. For more reasons to grow your own food, read on.
1. Enjoy Superior Flavor and Higher Nutritional Value
The flavor of produce that travels from your edible garden to your plate is far superior to that of store-bought varieties. Even before fresh produce reaches the bins of your local store, the fruits and vegetables must be picked, sorted, crated, and transported from suppliers t0 supermarkets and grocery stores. Time spent in transporting and storage can diminish food flavors and nutrient values.
2. Keep It Pesticide-Free
Go organic. Choose alternative methods (companion planting and organic sprays, for example) to treat garden pests and plant diseases. Organic farming starts with nourishing the soil, which in turn, nourishes the plants that nourishes a healthy body. Organically grown fruits and vegetables picked fresh, immediately prepared, and served are nutritionally superior than their commercially grown and stored counterparts.
3. Safeguard Your Health
Avoid the cancer-causing agents and toxic chemicals in pesticides that are commonly used on many commercially grown food products.
4. Cultivate Plant Diversity; Preserve History
Grow varieties of the vegetables and fruits you love. Or, choose cultivars that might have grown in your grandmother’s garden–a nod to preserving history. Or, plant varieties that have fallen out of favor, are unusual, or are even rare.
5. Lower Your Food Bill
Grow your own edibles and preserve them for later consumption (like freezing spring peas for a fall or winter meal). Preserving the bounty by drying or freezing or canning can reduce your grocery bills. Another cost and time saver is to grow hard-to-find varieties of heirloom herbs, vegetables, or fruits instead of tracking down sources for those items.
6. Expand Your Knowledge of Plants
Understanding the seed-to-harvest cycle in nature fosters deep appreciation for ecology and the environment and contributes to your knowledge about various plants’ needs for nutrients, water, light, and temperature. You also learn about treatment options for garden-variety pests and plant diseases. This wealth of information can be shared with younger generations who will inherit the responsibility of caring for the planet.
7. Get Exercise
You can still work out, albeit in the garden in the fresh air rather than in an indoors gym. Think about all the exercise you’ll get digging, planting, shoveling, watering, weeding, and composting. Gardening provides plenty of solid exercise and rejuvenates a weary spirit.
8. Reduce Your Stress
Time spent in a garden is restorative: it nourishes your spirit and reduces stress levels. In fact, just a few moments of deep breathing and thinking about birdsong, sunshine, fresh air, and healthy plants all around you–nature in all its splendor–can generate a positive mental attitude.
9. Alleviate Concerns about Food Safety and Quality
You know the quality of the food you bring from your edible garden to the table. You want the superior freshness, flavor, and food quality for your loved ones. The chances for food-borne illnesses of the kind that strike Americans every year and are often investigated by the Centers for Disease Control (CDC) are vastly diminished when you grow organic edibles and eat them as fresh as possible.
10. Preserve Our Planet’s Diversity
Choose seeds that are open-pollinated, non-GMO (genetically modified organism; the result of scientists engineering or modifying the genetic material of food plants). It may come as no surprise that the health of our nation has declined with the demise of small family farms even as there’s been a rise in the number of supermarkets and expansion of modern agribusiness. It’s no wonder people everywhere are getting behind buy-local, keep-it-local movements; participating in farmers’ markets, and engaging in urban homesteading where self-reliance is paramount.
11. Earn Extra Money
Selling your home-grown produce to others in your community means you can make possible the goodness of organic produce to others while earning a little money (hint: buy more seeds or otherwise reinvest in your garden).
12. Feel Good about Donating Excess Produce to a Food Bank
Your local food bank or (sometimes churches, too) will distribute donated produce to needy families. Let it be a source of joy for you that your gardening efforts have literally put food in the mouths of those in less fortune life circumstances.
Have You Planned Your Garden Yet?
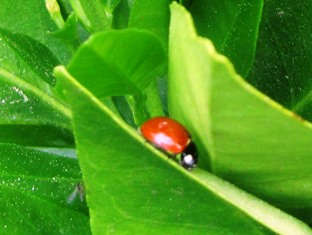
Ladybugs and honeybees occasionally meet on the same leaf when both forage for food. The ladybugs dine on aphids while the honeybees seek the sweet nectar of blossoms; orange, tangerine, and lime trees are favorites.
The bug and bee traffic has been steadily increasing now that showers and warm weather have triggered blossoms opening on the fruit and citrus trees around the farmette.
Spring doesn’t officially begin until March 20, but with the weather forecasters predicting upper 70’s Fahrenheit later this week and nighttime temperatures in the 50’s, it is time to consider options for your garden. Many DIY centers are already offering vegetable seedlings, herbs, and berries for planting. Some have markedly discounted their bare-root fruit trees and roses.
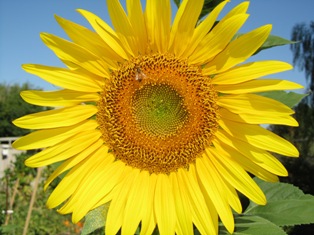
I’ve already planted seeds in flats for germination and scattered flower seed (collected from last summer’s flower garden) around prepared beds. When the outside temperatures start to climb, I’ll be rewarded with blooms from nasturtiums, petunias, zinnias, and sunflowers.
The climbing roses are already past the red-leaf stage and are producing the first flush of blooms for spring. The wisteria vines have plump pods ready to unfurl with gorgeous tracts of purple blossoms. And the first green tips of leaves are beginning to sprout on my apples even as the early peaches and apricots already have fruit forming.
This time of year holds the promise of new beginnings, and you see that in every step you take in a garden. Because I prefer to grow plants from varieties of heirloom, open-pollinated seed, I save it from the best specimens grown in the previous season. Of course, some plants freely re-seed themselves. That’s why I now find lettuce and onions and even sweet peas coming up in expected places on the property.
Have you figured out what veggies, flowers, fruits, and berries you’ll plant and grow in your garden this year? If not, now’s a good time to get started. For ideas, check out, http://www.organicgardening.com/learn-and-grow/plan-beautiful-vegetable-garden.
If you prefer, as I do, the non-GMO and organic seeds, there are many excellent sources for them. For heirloom and rare seed, check out http://www.rareseeds.com/store/vegetables/. Also see, http://www.victoryseeds.com/aboutus.html and http://www.anniesheirloomseeds.com/
Eggstra Confusing Egg Labels
Just because an egg is organic and from a cage-free chicken does not mean the eggs are free from Salmonella Enteritidis (the bacteria that causes the foodborne illness) or that the chickens producing the eggs live free of confinement.
Supermarkets carry dozens of eggs with labels like pasteurized or organic and also free-range, cage-free, or vegetarian. Consumers can find it confusing, so here’s the low-down on eggs and their labels.
CAGE FREE
This term relates to how the chicken is confined. The chickens are not raised in cages but may be confined in barns with floors. The floors may have pine shavings or other material and the chickens will likely have nesting boxes in which to lay eggs and roosts. But cage free does not necessarily mean they have lots of space; they could be living in close confinement with many other birds, depending on the farm.
ORGANIC
In order to get the USDA certification for organic on the eggs, the chickens must not be given hormones, antibiotics, and other drugs. The hens can be caged or otherwise confined, but usually they are cage free and eat an organic diet. The USDA stipulates that to qualify as organic eggs, the layers must be fed an organic diet of grains from land deemed free from toxic chemicals and pesticide for a minimum of three years and no grain from genetically-modified crops.
FREE RANGE
Chickens considered free range are able to leave their confinement and roam freely. Depending on the farm, the birds may be under a protective covering like a canopy. This keeps the flyers from escaping and the hawks from carrying away the birds. Free-range chickens might have a richer diet, again depending on the farm, because of greater access to freely foraging on grasses, grains, and seeds.
VEGETARIAN
How, you might wonder, can a chicken be deemed vegetarian when they naturally forage for grubs and worms? They are confined in cages and fed a vegetarian diet, free of animal and fish by-products.
PASTEURIZED
The eggs containing a pasteurized label have been put through a heating process while still in their shells. For three and one-half minutes, the eggs are heated to 140 degrees Fahrenheit, thereby killing the Salmonella bacteria. Pasteurized eggs are preferable for the diet of young children, elderly people, and those who have weakened immune systems and for whom a salmonella infection might have grave consequences. Even if you don’t buy pasteurized eggs, you can eliminate the risk of Salmonella infection if you cook the egg yolk and white until firm.
SAFETY TIPS
Eggs collected from your hen house should be washed within 36 hours of being collected and immediately refrigerated at 45 degrees Fahrenheit or below. These two steps can reduce the risk of Salmonella. Refrigeration prevents the bacteria (if present) from multiplying. Eggs purchased from the store should be immediately refrigerated. And if a recipe lists a raw egg as an ingredient (for example, mayonnaise or salad dressing or cake frosting), use pasteurized eggs or egg whites.
An egg from a pasture-raised hen is much more nutritious than an egg from a large commercial enterprise, according to Mother Earth News. The publication did a study in 2007 that measured how eggs from pastured hens stack up against the USDA’s nutrient data for commercial eggs. The results suggested that eggs from the pastured chickens were nutritionally superior. For the full story, see, http://www.motherearthnews.com/real-food/tests-reveal-healthier-eggs.aspx
• 1/3 less cholesterol
• 1/4 less saturated fat
• 2/3 more vitamin A
• 2 times more omega-3 fatty acids
• 3 times more vitamin E
• 7 times more beta caroten
It might be time to acquire a few more chickens if you love eggs as much as I do, especially in those big, mid-day farm table breakfast/lunches, with fresh veggies from the garden, and homemade bread and jam.
Fall Spraying for Peach Leaf Curl
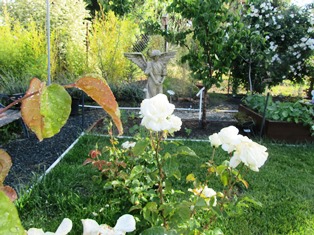
Just beyond the sliding glass door of my kitchen, we’ve carved a bit of a lawn and garden out of a wild weedy field. When I’m washing dishes or making jam, I can see my garden sanctuary where I’ve moved in a statue of an angel and positioned a bench near two nectarine trees–a perfect place to sit and take in the view of Mount Diablo’s peaks.
Of late, though the nectarine trees look less than healthy. The two heavy-bearers have become infected with the fungus that causes peach leaf curl. It’s not just my trees that are infected; two of my neighbors have the same problem. And this showed up late in my trees this year.
I’ve tried plucking off the twisted and contorted leaves as they show, discarding them in the garbage (not the compost pile). However, I fear I am losing this battle. The trees are going through a leaf drop now that it’s middle of November. I don’t want that fungus overwintering in the infected leaves, so I’m gathering those into the garbage, too. And I’ll begin a spraying program.
The nectarines and peaches need to be sprayed three or four times (if we have a strong rainy season), from autumn to bud break in the spring. Both lime sulfur and copper sprays can be used; both are considered organic, although some formulations are not very strong. But the leaves must not remain on the ground under the trees.
Last year, I sprayed those trees the required number of times with an organic horticultural oil recommended by the local garden center. The trees were fine most of the summer. But last month, the infection showed up. And here I am now, plucking the leaves from the trees and picking them up from the ground.
I dare not use anything on treating the fungus that is not organic and safe for the honeybees. Come spring, perhaps I’ll be rewarded for my vigilance with new growth that is healthy and free of the fungus.
Nuts and Honey Add Lovely Flavor to Dried Fruit Tart
Flaky tarts piled high with fresh organic berries has always been for me a delightful way to end a summer meal. With the onset of winter now only eleven days away, I flip through my recipe files for something similar to those lovely summer tarts and hit upon an easy-to-make tart filled with dried fruits, nuts, and honey.
You can substitute or add other dried fruit (cranberries, figs, dates, and raisins, for example) to this tart, but I’ve found the best flavor comes from the dried peaches and apricots. They combine beautifully to create a richly flavorful dessert. A dollop of whipping cream on top adds a layer of decadence to this rich autumn tart.
Pastry Ingredients:
1 1/4 cup flour
1/4 cup sugar
1/2 cup unsalted butter (cut into pats or small pieces)
pinch of salt
1 large egg yolk
Directions for Pastry:
Combine pastry ingredients in a food processor with metal blade. Process until the mixture becomes a fine crumble. Add egg yolk and process into dough. Pastry should hold together, forming a ball.
Filling Ingredients:
3/4 cup white dessert wine
3/4 cup honey
18-20 dried apricots and/or peaches
1/2 teaspoon grated orange rind
1 cup blanched whole almonds
3 eggs
1 teaspoon good quality vanilla
2 Tablespoons unsalted butter
1 cup walnuts
Topping:
1 cup cream
1/4 teaspoon cinnamon
1 teaspoon of sugar
Directions for Toasted Almonds:
Preheat oven to 350 degrees Farenheit.
Toast blanched almonds on a baking sheet for 10 minutes. Remove and set aside. Keep oven on for baking the tart.
Directions for Tart Filling:
In a stainless steel pan, add the dried fruit with the orange rind.
Pour over the fruit and rind half the wine and 2 Tablespoons of honey.
Cook over low heat for 20 to 25 minutes until the fruit absorbs the liquid and plumps up, becoming soft and plaint.
In a bowl, combine eggs, honey, remaining wine, vanilla, and butter.
Beat in the walnuts and almonds.
In a springform pan, press the dough as thinly as possible over the bottom and up the sides of the pan. Drop the fruit onto the dough, spreading around over the bottom of the pastry. Pour in the nuts and egg mixture. Use a spatula to smooth the filling.
Bake the tart for 45 minutes on the middle rack of the oven.
Allow the tart to cool in its pan before removing and placing on a serving plate.
Whip cream until peaks form and fold in cinnamon and sugar. Put a dollop on top of each individual serving.
Serves 8.
 Facebook
 Goodreads
 LinkedIn
 Meera Lester
 Twitter


