Backyard Blueberries Taste Delicious and Are Easy to Grow
What’s not to love about blueberries. They’re almost a a perfect fruit. They are delicious, packed full of antioxidants, easy to grow, and add lovely landscape interest to any garden.
Grow blueberries in containers or in the ground but keep in mind that these plants like well-drained acidic soil. The pH should be on the low side, ranging from 4.5 to 5.5.
In the hottest inland valleys of the Bay Area, blueberries do best with morning sun and shade for hot afternoons. Northern Highbush varieties require winter chilling (800 to 1000 chill hours) to get the plants to produce fruit. Southern Highbush blueberries require from 700 to 1000 chill hours.
These plants benefit from an organic fertilizer with nitrogen.
Hold off on pruning for up to three years, allowing the plant to develop both a strong root system and bushy foliage. New plants begin to produce berries around the third year. During the third year, start pruning twice a year to remove inner and crossing branches to let in light and reduce the possibility of foliage disease.
Of the dozens of varieties of blueberries on the market today, among the Southern Highbush types is an early cultivar known as Misty. It produces a medium to large berry that is both sweet and spicy. The bush is upright with leaves that are blue-green turning to burgundy in autumn.
Sharpblue is another Southern Highbush variety that needs only 200 chill hours and produces dime-size fruit in abundance. The leaves remain green through fall and the bush is an outstanding specimen with high ornamental value in any garden.
For exceptional large berries with a robust flavor, give Southmoon a try. The berries are sweet; the plant, upright and vigorous. The plant will require 400 chill hours and will perform best in a sandy soil with lots of organic matter.
Whether you like your blueberries picked from the bush to eat fresh or baked into a delicious pie, give this plant a try. If you provide your blueberry plant the nutrients, sunlight, and water it requires, it will reward you with luscious fruit year after year.
_____________________________________________________
Order a copy of The Self-Care Planner for ideas about how to care for yourself. https://www.simonandschuster.com/books/The-Self-Care-Planner/Meera-Lester/9781507211649

Check out the Henny Penny Farmette series of cozy mysteries. Available for purchase from online and traditional bookstores everywhere
Helping a Kitchen Garden to Grow in Clay Soil
Under the searing summer sun, the clay soil of my farmette will grow amazing pin oaks, white oaks, and pine trees. But for a gardener like me who wants to grow vegetables and herbs, clay soil frustrates and challenges.
Before planting next year’s kitchen garden in a new area of the property, I’ll have to change the soil structure now. This will take time and a lot of effort, but it will pay huge dividends over the long term.
Here are a few things things a gardener can do to improve clay soil.
1. A few weeks before working an area, mulch the area with an eight to ten-inch layer of wood chips to help the soil retain moisture and regain structure.
2. Use a pickax to break up the soil to the depth of 10 inches and work in composted organic material.
3. Avoid working the soil after a rain or when the ground is wet because the soil will ball up into unwieldy clumps.
4. Work in sand or perlite to create more pore space for aeration and drainage. Beware of adding too much sand; the soil becomes like concrete. Ideally, the soil should have roughly fifty percent pore space with minerals and organic matter filling in the rest.
5. When not growing plants, sow a cover crop of legumes to reduce weed germination, prevent erosion, and help water penetrate deeply into the soil. A legume cover crop provides plant matter that can be turned back into the soil or mowed, leaving the plant’s bio mass in place. Legumes fix the nitrogen in the soil that will nourish the plants of the kitchen garden.
6. Repeat all of the above steps annually and dig, turn, rake, and water. Over time, the soil should support healthy roots of plants and give you a robust kitchen garden that will provide many tasty vegetables and culinary herbs.
____________________________________________________________________
If you enjoy reading cozy mysteries and are interested in gardening/farming topics, keeping bees and chickens, or creating delicious recipes from heirloom vegetables and herbs, check out my Henny Penny Farmette series. All are available from Amazon, Barnes and Noble, and other traditional and online bookstores everywhere.
Coming 9/27/17
PUBLISHERS WEEKLY 08/14/2017 noted:
“Lester’s sensitive portrayal of Abby’s struggle with her wounded psyche raises this traditional mystery above the pack.”
See more at: https://www.barnesandnoble.com/w/a-hive-of-homicides-meera-lester/1125424538?type=eBook
Grow Seasonal Greens Now
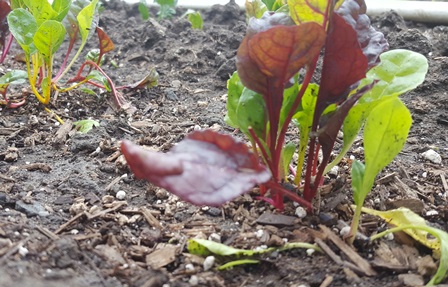
The cool season of spring is the optimum time to grow seasonal greens for salads and healthy blended shakes. In my kitchen garden, I’ve planted a variety of lettuces, spinach, kale, and chard. Most salad greens are easy to grow also in containers, raised beds, and window boxes when gardening space is limited.
Add compost and aged chicken manure to enrich the soil with nitrogen. Plant heirloom seeds about 1/2 inch in the soil, cover, and water. Within a week or 10 days, you should see the seedlings pop up. The greens will be ready to pick in about 25 days.
Water the plants to keep them hydrated but don’t drown the plants. When you are ready to make a salad, snip the leaves you want with kitchen scissors. New leaves will soon form if the roots are not disturbed and the plant continues to get nutrients and water.
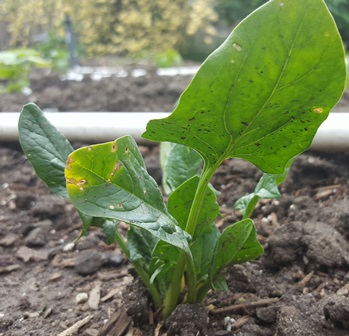
Spinach can be started in seed cell flats and then transplanted into your garden when all danger of frost has passed
SALAD OF FRESH GREENS
1. Snip a variety of greens in the early morning. Wash and thoroughly dry the leaves.
2. Place them in a bowl and crumble on some sharp cheese such as your favorite goat cheese or a Gargonzola (blue-veined, sharp tasting, and crumbly).
3. Add 1/2 cup sugared or candied walnuts.
4. Add some slice red onion and a handful of dried cranberries or chopped dried apricots.
5. Drop into the bowl some slices of a pear such as Bosc (considered the prince of pears).
6. Gently toss the salad and then spritz with red wine vinaigrette prior to plating on pretty salad serving dishes.
* * *
If you love reading about gardening and other farming topics, check out my Henny Penny Farmette series of cozy mysteries that include A BEELINE TO MURDER, THE MURDER OF A QUEEN BEE, and A HIVE OF HOMICIDES.
-
Delicious recipes
-
Farm quips and quotes
-
Tips for gardening and keeping chickens and bees
-
An exciting whodunnit mystery
From Garden to Table, Easy-to-Grow Squash
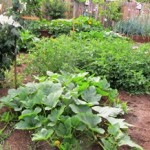
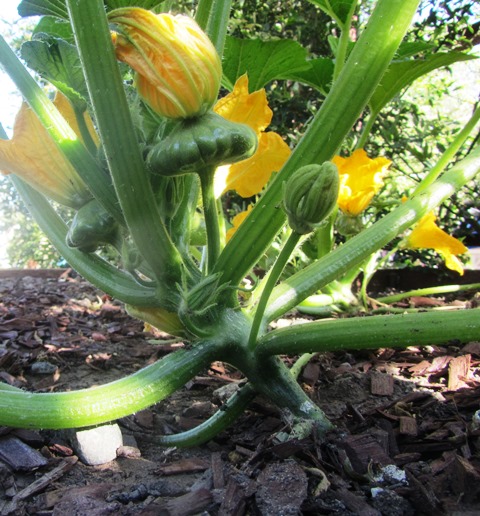
I love summer squash, tossed into rosemary potatoes and served up with eggs and sausage on a Sunday morning; or, grilled with fish, or added to a freshly-made pasta sauce. Best of all, you can have it fresh, from your kitchen garden to your table, as squash is one of the easiest vegetables to grow. Squash is a super food, high in antioxidants, fiber, and Vitamin A.
Squash is one of the Three Sisters (corn and climbing beans being the other two), grown together as companion plants in the tradition of certain groups of Native Americans who planted these vegetables. A fourth sister might be the Cleome serrulata, the Rocky Mountain bee plant to attract pollinators for the beans and squash.
There is a scientific basis for growing these three together. The squash grows fairly large and spreads out, blocking weeds. The beans provide nitrogen to the soil. The corn shoots up a stalk that provides the support the beans need to climb. The three plants benefit each other.
Each year, I plant both summer squash and winter varieties such as butternut and pumpkin that have hard shells and store longer. All types of squash are easy to grow. They just need sun, water, and room. They aren’t fussy about soil.
Summer squash includes zucchini, yellow squash, and scalloped (or round) squash. Autumn/winter varieties require a longer growing period (up to 120 days) and include butternut, acorn, hubbard, and pumpkin.
Growing Tips:
Choose a well-drained, sunny spot in the garden for your squash.
Plant three seeds to a hill (roughly six inches apart).
When the squash are about a foot tall, thin to the healthiest seedling.
Water two to three times each week.
Harvest summer squash when still young; if left on the vine, the squash becomes tough.
How to Repay the Thoughtful Gift of a Truckload of Manure
I begin obsessing about soil and manure this time of year after the summer garden is gone. The old adage of: take care of the soil and it will take care of you (via your plants) is really true. Out here on the farmette, the clay soil is so heavy that it cracks open in fissures during summer, so we are always working to improve it.
Recently, a generous friend brought us a truckload of horse manure. It was no small truck either. The manure seemed mostly aged and I could easily rake it into our flower beds and little lawn. Some of though is still relatively green, not aged, and I worry about using it to grow my winter crop of vegetables for fear of E-coli contamination.
There’s a new area where we are debating or not to put down a stone floor and just grow trees and flowers in a container wall on two sides. It might be the perfect place to use some of that horse dung.
In the meantime, on the property behind ours, the horse manure has been spread out with a bobcat to keep the growing areas fertile for the trees that were planted there nearly four or five decades ago.
There are all kinds of manures one can use in the garden, from bat guano and worm casings to animal waste products–horse, cow, sheep, steer, turkey, rabbit, and chicken, for example.
You can get manure tested, much like you can soil, to detect levels of nitrogen, phosphorus, and potassium. Not all manures are high in nitrogen, which is loved by many gardeners for that sudden growth and burst of bloom. Some manures, like cow and horse, also can carry seeds of weeds or whatever the animal has grazed on, which can emerge in your garden.
Most manures can be made into a fertilizer “tea” by mixing with water. Whether you apply aged manure or manure tea, always wash your fruits and vegetables well before eating to reduce the risk of consuming contaminated fruit or produce.
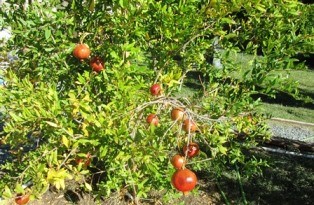
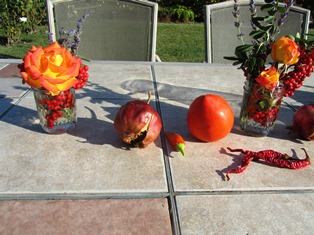
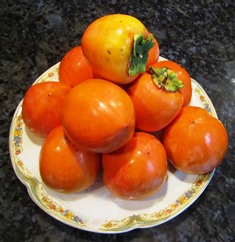
We appreciate our friend’s gift. Now . . . we wonder how to repay his kindness. I’m thinking a basket of persimmons and pomegranates, a French sugar pumpkin, a dozen organic eggs, and jars of jam and honey.
Divide Irises to Regenerate the Plant and Get Spectacular Blooms
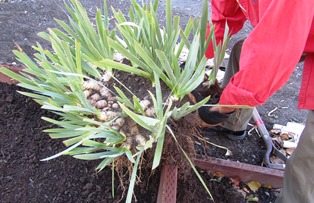
Dividing the rhizomes of bearded iris plants is an easy and necessary process as the plant ages. The division process is best done during late summer or early fall, but we are doing this job now on our farmette.
The rhizome is a thick tuberous type of structure that sends up stems and leaves and also produces roots. Many gardeners divide their iris clumps every three to four years. Our beds of iris have become overcrowded with many new baby plants. It’s time to divide.
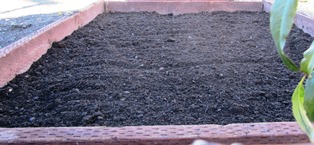
Before we move our iris from the side garden to planter boxes made of pressure-treated redwood, we prepare the soil in those boxes. We amend it with low-nitrogen fertilizer and compost.
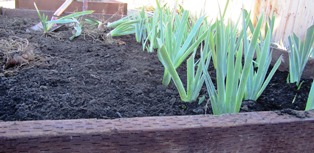
These iris are planted too close–they will be replanted to 16 inches apart for air to circulate and for growing room
We cut back the foliage and pull off any of the sword-shaped leaves that have dried. Then we gently pull apart the new growth from the old clump. Pruning and cutting back the leaves helps ensure that pests do not overwinter.
The rhizome produces more rhizomes over time. Eventually the original rhizome will wither and die. Regularly dividing the clumps ensures new baby plants and blooms for years to come.
The BGW of Composting
Perhaps you’ve wanted to try composting but are concerned about not knowing the ABCs. Forget the ABCs. Try remembering three other letters: B for brown, G for green, and W for water. Those are the three key ingredients of any successful compost pile.
The B (brown waste) includes twigs, branches, and dead leaves. The G (green material) is made up of fruit and vegetable scraps, grass clippings, and coffee grounds, among other things. The W (water) adds the necessary moisture.
The brown material provides carbon, the green material provides nitrogen, and the water creates the magic, turning that brown and green stuff to turn into that dark, crumbly, earthy compost that worms and garden plants love.
If you are like many gardeners, you might pay for compost purchased in bags at local nurseries. But keep in mind that food scraps and yard waste make up about one-third of the material that goes into landfills. Put that material into a compost pile and it saves you money in several ways.
Using compost in your garden reduces water usage because the compost keeps the roots of plants moist and cool. Reduced water usage lowers your water bill and leaves more money in your pocket. Your compost material enhances the richness of your soil while keeping down weeds. Your garden thrives, meaning you won’t have to spend as much on fresh produce if you are growing your own.
You can make a simple bin out of galvanized chicken wire. Stretch the chicken wire into a cylinder shape. Stick some posts in around the circle to hold the wire up and in position. And start throwing in the brown and the green waste, plus some water. Turn every so often.
Once you know the BGWs of composting, there’s really no reason not to try it. Composting not only saves you money, it helps our planet.
 Facebook
 Goodreads
 LinkedIn
 Meera Lester
 Twitter


