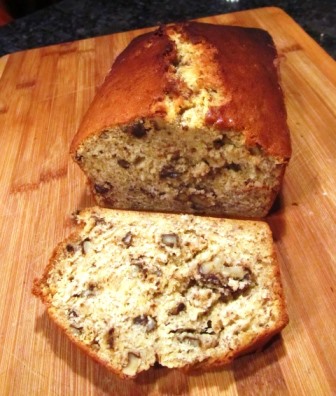
Traditional Banana-Walnut Bread
When the bananas on the kitchen counter become soft and the peels develop brown freckles, don’t toss them. Make a loaf of banana-walnut bread. This bread makes a lovely complement to a cup of steaming, fragrant Earl Grey tea.
The ingredient list for this bread is simple and the directions are easy. To start, you’ll need a 9 by 5-inch loaf pan, greased and floured; and, you’ll need to affix the paddle to your mixer. Set the oven to 350 degrees Fahrenheit. The recipe yields one loaf.
RECIPE: TRADITIONAL BANANA-WALNUT BREAD
Ingredients:
6 Tablespoons of softened, unsalted butter
1 cup sugar
1 1/2 cup mashed ripe bananas
3 large organic eggs
1/2 cup buttermilk (or 2 Tablespoons buttermilk powder dissolved in 1/2 cup warm water)
2 cups all-purpose flour
1 teaspoon baking powder
1 teaspoon baking soda
1 teaspoon ground nutmeg
1/2 teaspoon salt
1 cup walnuts, coarsely chopped
Directions:
Mix together in a large bowl the following–flour, baking powder, baking soda, nutmeg, salt, and chopped nuts. Set aside.
In the mixer bowl, cream the butter and sugar.
Add the bananas.
Add one egg at a time.
Add the buttermilk.
Pour the flour into the banana mixture and mix a little at time until the ingredients are all combined.
Fill the floured and greased loaf pan with batter until the pan is roughly 2/3 full.
Bake for approximately 55 minutes or until a toothpick inserted into the batter comes out clean.
*Tip: ripe bananas can be peeled and stored in a zip-lock freezer bag and frozen.
Not-So Spooky Halloween Cookies the Kids Will Love

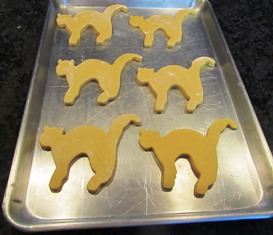
Let the kids decorate these not-so scaredy cats, using colors they like. Add orange or black sprinkles to finish.
When you let the young ones in your family choose the cookie cutter shapes and icing colors, you’ll get plenty of helping hands making cookies for Halloween. I make these cookies a lot; they are perfect for any holiday and also for children’s tea parties. Just change the shape and bake and decorate.
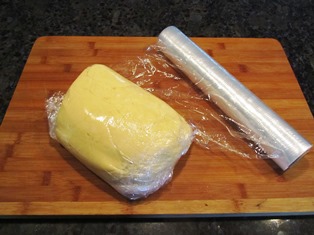
After making the dough, wrap in plastic and refrigerate for at least an hour to make the dough a bit firmer for rolling out.
Half the fun is dumping onto the counter an assortment of cookie cutters and letting the kids choose their favorites. For Halloween, they might like ghosts, cats, bats, witches, and pumpkins. Help them roll out the cookies and place them on the cookie sheet for baking.
Sugar Cookie Recipe
Ingredients:
1.5 cups butter (softened if cold)
2 cups granulated sugar
4 large eggs
1 teaspoon vanilla
5 cups white all-purpose flour
2 teaspoons baking soda
1 teaspoon salt
Directions:
Cream butter and sugar together.
Slowly beat in eggs and vanilla.
Add flour, baking powder, and salt and mix together until thoroughly blended and dough can be shaped into a ball.
Cover with plastic wrap and chill in the refrigerator for at least one hour. You can also chill the dough overnight. If you don’t want to make the cookies all at once, then divide the dough into two balls to use when you want.
Preheat the oven to 400 degrees Fahrenheit.
Sprinkle flour onto a flat surface and roll out the dough to roughly 1/4 inch thickness.
Cut into shapes using your favorite cookie cutters. Arrange cookies on a baking sheet leaving 1 inch between cookies.
Bake 7 to 10 minutes.
Let cool before icing with your favorite sugar cookie icing.
A drop or two of food coloring can give you various colors of icing; , just be sure to put icing in separate bowls before adding the food coloring. Use a pastry bag with tips or even a toothpick to make designs on the iced cookie. Decorate with sprinkles.
 Facebook
 Goodreads
 LinkedIn
 Meera Lester
 Twitter


