You are currently browsing the archives for the Foods category.
Blogroll
 Facebook
 Goodreads
 LinkedIn
 Meera Lester
 Twitter
SITE VISIT COUNTER


Archive for the 'Foods' Category
Cinco de Mayo Fresh Guacamole
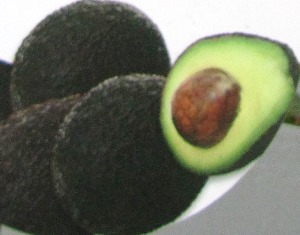
Leathery skin, large seed, and creamy fruit characterizes a ripe avocado
What better way to enjoy Cinco de Mayo (Mexico’s victory over the French in 1862) than with a yummy guacamole, made with fresh ingredients from your garden or farmers market, piled onto your favorite organic chips?
Here’s my recipe for guacamole using onions I planted in February (that nowhave large bulbs), garlic from last year’s crop, and the freshest organic tomato and avocados I could find.
Ingredients:
1 medium red onion
1-2 cloves of garlic
1 ripe tomato
2 large ripe avocados
1-2 Tablespoons fresh cilantro leaves
1/2 teaspoon Kosher or coarse salt
1/4 teaspoon ground cumin
1/8 teaspoon cumin seeds
1 teaspoons garlic powder
juice of one lemon
freshly ground, cracked black pepper to taste
*add serano chilies, seeded, washed, and chopped for heat, if you like
Directions:
Finely chop the onion and garlic and set aside.
Wash and coarsely chop the tomato.
Peel and remove each seed from the avocados and cut the flesh into cubes.
Wash the cilantro leaves and tender stems and finely chop.
In a medium-size bowl, combine the onion, garlic, tomato, avocado, cilantro, and spices.
Add the lemon juice and gently mix and mash, but don’t overdo as it the consistency should be a little chunky.
Add pepper.
Taste and correct seasoning, if necessary.
If you are using hot chili peppers, add small portions at a time to the guacamole, checking the heat by tasting.
This guacamole tastes wonderful on homemade taco chips or organic blue corn tortilla chips.
Learning about GMO Food Safety

Find non-GMO zucchini seed from heirloom seed-saving sources
You might assume your zucchini and sweet corn is safe to eat but what if it was grown from GMO-treated seed, able to withstand an herbicide or even produce an insecticide as it grows? What happens in your gut when you eat that corn? What happens to animals fed such corn? These are questions that scientists, doctors, consumers, food safety advocates, and environmentalists all grapple with in their concern about GMO food safety.
The Non-GMO Project is a nonprofit organization concerned with GMOs and food safety. It explains on its Web site that a genetically modified organism (GMO) is a plant or animal that has been “genetically engineered with DNA from bacteria, viruses, or other plants and animals.” That means it is an anomaly in nature as such experimental combining of genes of different species does not occur in traditional crossbreeding or in nature (http://www.nongmoproject.org/learn-more).
Consumers might not be getting all the facts of what is known and what science is discovering about the health concerns of many Americans eating foods that contain GMOs. Estimates suggest that 80 percent of U.S. processed foods contain GMOs, meaning millions of Americans are eating foods that might not be all that safe to consume. Research into links between GMO consumption and ill health are ongoing but already GMO-altered foods, whether plants or animals, are raising health concerns.
Seed suppliers say that interest in non-GMO corn seed is growing among farmers because of lower costs, better animal health, and higher yields as well as increasing disenchantment with genetically modified traits of GMO seed (http://www.non-gmoreport.com/articles/january2013/Demand-growing-for-non-GMO-corn-seed.php)
With summer on the horizon, many people are planting seeds or seedlings in their gardens or are anticipating the plentiful vegetables available at produce stands and in supermarkets. But read the labels on all those mounds of squash, tomatoes, peppers, and potatoes.
Potatoes and tomatoes are considered low-risk for GMOs by the Non-GMO Project, that is, those two vegetables are not currently being genetically engineered. Although many people might think wheat is a concern, the Non-GMO Project states that wheat is not now nor ever has been genetically engineered, unlike soy, cotton, sugar beets, alfalfa, canola, zucchini, and summer squash.
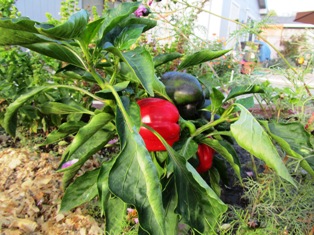
Sweet red and green bell peppers
More than 60 countries, including most of the developed nations, have banned or restricted GMOs. The United States is the exception, allowing production and sale of such products to continue. Consumers, scientists, and environmentalists opposed to genetic manipulation of plants and animals say avoidance and boycott of such products are consumer choices even as legal battles against bio-tech giants and anti-GMO advocates move through the courts.
As for summer corn, the best option might be to grow your own from heirloom seed that has not been genetically maniuplated. Otherwise, buy corn certified as non-GMO or from sources that support organic farmers and food sources such as Whole Foods and other organic markets. Check out the offerings for seed at Seeds Now (http://www.seedsnow.com/pages/shop-all-seeds).
Building A Fence Brings Neighbors Together

Carlos Carvajal, my architect-designer husband, near the fence we have been building for our neighbors
My husband is good at what he does. His highly developed aesthetic sense for design and sense of proportion and drive for perfection has proven invaluable in the projects he designs and builds. For the last two weeks, he’s been working one farmette over, replacing an old fence and crafting a trellis to support a gorgeous Japanese wisteria about to bloom.
I’ve been helping on the days he doesn’t have extra workers. Although I’ve helped him build fences on our property, the fence for our neighbors was a bit different. It would include supports for a lattice and would extend about 100 feet in length between the two properties.
Our neighbors are lovely and the building brought everyone together. We shared bottles of water and cups of juice, noonday meals, and lots of conversation. We worked through the weekend and since yesterday was Sunday, we even met extended family members who came to visit and to observe the fence building that was going on.

The completed trellis for the wisteria awaits a fountain and hanging plants
We shared a lovely Saturday lunch, thanks to the neighbors on one side of the fence and a beautiful Sunday lunch, gratis the neighbors on the other side of the fence. When the sun grew low on Sunday afternoon, yet another neighbor invited us over for a sumptuous meal of salad and grilled salmon. While the salmon cooked, we plucked two huge bunches of leaf lettuce from my garden and rolled lettuce leaves around slices of sheep’s milk cheese and sardines. The food went down perfectly with a central coast zinfandel from the Sterling vineyards.
I almost hate to have the fence building end. It’s been a wonderful experience to learn about the families living nearby and to share our love of our construction and gardening with them. In fact, it’s been the discussions about gardening that have proved for me most gratifying. I’ve enjoyed seeing their fruit trees in bloom and learning gardening tips they have shared.
Some people might believe that putting up fences hinders the fostering of neighborly relationships, but I’d have to say that it was the fence construction that helped us get to know our neighbors better.
Blackberries and Dumplings
I dug up ensnarled blackberry vines yesterday and threw the lot into a bucket for replanting elsewhere on the farmette. Originally planted next to a fence, the vines had, over the last year, tangled into the roses and lavender that I had planted too near to them. Blackberry vines have a habit of spreading.
While cutting the vines, I recalled the blackberries and dumplings that my grandmother used to make in her small, but utilitarian farm kitchen near Booneville, Missouri.
We would set off in the early morning to gather the blackberries that grew in thickets around the farm. When our galvanized pails of berries grew heavy, we’d trudge back to the farmhouse.
My job was to wash the berries while my grandmother took a blue-striped yellow ware mixing bowl from the old Hoosier cabinet and began assembling the dry ingredients to make dumplings.
Dumpling ingredients:
1 cup all-purpose white flour
1 1/2 teaspoons baking powder
1/2 teaspoon salt
1/2 teaspoon baking soda
1 cup, plus 1 Tablespoon sugar
1 large egg (with yolk separated from egg white)
2/3 cup buttermilk
3 Tablespoons of butter (2T for dumpling batter, 1T for skillet)
Two pints of freshly washed blackberries
Directions for making the dumplings:
Combine flour, baking powder, salt, baking soda, and a Tablespoon of the sugar.
Mix together in another bowl the egg yolk, buttermilk, and 2 Tablespoons of butter.
Slowly combine the wet ingredients into the dry.
Beat the egg white until peaks rise and then fold it into the dumpling batter.
Directions for cooking:
In a 10-inch cast-iron skillet over medium high heat, melt 1 Tablespoon of butter. Using a large spoon, drop half dozen or so of the dumpling batter into the butter and cook about five minutes until both sides are brown. Remove this batch and repeat until all batter is cooked. Then set the dumplings aside.
Pour the blackberries into the skillet with 1 cup sugar. Mix together until the berries and sugar simmer and then reduce the heat. Position the dumplings on top of the blackberries and cook for ten minutes. The dessert is best served warm. Serves 4 to 6.
Transitioning between the Seasons
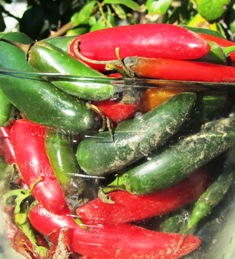
California chili turns red when ripe
Now that we’ve entered a new year and a new season, I’ve reluctantly pulled the last of the chili pepper plants from my garden. This past summer I grew Anaheim, ancho, chiles de arbol (hot and related to cayenne), banana (also known as yellow wax peppers), and jalapeno (called chipotle whenever the chilies are smoked). I save the seeds in white paper envelopes for replanting and use the chilies in cooking my Hispanic, Caribbean, Indian, Southwestern, and Thai dishes.
Cooks the world over love chilies for the flavors they add to their cuisines, however, chilies contain oils that can irritate skin and eyes. When harvesting seeds from chili peppers, I wear latex gloves (like surgeons wear). The gloves protect my fingers and hands from the oils but allow me to easily work with the chilies.
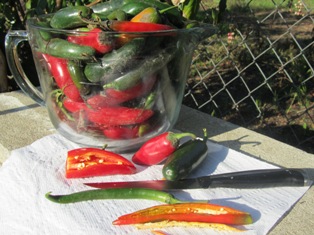
Chili peppers add terrific flavor and heat to many of the world’s cuisines
A little tip about gauging the heat of chilies is to look at the top (shoulder) and tip (pointed end). If the top is wide and the tip is blunt, the chili will be milder than a chili with a narrow top and a pointed end. See, http://whatscookingamerica.net/chilepep.htm.
I opted not to put in winter season crops this year. The clay soil needs turning (with a rototiller) and more amendments. With the vegetable garden devoid of plants now except for vagrant lettuces, carrots, and potatoes, I do winter clean-up chores such as composting, pruning, and preparing beds for spring.
The Bay Area forecast for the inland valleys last night predicted plunging temperatures and a hard freeze. I covered the citrus trees with blankets and a heavy sheet of black plastic. At sunup, the temperatures still hovered around 30 degrees Fahrenheit, and white hoar frost covered everything in the garden, including the sheeting.

Jonquils (Narcissus jonquilla)
A garden needs winter–a time of rest, dormancy, and chill. Some plants require many hours of chilling to perform well. Freezes also eliminate some garden pests.
Our neighbor graciously gave us some bulbs a year ago that we planted in the fall. Now they’ve sprouted and are blooming. These white jonquil blooms are similar to those grown in my mother and grandmother’s gardens (although their jonquils were yellow with orange-yellow centers). The blooms add welcome color to the otherwise monochromatic winter landscape. These and other bulbs we’ve planted will eventually render some color in the garden and hopefully a little pollen for the honeybees while we wait for winter to transition into spring.
Christmas on the Farmette
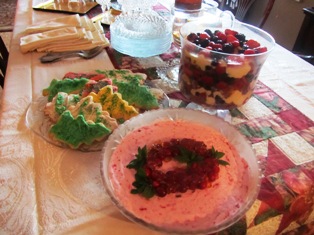
Frozen cranberry souffle (foreground), cookies, trifle
Christmas is one of my favorite holidays of the year. The season is richly imbued with traditions that span cultures across the world. Although family traditions were always important to me, after enduring two cross-country moves and spending two years cleaning and renovating this farmette, my thoughts tend to focus more on future farmette projects than on resurrecting family traditions.

Carved Santa, a gift from my talented wood-carver friend, Leeanna Franklin
Still . . . we spruced up our home for the holidays by putting out festive nutcrackers, candles, and a hand-carved Santa. When my children were small, we elaborately decorated the house. Our farmette cottage is only a quarter of the size of our previous home and as-yet unfinished, so a bough of greens with red pepper tree berries seemed enough.
On Christmas Eve night, we entertained my daughter’s family and their friends in a progressive party. My daughter had proposed the idea a month ago.
The progressive party had been a family tradition before my first husband passed away following a heart transplant. Now I had a new spouse, a new house, and a new life. My daughter felt it was time to resurrect the progressive party tradition.
This year, the party would travel to two houses in Clayton, with our house as the last stop in Concord. All the houses were less than five to eight minutes apart.

- Rum-flavored English trifle to be topped with whipped cream and nuts
Appetizers and and a glass of holiday cheer got things started. We played two games of bingo with the children. Bundled up against the cold, we traveled to the next house, my daughter’s home. There we dinned on a hearty meal of ribs (slow-cooked for six hours), mashed potatoes, and green beans. After the meal, we pulled numbers from a bag that corresponded to a wrapped gift (all the gifts were white elephant presents or under five dollars). Gifts could be “stolen” from someone else, but only when it was your turn to choose.
The next stop on our progressive party was the Henny Penny Farmette for desserts. I had covered the table with a white silk tablecloth that I had purchased in Greece while writing my book, the Everything Women of the Bible. I picked blooms of purple iris and the last roses on the Sally Holmes bush and put them into a crystal vase for color. I placed crystal stemware upon gold trays, arranged forks in stacks alongside linen napkins. Finally, I put out some antique dishes to hold decorated cookies, a caramel cake, and candies.
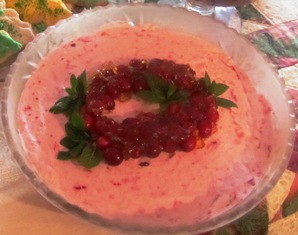
Frozen cranberry souffle
It wouldn’t be Christmas at my house without the frozen cranberry souffle that I learned to make many years ago. Also I made an English trifle using blackberries, raspberries, blueberries, and strawberries. These fruits are layered with pound cake and egg custard. Just before serving, I add dollops of freshly made whipping cream and sliced toasted almonds. The desserts were paired with a choice of coffee, chilled apple-pear cider, or tea. I also put out a bowl of ripe persimmons.
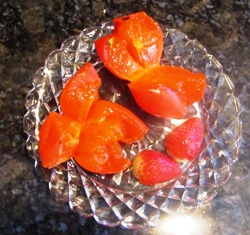
Hachiya persimmons, jelly soft ripe
After saying goodnight to everyone and sitting alone for a bit after Carlos went to bed, I found myself wishing we had included a gas fireplace in our remodel. Maybe next year. I wanted to kindle the ancient light of fire, sit mesmerized by its dance, and invite into my consciousness the numinous presence of the divine. As the Irish Catholic scholar John O’Donohue wrote, “something begins to change when we can see exactly where the walls of limitation stand in our lives.”
Maybe I don’t really need a fireplace, I think as I gaze at the candles burning. During my reverie, my thoughts turned to the divine in appreciation for such abundant blessings. Our life here isn’t easy, but what life we are living!
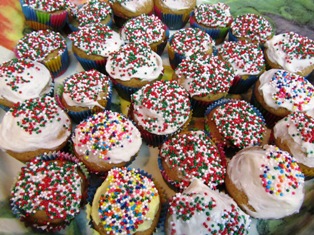
Sugar Cookies for Santa and the Elves
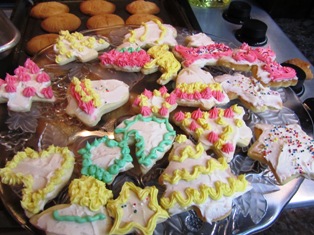
Sugar cookies iced in pastel colors
Everyone needs a little help during the holidays. An elf or two can make all the difference when you are trying to decorate the tree, hang stockings, and make all those special treats for Santa. I am baking dozens of batches of cookies to put into decorative tins that will then be tucked into baskets of other edible and gift items.
My book, Why Santa Wears Red, http://tinyurl.com/chp9sua (Fall River Press 2009), includes suggestions for things you can find in your back yard to decorate the house. In that book, I also include recipes for traditional fruitcake, cranberry scones, and fragrant herbal tea. But sugar cookies and pumpkin spiced cupcakes are two of my favorite holiday snacks.
Pumpkin spiced cupcakes
Sometime during the summer, I purchased Nick Malgieri’s book, Cookies Unlimited and found a terrific sugar cookie recipe in it that I am using this year. It makes five dozen cookies per batch.
The ingredients are basic items (flour, sugar, and butter, for example) that you will probably have on hand if you like baking cookies. The texture is lovely and the cookies come out great every time. We iced them with a butter cream frosting and decorated with sprinkles before the icing could harden.
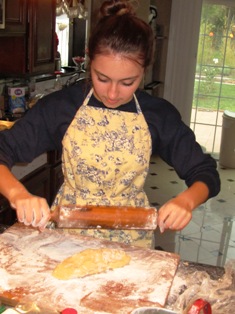
One of the twin elves in our family who likes to bake
I enlisted help with the baking this year from family members. They also did the decorating and I packaged everything into the gift baskets. Each basket contains a few different items, depending on the family to receive them. In some, I tucked in one or two of my books, packets of seeds from my plants (like sunflowers, nasturtiums, zinnias, and marigolds), jars of apricot, white peach, or strawberry jam, and honey.
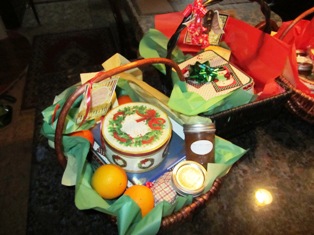
Holiday baskets can be generic or highly personalized
You might also add candy canes, tins of fudge, cookie cutters, scone mix, measuring spoons, fresh fruit, bags of nuts, and myriad other treats or kitchen utensils. Friends say they love getting these baskets. I think they are well worth the effort, especially when family members become helper elves in your kitchen.
Nuts and Honey Add Lovely Flavor to Dried Fruit Tart
Flaky tarts piled high with fresh organic berries has always been for me a delightful way to end a summer meal. With the onset of winter now only eleven days away, I flip through my recipe files for something similar to those lovely summer tarts and hit upon an easy-to-make tart filled with dried fruits, nuts, and honey.
You can substitute or add other dried fruit (cranberries, figs, dates, and raisins, for example) to this tart, but I’ve found the best flavor comes from the dried peaches and apricots. They combine beautifully to create a richly flavorful dessert. A dollop of whipping cream on top adds a layer of decadence to this rich autumn tart.
Pastry Ingredients:
1 1/4 cup flour
1/4 cup sugar
1/2 cup unsalted butter (cut into pats or small pieces)
pinch of salt
1 large egg yolk
Directions for Pastry:
Combine pastry ingredients in a food processor with metal blade. Process until the mixture becomes a fine crumble. Add egg yolk and process into dough. Pastry should hold together, forming a ball.
Filling Ingredients:
3/4 cup white dessert wine
3/4 cup honey
18-20 dried apricots and/or peaches
1/2 teaspoon grated orange rind
1 cup blanched whole almonds
3 eggs
1 teaspoon good quality vanilla
2 Tablespoons unsalted butter
1 cup walnuts
Topping:
1 cup cream
1/4 teaspoon cinnamon
1 teaspoon of sugar
Directions for Toasted Almonds:
Preheat oven to 350 degrees Farenheit.
Toast blanched almonds on a baking sheet for 10 minutes. Remove and set aside. Keep oven on for baking the tart.
Directions for Tart Filling:
In a stainless steel pan, add the dried fruit with the orange rind.
Pour over the fruit and rind half the wine and 2 Tablespoons of honey.
Cook over low heat for 20 to 25 minutes until the fruit absorbs the liquid and plumps up, becoming soft and plaint.
In a bowl, combine eggs, honey, remaining wine, vanilla, and butter.
Beat in the walnuts and almonds.
In a springform pan, press the dough as thinly as possible over the bottom and up the sides of the pan. Drop the fruit onto the dough, spreading around over the bottom of the pastry. Pour in the nuts and egg mixture. Use a spatula to smooth the filling.
Bake the tart for 45 minutes on the middle rack of the oven.
Allow the tart to cool in its pan before removing and placing on a serving plate.
Whip cream until peaks form and fold in cinnamon and sugar. Put a dollop on top of each individual serving.
Serves 8.
Old World Honey Cake
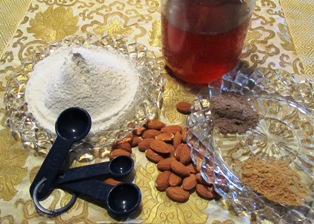
Preparing ingredients for honey cake
Honey cake has been called the world’s “oldest-known cake.” Versions of the cake date to biblical times, although food historians will tell you that it wasn’t really called cake back then. The English term “cake” dates to the thirteenth century and derives from the old Norse word, “kaka.”
Modern pastry chefs have the ancient Egyptians to thank for pioneering the culinary process of baking. The ancients’ version of honey cake was most likely an old-world type of flat bread drizzled or lashed with honey, the sweetener of choice during ancient times. In fact, bread and cake (even today) are not too different. Think of pumpkin bread or banana nut bread. A slice of either at breakfast is like having dessert in the morning.
The Romans added eggs and butter to get a lighter dough. Cooks began to add nuts and dried fruits such as dates, figs, and raisins to make their honey “cake” even more mouth-watering and special.
Although that round shape that we associate with cake today didn’t emerge until the seventeenth century, medieval bakers in Europe had for centuries continued to create new versions of the honey cake with spices such as ginger. In fact, the taste for ginger resulted in gingerbread. The addition of dried fruits, nuts, spices, and (later) rum and brandy yielded the cake we know today as fruitcake.
The following recipe is more of a medieval style honey cake, although during the medieval period cakes tended to be smaller than we think of them today.
Old World Honey Cake
Ingredients:
1 cup plus 1 tablespoon honey (preferrably dark)
1 teaspoon cinnamon
1/2 teaspoon ground nutmeg
1/2 teaspoon cardamom
2 teaspoon baking soda
1/2 cup softened unsalted butter
1 cup dark brown sugar
4 eggs (separate yolks from whites)
1/2 cup unflavored Greek yogurt
1/2 cup cottage cheese
1 tablespoon fresh orange zest
2 1/2 cups flour
1/2 teaspoon salt
1/2 cup raisins
10 dates, stoned and chopped
1 cup walnuts, finely chopped
Directions:
Preheat the ove to 300 degrees Fahrenheit. Grease a ten-inch tube pan.
Combine honey, cinnamon, nutmeg, and cardamom in a saucepan over medium high heat and bring to a boil, stirring often. Add baking soda, stir in, and remove from heat and let cool.
In a mixing bowl, cream butter with brown sugar. Beat in one egg yolk at a time. Add this to the honey/spice mixture.
In a bowl, mix yogurt, cottage cheese, and orange zest.
Sift half the flour and the salt into the honey/spice mixture (that now also contains the creamed butter, sugar, and eggs). Combine remaining flour with raisins, dates, and walnuts. Mix this into the bowl of batter.
Pour the batter into the greased tube pan and bake for 1 1/2 hours. Test for doneness by inserting a toothpick into the cake. The toothpick, when pulled out, should have no batter on it.
Cool the cake for 15 minutes before inverting. Brush with 1 Tablespoon of honey.
Optional: Sprinkle with slivered almonds. After the cake is completely cooled, store in an airtight container for 24 to 48 hours before serving.
Copyright Meera Lester 11-28-2012
Fried Zucchini Flowers
The recent rain has brought out more blooms on the zucchini plants just when I thought the plant had finished producing. The beautiful yellow blossoms can be easily turned into a tasty treat when deep fried in hot oil and sprinkled with salt and your favorite dried herbs from the garden.
For optimal results, pick the large blossoms in the early morning after they have opened. You’ll need to remove the stalks and rinse the flowers, taking care not to damage them. Then let them drain while you prepare the crepe-like batter.
Ingredients:
24 zucchini blooms
1 c. all-purpose flour
pinch of salt
1 T. olive oil
1 egg (separate the yolk from the white)
approximately 2/3 cup of water
seasoning–salt and your favorite dried herbs
mild tasting oil such as canola for deep frying
Directions:
In a wok or heavy frying pan, heat the oil until hot but not smoking. Mix the ingredients to make the batter which should be pourable. Beat the egg white until stiff and fold it into the batter. Dip each flower to coat with batter and fry in the hot oil until golden. Sprinkle with herbs and salt and drain on paper towels.