Archive for the 'Gardening' Category
The Cornell Baking Soda Formula for Roses
While perusing the December 2012 edition of American Rose, the Magazine of the American Rose Society, I discovered an article about the diseases of roses and some of the ways several rose experts would deal with them.
In a discussion of treating rust, downey mildew, and blackspot, the rose experts concurred that prevention is the first line of defense against these diseases. Once you find evidence of them in your garden, you must remove and destroy infected leaves and stems, including the leaves that have fallen to the ground.
Another important step, among others, was to spray an oil and bicarbonate of soda recipe referred to as the Cornell Baking Soda Formula.
The ingredients are simple and can be found in many homes: 1 Tablespoon each of baking soda, horticultural or summer oil, and castille soap. Mix these into 1 gallon of water, shake, and spray.
For advice on growing roses that are best suited to your area, check with your local nurseries and consider joining your the American rose society or local garden club. Also, think about choosing varieties of roses to grow in your area that are resistant to these diseases.
Keeping a Garden Ecosystem in Balance
A healthy ecosystem, whether in a forest or a garden, stays in balance in part because of its “grazers” and “predators.” The grazers can range in size from a large plant-eating animal like a cow to a tiny aphid, and predators share this size range, too. Consider for example, a tiger (predator) in a wild, natural environment dining on an antelope (a grazer) or tiny ladybug (a predator for grazing aphids) in a rose garden.
A lush, healthy garden will have an underlying healthy ecosystem. If your garden plants are being devoured by pests, you might want to introduce more of the pests’ natural enemies. For example, if your roses are infested with one or more of the 200 different types of aphids, buy lacewings.
One lacewing larva can destroy roughly 200 pests (and pest eggs) for as long as two or three weeks. The adult lacewings do not kill insects (they suck nectar and pollen), but their larvae will inject venom into aphids and then suck out the the plant grazers’ body fluids, which destroys those pests. Adult lacewings will stick around if there are sources of pollen, nectar, and honeydew. They are beneficial to a garden ecosystem because the lacewing larvae feed on spider mites, mealybugs, leafhoppers, thripes, and other unwanted plant grazers.
Take a stroll around your garden on a regular basis. Take note of its ecosystem. Create a healthy garden using organic products when possible. Remember that plants cycle through seasons. There may be periods of the year when your plants seem to be more infested than at other times. Practice tolerance if an infestation is mild. Let nature run its course. If the balance is right in your ecosystem, the predators will take care of the grazers.
Organic Amendments to Benefit Soil
There are many ways to improve soil composition to grow healthy plants. Healthy plants produce more abundant and bigger yields.
The soil on the Henny Penny Farmette is mostly heavy clay. After a rain, its sticks together like solid, cold mass of margarine. In the summer, it hardens like concrete and also cracks.
To make soil more porous, it is necessary to add amendments that permit air circulation and water penetration and retention.
There are basically two different types of amendments. The mineral amendments such as vermiculite, pumice, and perlite are generally used in sandy soil to create aeration and water retention. Types of organic amendments for soil such as our clay soil include manure, leaf mold, ground bark, peat moss, and sawdust. These rely on bacterial action to break down into a soft, crumbly humus.
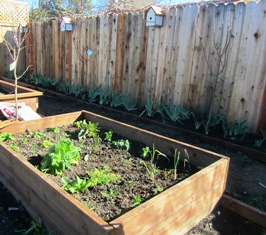
In our vegetable growing boxes that are 4 feet by 6 feet, we include 25 percent organic amendments to 75 percent soil. Sometimes we even up the percentage of amendment material. We turn it thoroughly.
The clay soil immediately benefits from the tilling (adding air) and also from the blending of organic material into the soil to change its density, nutrient value, and permeability to water.
Raised beds, which I first saw on farms in villages along the Volga in Russia, allow us to control the soil and makes it easier to add amendments and mulch. However, we also have garden beds, too, that benefit from organic amendments.
Planning and Planting a Perfumed White Garden
Some years ago while researching a book about decorating with flowers and floral motifs, I learned about the white garden of English writer Vita Sackville-West. The garden was part of her Sissinghurst estate in Kent, England. I seized upon the idea of someday having my own white garden.
Sackville-West’s garden, planted roughly from 1949 to 1950 featured various plants with white flowers and others with gray-green foliage. The combination of white and gray-green colors is stunning when viewed by moonlight. The author sought not only ravishing florals such as Regale lilies and trumpet lilies, dianthus, and white peonies but also made certain that her chosen flowers would perfume the garden.
On my Henny Penny farmette, I’ve created a fairy ring in a white garden that I’ve started. The center of the fairy ring is an Iceberg hybrid tea rose. I used artemisia (Dusty Miller) with silvery gray-green leaves planted in a circle around the rose. I frequently have to aggressively clip the artemisia as its feathery leaves grow fairly fast.
In another area, I have also planted a group of floribunda white roses and plan to put in white mugwort. Other plants with white blooms will be added and then the whole area encircled in yarrow. A piece of statuary, perhaps a four or five foot angel, will be installed to finish the project.
Other white flowering plants I could tuck into a white garden could include tuberose, phlox, Madonna lily, evening stock, cleome, and various white roses. Those plants are also highly fragrant.
A perfect place to position a white perfumed garden might be beyond a bedroom window. You could see it in the moonlight and breathe in the heady perfume as you are falling asleep.
Seasonal and Perennial Vegetables
To get your vegetable garden off to a great start, know whether you are planting a cool season- or warm-season plant. Get your veggies into the soil at the right time for optimum results. For warm–season vegetables such as beans, corn, cucumber, eggplant, melons, peppers, squash, and tomatoes, plant as soon as the soil is workable, when frost danger has passed.
Sow seeds directly into the soil or plant seedlings that you’ve started in flats indoors or that you buy at the nursery. The warm-season vegetables will grow and crops often will be ready to harvest before the blazing heat of mid-summer sets in.
Cool-season plants include asparagus, broad bean, beet, broccoli, brussels sprouts, cabbage, carrot, cauliflower, endive, garlic, leek, lettuce, parsnip, pea, radish, and turnip. These can go into the earth mid-summer so the growth spurt to maturation takes place during the fall. Crops can be harvested in the autumn or early spring.
Most vegetable are annuals, but a few are perennial plants, including artichoke, asparagus, chayote, and rhubarb.
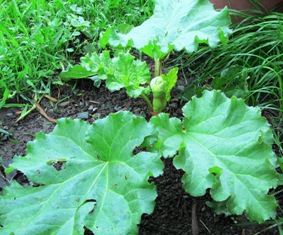
Rhubarb is a vegetable, but is often used like a fruit (for example, with strawberries) in a sauce or pie. Plant rhubarb in early spring or late winter. Don’t plan on harvesting stalks until the third spring (giving the plant two complete growing cycles). When harvesting, discard the leaves as they are poisonous.
Asparagus is another plant that needs about three growing cycles, but then will reward with spears for a dozen or more years in the garden. The green feathery top growth is a lovely but when it turns brown in the fall, it needs to be cut to soil level.
Artichokes need a lot of garden space as they grow to about 4 feet high and can double that size in width. Artichokes grown in coastal California, are harvested from September to May. They are the flower buds found at the top of large stalks. The perennial artichoke will need to have the tops cut to about a foot in the fall and folded over the top of the root. The plant then needs heavy mulching to protect it during cold weather.
Chayote is a relative of squash and produces edible fruits along a climbing vine. Plant this perennial in February or March (after the frost danger has passed) near a fence or on a trellis. When you tuck this plant into your garden, be sure to put the sprouted end at the lowest level in the soil, leaving the narrow end exposed. Expect 20 to 30 feet or more of vine.
Before you head off to the nursery to buy plants, consider starting some seeds indoors. Not only will you find it to be economical, you’ll also get a jump on the growing season.
Grow plants from open-pollinated seed. You can then harvest some of the seeds to use again next year. Hybridized seed won’t come true the second year, but open-pollinated seeds will produce plants just like the parent plant.
Recycling Landscape Materials
My ears perk up when I hear someone talking about renovating his or her landscape since such a project often involves removing not only plants but potentially brick, flagstone, and other types of outdoor flooring and landscaping materials.
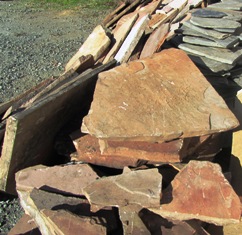
After learning about a demolition going on down the road recently, we inquired whether or not we could haul away the unwanted stone. The property’s owners had already begun the tear-out as a first step in revamping the home’s entire landscape. Out came decades-old rose bushes and two types of stone, some of it slate.
Flagstone, redstone pavers, and boulders can be reused to create raised beds for flowers, herbs, or vegetables. A caveat about using natural stone or boulders: keep them low as soil can sift out between the cracks unless you use mortar. Better still, use landscape fabric as a barrier against the soil sifting.
In our arrangement, the homeowner will not need to pay someone to haul away unwanted materials. We will not have to pay for the stone. We can stack it on our property and when we are ready, use it to construct an outdoor kitchen floor or sitting area. Most importantly, we are recycling, keeping the unwanted landscape materials out of landfill.
Potager Gardens
Growing up on a farm in rural Missouri, I learned early in life that the quality of food is the direct result of the quality of the garden in which the vegetables and fruits are grown. The culinary creations on the table of my childhood tasted best when the vegetables were freshly plucked from my grandmother’s garden.
After college, I moved to Northern California on a ten-acre ranch planted in grapes atop the Santa Cruz Mountains. There, I created a small kitchen garden using French intensive gardening methods. I hoped to have vegetables like we grew in Missouri and was pleasantly surprised when the quantity and size of my California-grown vegetables exceeded those on my grandmother’s Missouri farm.
I fell in love with the idea of potager gardens after reading about the culinary traditions of the French and the abundance of herbs and vegetables, berry vines, fruit trees, and flowers they grew in square and rectangular shapes sectioned off in their gardens. Those French potager gardens were not only functional, but visually stunning, ever-changing, living works of art.
Throughout history, the gardeners of large French châteaux would create elaborate potagers with parterres that gave them a formal aesthetic. Along with tightly-clipped hedges of boxwood, fencing, or stone, the gardens might include ornamental plants and water features such as fountains or stone troughs.
A simple design for a modern country potager in an urban or rural landscape could be laid out as a cross within a square. At its center (in the heart of the garden), one could install a fountain, a piece of statuary, pot of flowers that provide riotous color or fragrance, bird bath, or piece of exotic garden art.
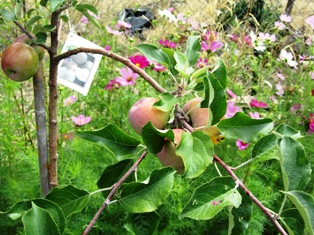
In my garden, we are deviating from a conventional formal design. Working along the perimeter of our rectangular-shaped property, we have laid out double rows. Along the back row, we have planted fruit trees. Along the second row (in front of the back row), we have built boxes (4 feet by 6 feet) leaving the same size of space between the boxes. We have planted berries, flowers, or vegetables in each box; in the spaces between the boxes, we’ve planted fruit trees.
The boxes are basically raised beds in which we can control the soil type. Otherwise, we find it difficult to work the soil here in this inland valley, east of the San Francisco Bay, because it is composed of clay and becomes as hard as concrete in the summer. We’ve found that root crops, such as potatoes, carrots, and turnips are difficult to grow in such compacted, clay soil.
I may not have a spectacular potager of the type you might find on a French country estate, but the organic heirloom vegetables and fruits taste terrific and that is a testament to the quality of the garden, I believe.
Outdoor Projects on the Farmette
During winter when rain is frequent and freezing nights seem more common than they used to be in Northern California, we permit the land to rest. This season is perfect for reviewing our master plan for the property and the outdoor projects ahead of us.
We still have work to do on our house but we are thinking of outdoor entertaining spaces, too.
We get great ideas while visiting local nurseries and do-it-yourself supply centers, but we resist the temptation to start any new outdoor project until the weather has warmed. Also we don’t plant shrubs, roses, or trees in the garden without considering how doing so might impact our overall garden design.
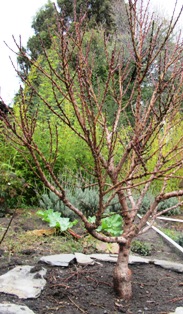
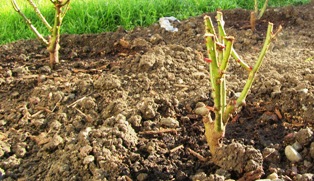
The exception is heeling in a bare-root plant. That means we put a plant into a temporary hole in the ground to keep the roots from drying out before moving it to its permanent location. We don’t want our plants to break dormancy too soon because a frosty night could damage new plant growth.
While we stroll around the property, we discuss landscape plans for this new year. Frequently, we stop to watch the birds feeding and squirrels foraging. We talk about which area of the farmette might be the best location for a house expansion, utility shed, or outdoor kitchen.
Carlos has a strong aesthetic sense about design. He’s created some lovely outdoor kitchens. Since he takes into consideration the environment as well as functionality in his designs, he’s already thinking about building sites on our property that capitalize on the various views we have of Mt. Diablo but that are not too far away from the house.
Just listening to Carlos talk about his design ideas inspires me to think about grilling in the to-be-built outdoor kitchen, perhaps fresh figs and melted goat cheese or oysters (with garlic butter, shallots, and fresh Parmesan). We love sharing food with friends and neighbors in an outdoor spaces during nice weather, but for now our small patio will have to suffice.
We keep chipping away at what needs to be done, finishing one thing , crossing it off the list, and moving on to the next. The outdoor kitchen is pretty far down on a long list of things to do. But as the old adage goes: Hope springs eternal.
Transitioning between the Seasons
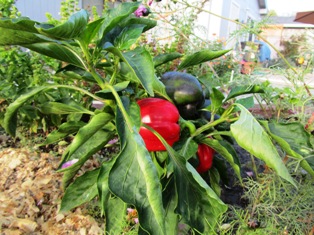
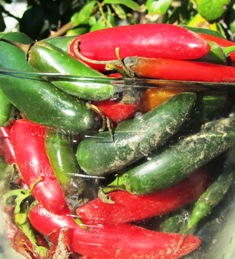
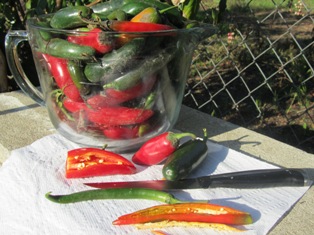
Now that we’ve entered a new year and a new season, I’ve reluctantly pulled the last of the chili pepper plants from my garden. This past summer I grew Anaheim, ancho, chiles de arbol (hot and related to cayenne), banana (also known as yellow wax peppers), and jalapeno (called chipotle whenever the chilies are smoked). I save the seeds in white paper envelopes for replanting and use the chilies in cooking my Hispanic, Caribbean, Indian, Southwestern, and Thai dishes.
Cooks the world over love chilies for the flavors they add to their cuisines, however, chilies contain oils that can irritate skin and eyes. When harvesting seeds from chili peppers, I wear latex gloves (like surgeons wear). The gloves protect my fingers and hands from the oils but allow me to easily work with the chilies.
A little tip about gauging the heat of chilies is to look at the top (shoulder) and tip (pointed end). If the top is wide and the tip is blunt, the chili will be milder than a chili with a narrow top and a pointed end. See, http://whatscookingamerica.net/chilepep.htm.
I opted not to put in winter season crops this year. The clay soil needs turning (with a rototiller) and more amendments. With the vegetable garden devoid of plants now except for vagrant lettuces, carrots, and potatoes, I do winter clean-up chores such as composting, pruning, and preparing beds for spring.
The Bay Area forecast for the inland valleys last night predicted plunging temperatures and a hard freeze. I covered the citrus trees with blankets and a heavy sheet of black plastic. At sunup, the temperatures still hovered around 30 degrees Fahrenheit, and white hoar frost covered everything in the garden, including the sheeting.
A garden needs winter–a time of rest, dormancy, and chill. Some plants require many hours of chilling to perform well. Freezes also eliminate some garden pests.
Our neighbor graciously gave us some bulbs a year ago that we planted in the fall. Now they’ve sprouted and are blooming. These white jonquil blooms are similar to those grown in my mother and grandmother’s gardens (although their jonquils were yellow with orange-yellow centers). The blooms add welcome color to the otherwise monochromatic winter landscape. These and other bulbs we’ve planted will eventually render some color in the garden and hopefully a little pollen for the honeybees while we wait for winter to transition into spring.
Managing Rose Rust
I found rust on the undersides of leaves on some of my hybrid tea and floribunda roses while strolling around the farmette this morning. Usually by this time of year I have plucked off all the old leaves and cut the canes down to between 12 and 18 inches. The cutting back of hybrid teas and floribundas is necessary since those rose bushes produce flowers on new growth. Removing the leaves and cutting out the dead wood as well as pruning back the canes this time of year (end of December) encourages dormancy. I’m just now getting around to doing these chores.
Removing the foliage and destroying disease-infected leaves is a must. Do not put these in your compost pile. I keep a little bag next to me when I’m working with the roses in case I find evidence of rust or powdery mildew or black spot. Wind, rain, and overhead watering can spread the spores of these diseases. Destroying the leaves ensures that the plant gets a new start in the spring and that diseases cannot winter over on the foliage.
Rust most often appears on roses when the plant has moisture on its leaves for several hours. The rust infection looks like orange or yellow spots on the underside of the leaf. Eventually, it can migrate to the topside of the leaf as well. Leaves infected with rust will discolor and drop to the ground.
The long term solution to dealing with rust is to use drip irrigation or a soaker and to avoid overhead watering of your roses. As soon as you noticed rust, black spot, or mildew, remove and destroy any infected leaves and stems. Clean beneath the base of each plant and mulch with organic materials. That way, come spring your rose can start anew, producing strong canes, healthy leaves, and gorgeous blooms.
 Facebook
 Goodreads
 LinkedIn
 Meera Lester
 Twitter


