Archive for the 'Gardening' Category
Harvesting and Saving Sunflower Seed for Replanting
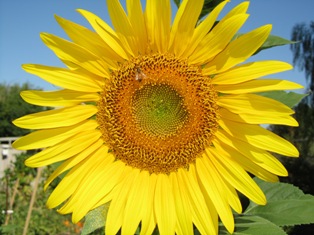
Last year, my sunflowers were gigantic and gorgeous. I removed heads as large as dinner plates for drying so I could plant the seeds again this year. Some of the smaller heads contained seeds that were totally black. I figured the bees had done some magic with cross pollination of other sunflowers from the neighborhood.
I stored the heads in my garden shed over the winter, but never got around to removing the seed for replanting. When I went into the shed to retrieve them for planting last month, I discovered with dismay that something had devoured most of the seeds. A few seeds were left so I optimistically tucked them into the ground. Alas, none germinated.
Determined not to let that ever happen again, I recently bought four packets of open-pollinated, heirloom sunflower seed. After they grow, I’ll harvest and preserve the seed correctly at the end of summer so I’ll have plenty to plant next year. When you use open-pollinated, heirloom seed, next year’s plants will come true to the characteristics of the parent. This is not the case, however, with hybrid seed.
In case you might be interested in harvesting and storing sunflower seeds, too, here are the steps.
1. When the sunflower heads have turned from green to brown, remove the head from the stalk with a knife.
2. Let the head dry for a few weeks to a month in a dry place, safe from marauding squirrels and racoons. You can tie the heads with string and hang them from the ceiling in a drying shed or place them on paper.
3. Shake or gently bang or otherwise extract the seed onto paper from the dried heads.
4. Store the seed in paper envelopes and label them with the date and type of seed.
Farming Prerequisite: Muscles
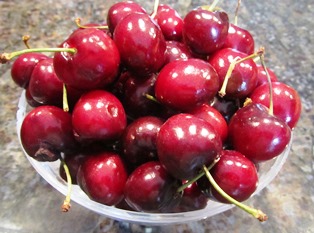
Preserving luscious stone fruit can involve hours of work, even when the process of canning is simple
Preserving the bounty of the orchard, garden, and hive is necessarily labor-intensive. The kitchen work is especially hard on the shoulders, back, and legs during stone fruit season because it requires hours of standing, washing, cutting, pitting, stirring, wiping, boiling, bottling, and labeling.
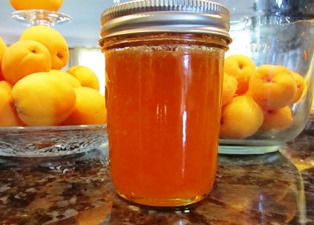
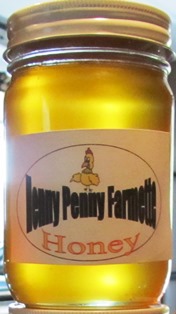
Still, I love seeing my pantry shelves stocked with jars of jam, marmalade, conserve, and honey. At last count, I’ve made (so far this season) 70 jars of apricot jam and 12 of cherry-orange conserve.
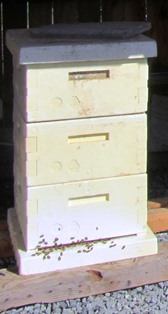
Harvesting honey from a hive is not exactly easy work either. My beekeeper neighbor and I removed a few frames of honey for ourselves in late May. From that work, this much I know: lifting a honey-filled super isn’t exactly for the faint of heart.
When the hive has a second or third super on top, lifting (not moving, just lifting) the whole shebang requires a lot of upper body strength.
Weed pulling is another job that requires muscles. This morning I weeded for a couple of hours before I’d had enough. Some weeds can grow tenacious roots up to a foot long and the roots can also have many branches. While I use a spade or shovel often as an aid to weeding, there’s something satisfying about leaning over and pulling out a weed. It’s a compulsion I share with many gardeners.
I didn’t know when I was in my twenties and off on a pilgrimage to India that the yoga I learned there and have done ever since would pay big dividends in the farm work I do today. Joint flexibility and strong muscles are absolutely necessary for the labor-intensive work of farming.
Letting a Plant Go to Seed
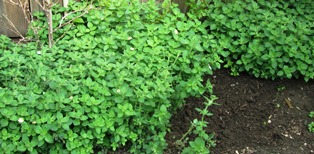
Some lettuces, basil, and Greek oregano have spontaneously appeared in my garden. No surprise in that since I let some of my herbs and vegetables go to seed last year.
We used the rototiller on the garden area twice before planting this year. By the time we turned the soil, the vegetables and herbs I had planted last year were a memory. That said, some certainly did re-seed and the evidence of that are the new plants popping up where I didn’t plant them this year.
Open-pollinated vegetable and herb seeds, well tended (meaning, meeting the seed needs of light, water, and good soil), will go through the cycle of sprouting, pushing up through the earth, blooming, bearing, and dying. If you let your plant go to seed and the wind broadcasts the seed or it drops, you will likely (in the case of oregano, basil, chives, and other herbs and some vegetables) get new offspring.
The plant that the mother seed produced will also yield seed (and if you are smart and save some), that seed will repeat the same cycle and the vegetable will also be a true likeness of the original seed. Everything starts with the integrity of the seed.
This is why open-pollinated (OP) seed continue to perform in the same way their ancestors have for hundreds, even thousands of years. And nature’s plant cycles make that possible.
Stinking Away Gophers
In anticipation of the city-wide garage sale this weekend, I’ve been walking around the property, looking for things to sell and making a to-do list. That is, until my foot disappeared into a freshly dug tunnel. Now all I can think about is how to get rid of the gophers.
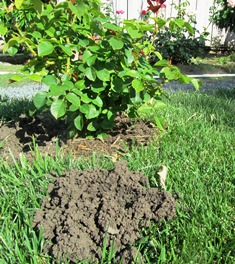
A newly erupted, fan-shaped mound of dirt with a hole off to the side suggested a gopher had been tunneling underground in my yard. How do I know it’s a gopher and not a mole? The fan-shape ridge of soil and complete disappearance of plants are telltale signs of the presence of a gopher.
Moles tunnel but don’t consume plants. They feed on grubs and worms. Their soil ridges are shallow and near the surface.
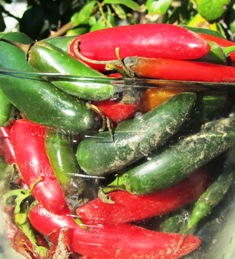
Frankly, I don’t mind the moles as much as the gophers. Moles are harmless and their tunnels, although ugly, aerate the soil. But gophers are destructive. In the last two weeks, I have witnessed how a gopher can take down a lush garden. A number of organic plants, tomatoes, cilantro (young leafy coriander), and hot peppers that were planted last month have been decimated in less than a week by gophers.
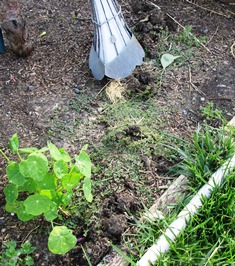
I have searched magazines, newspapers, and the Internet for ways to get rid the pesky critters. I don’t want to use poison or cages. I am more interested in using all-natural caster oil granules. But I haven’t seen a lot of testimonials about the effectiveness of the granules in repelling gophers. The caster oil does not kill gophers. When the granules are watered, they release a scent that is supposed to repel gophers and moles. In fact, you can direct the vermin from your property by strategic application of the granules–1 pound to 1,000 square feet. A spreader makes it easy to spread the granules evenly.
So, I’ve added buying and spreading caster oil granules to my list. I’m going to stink them away.
Post script: Several days have passed with no new gopher mounds on the farmette, so I believe the caster oil method worked.
Fairy-Folks Fingers Look Great in Borders and Beds
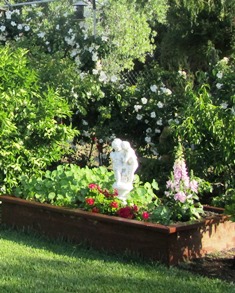
Foxglove flowers look like bells or the fingers of a glove making an attractive spire on a leafy stalk
In the folklore of Wales, the Foxglove plant is commonly known as “fairy-folks fingers” and also “lambs tongue leaves.” Americans recognize it the digitalis plant, an old-favorite for flower gardens.
Foxglove’s botanical name is Digitalis purpurea but gardeners in Great Britain (especially Scotland and Wales) where Foxglove grows as a wildflower know it by more colorful names: Bloody Fingers, Witches Bells, Dead Man’s Fingers, Fairy Caps, Fairy Glove, Virgin’s Glove, Folk’s Glove, and Fairy Thimbles.
My garden and planter boxes include several Foxglove plants ranging in color from white to a dusty shade of rose. The flowers are tubular and measure between 1 1/2 to 2 1/2 inches. Because the plants can grow 2 to 5 feet tall, they are especially good choices for color at the back of a flower bed.
Foxglove plants are considered poisonous. But the plants readily re-seed themselves, are excellent cut flowers for a summer bouquet, and are deer resistant. Plant in full sun or light shade and keep the soil moist, albeit well-drained.
Best time to plant Foxgloves is in the spring or fall. When cutting blooms from the plant, remember that cutting the central upright stalk will cause the plant to produce lateral shoots for new blooms. If the plant is not cut, the flowerheads produce seed that self-sows. If you want an elegant back border for your flower garden, consider planting Foxgloves. Plants are available in many colors are low maintence.
Natural Medicines For Healing and Health
Recently, I went through a box of books that I had not unpacked after moving from Miami to Northern California. In the box was Best Remedies, a book written by Dr. Mary L. Hardy, M.D. and Debra L. Gordon for Reader’s Digest.
The book focuses on ways to use natural remedies alone or with conventional medicines in an integrative approach to healing. Many of the remedies involve the use of herbs, honey, vegetables, and oils. Listed below are just a few remedies to treat common maladies.
Chamomile
Chamomile is an herb that when made into tea can be used as a mild sedative and also fights the inflammation of a sore throat. Likewise lemon and honey in hot water can soothe swollen throat tissue.
Echinacea
For treating colds, a tincture of Echinacea purpurea and Echinacea angustifolia can provide relief when made into a tincture and mixed with hot water. Authors Hardy and Gordon recommend 1/4 – 1/2 teaspoon of the tincture in 1-2 ounces of hot water to be consumed every four to six hours.
Garlic
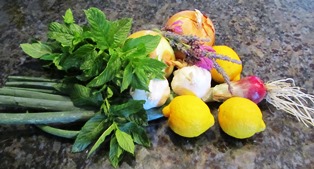
Traditionally used as an herbal remedy for respiratory infections, garlic, to be most effective, must be consumed raw. The best way is to peel and mash 3-4 cloves into pasta, rice, or mashed potatoes.
Ginger Root
For treating bad breath, tea made from ginger root (1- to 2-inch pieces, peeled and steeped in hot water, sweetened with honey) or peppermint tea (all types of mint are easily grown in the garden or in containers) can be effective agents.
Lavender Oil and Aloe Vera
Oil of lavender works as an inflammation and pain reducer while acting as an antiseptic; therefore, it’s a wonderful natural agent for treating minor burns. Once you have applied the lavender oil, you can also apply the sap of an aloe vera plant. Aloe reduces the pain of a burn and promotes healing.
Lemon Juice and Honey
Honey, one of nature’s antiseptics long used to treat respiratory ailments, provides a protective coating of the throat and acts as a humectant (drawing moisture) while the lemon works as an astringent to reduce swelling of inflamed throat tissue.
Olive Oil, Beeswax, and Honey
These three ingredients mixed together in equal parts can be used to treat psoriasis, a disease characterized by itchy, scaly skin. The authors recommend smoothing the mixture onto the affected area of skin before going to bed at night and then covering the skin with plastic wrap, held in place with an elastic bandage.
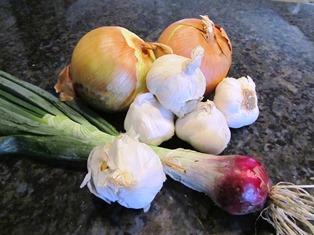
Onions and Garlic
Onions and garlic are recommended as two vegetables that can lower blood sugar, cholesterol, and blood pressure. Onions are high in vitamin C and, and like garlic, contain immune-enhancing compounds. Garlic reduces blood clotting (thus, preventing heart attacks) and raw garlic has strong immune-stimulating properties as well as antibacterial and antiviral benefits. For people with chronic diseases such as Type 2 Diabetes, these foods should be a regular part of the diet, according to Hardy and Gordon.
St. John’s Wort
St. John’s wort essential oil–10 drops to 1 ounce massage oil–massaged into the skin over painful areas over time may result in relief from nerve pain. Patients who have fibromyalgia, diabetic neuropathy, shingles, Lyme disease, autoimmune disorders, and other types of diseases can suffer nerve pain as stabbing, burning, and shooting sensations. Other herbs believed to revitalize nerve and brain cells include Gotu kola (an herb considered a mainstay in Ayurvedic medicine) and Evening primrose oil that fights inflammation and is found in black currant and borage oil.
Grow these herbs in a garden or in containers on your patio for use to restore and maintain health and also for enhancing flavors in your cooking.
Seven Tips for Growing Sweet Corn
Nothing says “summer” like juicy ears of sweet corn. Corn (or maize, as it is called in much of the world) isn’t difficult to grow but following a few tips can ensure success in growing this amazing plant.
What would a summer backyard barbecue be without a platter piled high with corn on the cob? And what could be better than picking it fresh?
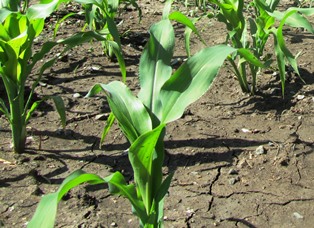
We planted corn last year and still had a few ears that the squirrels hadn’t found. When I discovered them a few weeks ago, I removed the dried husk and planted some of the seed. Amazingly, the seeds grew and are now over a foot tall.
If you want to grow corn, it is helpful to understand several points.
1. Corn seeds won’t germinate in soil colder than 50 degrees. So wait until the soil is warm to plant your seeds.
2. Wind is the pollinator for corn, so do not plant your seed corn in straight rows. Instead, plant the seeds in blocks. Corn is monoecious, meaning the male and female parts are on the same plant. Block planting enables better pollination.
3. Plant corn kernels (two or three seeds) 15 inches apart in rows 30 to 36 inches apart.
4. After planting the corn seeds, water well. Corn needs plenty of water and nutrient-rich soil high in nitrogen. Dig in some aged manure to help meet the corn’s nitrogen needs.
5. Fertilize plants when they have reach 12 to 15 inches in height.
6. Weed often, but take care not to damage the corn roots. Compost can help keep weeds at a minimum and also adds nitrogen to the soil.
7. To harvest corn, bend the ear downward and twist from the plant. Remove husk and silks before cooking or freezing.
A little known fact about sweet corn comes by way of horticultural specialist Jonathan R. Schultheis, University of North Carolina Extension, who notes that the first known variety of sweet corn, Papoon, was acquired from the Iroquois Indians in 1779. See, http://www.ces.ncsu.edu/hil/hil-13.html
Whether you call it sweet corn or maize or classify it as vegetable or grain–these terms won’t matter as much as the word, “delicious” when it comes time to serving your home-grown corn to family and friends.
New Kind of Seed Farm Addresses Shrinking Biodiversity
I save things; seed, for example. But I also save magazines and recently I found a National Geographic from last year with an article I’d flagged to re-read. The piece focused on heirloom seeds and the real concern for diminishing biodiversity and food shortages on our planet.
Author Charles Siebert noted in his National Geographic article that “it took more than 10,000 years of domestication for humans to create the vast biodiversity in our food supply that we’re now watching ebb away.” See, http://ngm.nationalgeographic.com/2011/07/food-ark/siebert-text
Humans are creatures of habit who become complacent. Our reliance upon commercially produced fruits and vegetables means thousands of open-pollinated, heirloom varieties have already disappeared.
What started out with the best of intentions (improve the world food supply), the so-called “green revolution” has been fraught with negative consequences. There was the strong allure of higher yields through the planting of monocrops in vast fields (to the exclusion of crops with lower-yields but that were better adapted to local conditions). The genetically-weaker monocrops required, according to Siebert, “expensive chemical fertilizers and toxic pesticides.”
Seeds hold our future, states “Tom Stearns, Founder of High Mowing Organic Seeds, a company focused on the cultivation, improvement, protection, and preservation of organic seeds and making them available to farmers, gardeners, commercial growers, and others.
I recently sent for High Mowing’s catalog of organic seeds. Not only did the catalog contain a multitude of seed listings (650 varieties), but throughout the pages were stories of how the independently owned company works with partners to educate people about the importance of protecting the genetic integrity of seed so our food supply remains strong, safe, and diversified. See, http:www.highmowing seeds.com
I think it’s kind of cool to grow the vegetables that my grandmother grew in her garden and perhaps her grandmother also grew. It might be time for all of us who love to garden to start saving seed as if the diversity and abundance of the food supply for our generation and those of the future depended upon it.
Climbing Roses Put On a Show for Spring
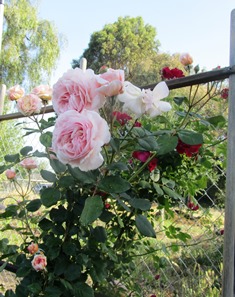
I confess I’m a rose lover. This time of year, the climbing roses we’ve planted are clambering up on wooden trellises, chain link fences, and even the wall of the chicken house, putting on a spectacular display. What’s not to love?
Here in Northern California’s inland valleys, these climbers offer their most magnificent displays of color, shape, texture, and scent during spring. Most do well with a season-long balanced fertilizer, water, and pruning to remove dead canes and spent flower heads. Mulch with organic matter to conserve water and keep down the weeds.
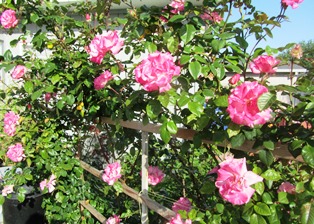
Climbing Handel features cream-colored blooms, edged in a rose shade of pink. It is hardy, has glossy green foliage, and upright pillar growth.
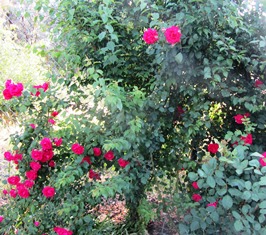
Climbing Don Juan grows upright and has a tendency to spread out. Its canes produce red flowers that are 3 to 6 inches in diameter. The plant blooms from spring until frost.
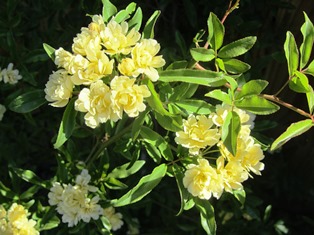
Lady Banks is a species rose named after the wife of Sir Joseph Banks, legendary head of the Royal Horticultural Society of Great Britain
Climbing Lady Banks scampers up our chicken house wall and explodes into a profusion of hundreds of disease-resistant yellow roses on long canes without thorns. This rose is not a hybrid, but rather comes from China and has been cultivated since 1796. To say it spreads is an understatement–the largest Lady Banks grows in Tombstone, Arizona where it covers 8,000 square feet.
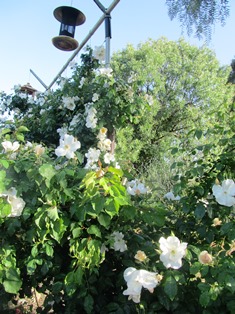
Climbing Sally Holmes is a showoff in our garden. The pointed-shaped buds start out cream-colored (tinged in pink) and then open into an white bloom with a light, sweet fragrance. The rose can climb 12 feet, the height ours has reached where it grows along the back fence.
The vigor of Sally Holmes means it can easily be grown from cuttings. In fact our massive climber was grown from an arm-length cutting dusted with root hormone that we stuck in the ground three years ago. We’ve taken many cuttings since to start the climber elsewhere on our property.
If you have the space for climbers, consider giving one or more a try. Although they are hardy, often disease-resistant, and reward with spectacular displays of bloom, they need support, so think pillars, arbors, gazebos, porch railings, and fences.
The BGW of Composting
Perhaps you’ve wanted to try composting but are concerned about not knowing the ABCs. Forget the ABCs. Try remembering three other letters: B for brown, G for green, and W for water. Those are the three key ingredients of any successful compost pile.
The B (brown waste) includes twigs, branches, and dead leaves. The G (green material) is made up of fruit and vegetable scraps, grass clippings, and coffee grounds, among other things. The W (water) adds the necessary moisture.
The brown material provides carbon, the green material provides nitrogen, and the water creates the magic, turning that brown and green stuff to turn into that dark, crumbly, earthy compost that worms and garden plants love.
If you are like many gardeners, you might pay for compost purchased in bags at local nurseries. But keep in mind that food scraps and yard waste make up about one-third of the material that goes into landfills. Put that material into a compost pile and it saves you money in several ways.
Using compost in your garden reduces water usage because the compost keeps the roots of plants moist and cool. Reduced water usage lowers your water bill and leaves more money in your pocket. Your compost material enhances the richness of your soil while keeping down weeds. Your garden thrives, meaning you won’t have to spend as much on fresh produce if you are growing your own.
You can make a simple bin out of galvanized chicken wire. Stretch the chicken wire into a cylinder shape. Stick some posts in around the circle to hold the wire up and in position. And start throwing in the brown and the green waste, plus some water. Turn every so often.
Once you know the BGWs of composting, there’s really no reason not to try it. Composting not only saves you money, it helps our planet.
 Facebook
 Goodreads
 LinkedIn
 Meera Lester
 Twitter


