Archive for the 'Gardening' Category
Northern California Nut Trees in a Nutshell
Take a trip into Northern California’s great Central Valley and you’ll notice how the landscape becomes dotted with nut tree farms along with vegetable fields, fruit tree orchards, and dairy farms. While Texas dominates the pecan tree market, California’s big three nut crops are almonds, walnuts, and pistachios. With nut prices on the increase, backyard gardeners might consider planting a tree or two if they have the space.
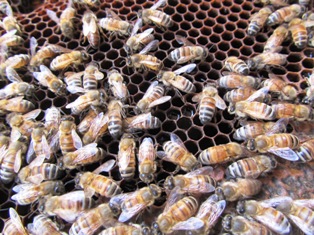
Some nut trees, such as almonds, require pollination assistance–a couple of different cultivars and honeybees will do the trick. For this reason, commercial almond growers pay beekeepers to bring their hives in to pollinate California’s early almond crop each year. Growing almonds is big business in California (it’s the third leading agricultural product in the state); the decline in honeybee populations is bound to affect this profitable crop.
The Central Valley has the perfect climate and growing conditions for almonds. It’s estimated that there are roughly 5,500 almond growers in the state. Many are commercial growers who capitalize on the rich, well-drained soil, and the hot summers and cool winters of Northern California. But California’s continuing drought is causing concern to almond growers since almonds require a lot of water. Backyard gardeners, too, must consider the water requirement of almonds before planting trees.
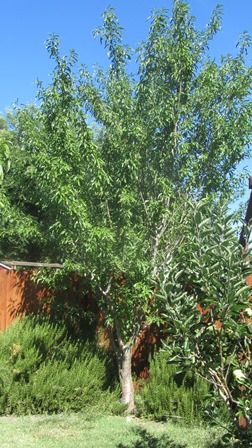
A newly formed almond on the tree looks like an unripe fuzzy peach because almonds are related to the peaches. Mature almond trees reach 20 to 30 feet tall. Some popular cultivars in zones 5 through 8 are Hall’s Hardy, Nonpareil, Peerless, and Mission. My neighbors have gorgeous, healthy almonds growing on their farmette.
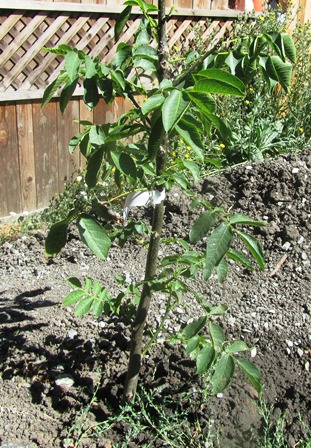
The California Black Walnut and Persian Walnut (with cultivars of Franquette, Chandler, and Hartley) are valued for their stateliness, shade, bountiful crops, and longevity. Walnuts contain healthy nutrients. Cultivars of the English walnut are fast-growing and the nuts are thin-skinned and bountiful.
If a walnut is planted at the birth of an individual, and he lives 75 years, that walnut tree might could still be growing when the person breathes his last breath. The black walnut can reach 100 feet in height. The nuts have an thick outer hull that can blacken sidewalks and driveways with their stain; also, the tree also can be toxic to other plants.
In comparison to walnuts, filberts/hazelnuts are considered small trees (achieving heights of only 10 to 40 feet), they are often the nut tree of choice for backyard landscapes. DuChilly and Daviana are excellent pollinizers with Barcelona. Other cultivars are Bixby, Royal, and Hall’s Giant.
Pecan trees grow much larger than filberts, often towering 70 to 150 feet. Some cultivars include Major, Peruque, Stuart, and Colby. The cultivars of Wichita, Western Schley, and Cherokee are excellent pollinators for each other. Of all the nuts valued for their antioxidants, pecans rank the highest.
There is a pistachio tree growing a mile or so from my farmette. While pistachios love the Mediterranean climate of the Central Valley, in some places the trees perform better than in others. The nuts are highly valued by consumers. Growers have taken notice. Pioneer Gold, a varietal that’s been around since 1976, remains a popular choice. The trees are wind pollinated and require a male and female tree for a crop set.
If you have room in a backyard garden or on a farmette or field, consider planting one or more nut trees. You’ll be rewarded with shade and heart-healthy, nutritional snacks for years to come.
Drying Fruits Naturally
I love dried apricots, but don’t tolerate well the ones treated with sulfur dioxide(used to prevent oxidation and loss of color). With so many apricots on our property coming ripe at once, I have decided in addition to making jam this year to also dry some of the fruit.
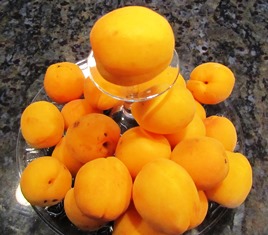
Apricots, so plentiful this time of year, are easy to dry and make great snacks when the season is over
Apricots dried but not treated with sulfur dioxide will turn a natural brown color. Some stores sell them this way. They are usually priced the same or similar to the treated apricots with the bright orange hue.
Besides apricots, other fruits that dry well include apples, bananas, cherries, grapes, nectarines, peaches, pears, plum, rhubarb, and even strawberries. You can use a drying machine
Quick Tips for Drying Fruit
1. Choose to dry only the freshest picked fruits, without bruises, scale, sun scald, or other blight.
2. Spray nonstick vegetable spray on drying pans or trays to make it easier to remove the dried fruit
3. Lay out the fruit to dry in a single layer on trays. Remember to rotate the trays occasionally and turn the pieces from time to time.
4. Destroy any insects (miniscule or otherwise) by freezing or baking the fruit. Simply take the tray and stick it into an oven heated to 175 degrees Fahrenheit for about 15 minutes. Alternatively, pack the dried fruit in freezer bags and freeze for at least 2 days.
5. Freezing dried fruit in resealable freezer bags will preserve its shelf life.
What’s Eating the Chicken Eggs?
Several times over the last month or so, I’ve traipsed to the hen house to collect eggs and found a broken egg or one with a hole in the shell and the egg otherwise intact.
I wondered if one of the chickens had gone rogue and was pecking the egg that either she or one of the other hens had laid.
My flock is small and they usually lay their eggs during the morning hours, using the afternoon to free range and forage.
Each time I heard a cackle, I sprinted to the chicken house to see who was raising the ruckus and whether or not she’d pecked her egg.
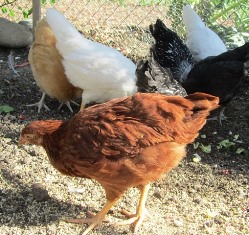
Finally, I caught one of my Silver-Lace Wyandotte hens on the nest. With her head twisted behind and under her wing, I could not tell what was going on. I slipped my hand under her, causing her head to jerk around. It appeared I had caught her in the act as her beak was covered with yolk.
So I thought I’d solved the mystery. My solution was to remove each egg as soon as the hen laid it. If I removed the eggs, any temptation for the chickens to peck the eggs would be eliminated, too. But running for every chicken squawk became so time consuming, I finally stopped.
To my utter surprise, there were no more broken eggs. That didn’t make sense. However, during the whole ordeal with the broken eggs, I’d been smelling a skunk. When my closest neighbor said a skunk had been raiding his coop for the eggs, I began to think I had wrongly accused my poor Wyandotte.
Indeed, since my neighbor took care of the skunk (by trap, I believe), my hens are producing eggs every day and none have holes or are cracked. I’m now thinking the skunk was the egg robber.
That experience got me thinking about other predators that will eat chicken eggs (and chickens, too). The list includes opossums, weasels, rats, snakes, minks, foxes, wild dogs, coyotes, raccoons, hawks, and owls. So, even if I’ve got a nice hen house and a run with a wire roof, it seems that a predator motivated by a good meal with find a way in.
Fire Blight Can Ravage a Pear Tree or Take Down an Orchard
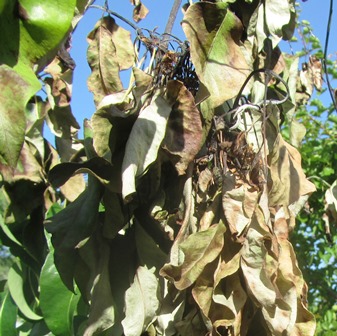
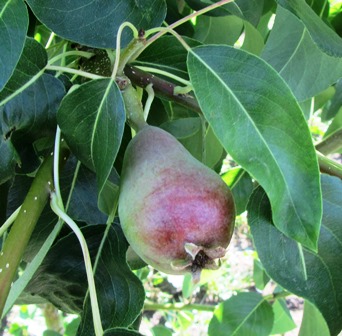
I’ve discovered limb tips, fruit, and blossoms blackened by fire blight in my Bartlett pear tree. That means dealing with the disease quickly or losing tree.
While there are dozens of other types of fruit trees on the farmette, there are no other pear trees. Sadly, this one is in bad shape because of a widespread infection by the bacteria Erwinia amylovora.
The blight started last summer and, despite spraying to control it, the disease has overwintered in the bark of the tree to reappear with the emergence of blossoms this year. Disease spread is helped along by the bees.
Fire blight’s vicious cycle and must be broken if the tree is to survive. The life cycle of blight can be seen at a glance at http://nysipm.cornell.edu/factsheets/treefruit/diseases/fb/fb_cycle.gif
Treatment starts with a vigorous pruning of the affected limbs. That means cutting back twelve inches from the site of the blackened area of fire blight. The disease is highly contagious, so the cuttings must not be recycled or composted. Burning them is recommended.
Also, minimizing the amount of tree blight inoculum in the orchard is important as this disease can also spread to other pear trees, apples, quince, raspberries, and fire-thorn bushes. Cornell recommends a regular spraying program using an appropriate bacteriocide to save fruit trees infected with fire blight.
The saddest thing of all for me is that the tree was once beautiful and healthy and (even now) is loaded with fruit. I hate to think of not being able to save this lovely pear tree. Since most pear cultivars are susceptible to fire blight, it might make sense for me to plant a Seckel Pear tree since it is less susceptible to this highly contagious disease that can destroy a single tree or ravage the entire orchard.
From Garden to Table, Easy-to-Grow Squash
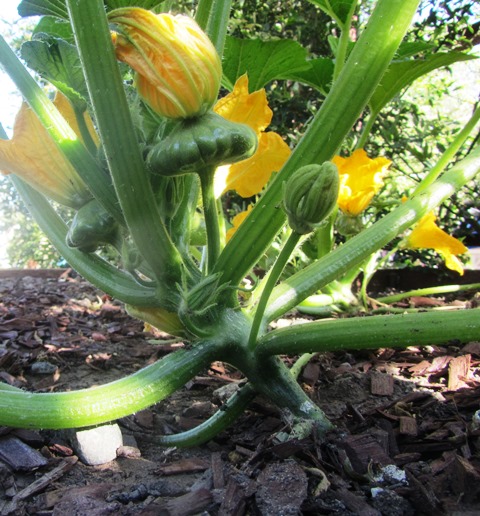
I love summer squash, tossed into rosemary potatoes and served up with eggs and sausage on a Sunday morning; or, grilled with fish, or added to a freshly-made pasta sauce. Best of all, you can have it fresh, from your kitchen garden to your table, as squash is one of the easiest vegetables to grow. Squash is a super food, high in antioxidants, fiber, and Vitamin A.
Squash is one of the Three Sisters (corn and climbing beans being the other two), grown together as companion plants in the tradition of certain groups of Native Americans who planted these vegetables. A fourth sister might be the Cleome serrulata, the Rocky Mountain bee plant to attract pollinators for the beans and squash.
There is a scientific basis for growing these three together. The squash grows fairly large and spreads out, blocking weeds. The beans provide nitrogen to the soil. The corn shoots up a stalk that provides the support the beans need to climb. The three plants benefit each other.
Each year, I plant both summer squash and winter varieties such as butternut and pumpkin that have hard shells and store longer. All types of squash are easy to grow. They just need sun, water, and room. They aren’t fussy about soil.
Summer squash includes zucchini, yellow squash, and scalloped (or round) squash. Autumn/winter varieties require a longer growing period (up to 120 days) and include butternut, acorn, hubbard, and pumpkin.
Growing Tips:
Choose a well-drained, sunny spot in the garden for your squash.
Plant three seeds to a hill (roughly six inches apart).
When the squash are about a foot tall, thin to the healthiest seedling.
Water two to three times each week.
Harvest summer squash when still young; if left on the vine, the squash becomes tough.
Twenty Water Conservation Tips
California is in a historic drought. It’s our fourth year of below-normal rainfall and scientists, city governments, state lawmakers, and communities worry that this drought could run longer, perhaps even becoming a mega-drought. Wells are going dry, reservoirs in the state are lower than they’ve been in years, and water levels in rivers, lakes, and streams have shrunk.
Farmers have a right to be worried that their acreage may have to lay fallow. And what about the fruit and nut orchards? The Sierra snow pack that supplies much of the water to the Central Valley and Bay Area (where much of California and the nation’s food is grown) remains a fraction of what it has been in non-drought years. Salmon runs are being impacted. Water is getting more scarce and more expensive. And less food produced means higher food prices.
Recently, Governor Jerry Brown mandated water conservation throughout the state. Communities are implementing drastic measures to force their citizens to cut water use. But that doesn’t necessarily mean lower water bills if our communities have to buy water to make up a shortfall. Each of us must do our part.
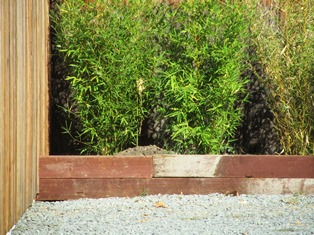
Environmentalists value bamboo for its drought tolerance and landscape appeal; stone is an excellent element for zero landscaping and can be used with succulents or cacti
Twenty Tips to Cut Water Use
!. Install low-flow toilets and tub, sink faucets, and shower heads.
2. Use a front-loading washer rather than a top-loading version. The front-loading machines use roughly 20 gallons per load versus the 40 gallons of top-loading machines. We installed our energy-efficient front-loading washer when we moved in.
3. Wash laundry less often and make sure you set the machine for the right size load.
4. Take shorter showers with the drain closed. Capture the gently-used water in pails to recycle.
5. Use your energy-star dishwasher for cleaning dishes, glassware, and pans. You will use less water than by washing dishes by hand. But run the dishwasher only after it is full, not half-empty.
6. If you have a pool or hot tub, use a cover on it to prevent evaporation of water.
7. Wet your toothbrush, but then turn off the water as you brush your teeth.
8. Capture gray water (from the dishwasher, washing machine, shower, and sink). Gray water is gently used household water, not water from the toilet or sewer. Have a plumber install a gray water system to trees and plants on your property.
9. Completely turn off faucets to avoid drips. Also, fix any leaky faucets or water pipes.
10. Collect rainwater in plastic barrels and keep covered to eliminate the potential for mosquitoes breeding in the water.
11. Shower less often. Flush the toilet less often and never to flush away an insect or tissue. Use a lidded-waste can instead.
12. Use the broom to clean the sidewalk and driveway, not the garden hose and water.
13. Stop watering the lawn. Consider removing the lawn in favor of a landscape with drought-tolerant and indigenous plants. Or zeriscape, using bamboo, succulents, cacti, and stone.
14. Buy and use green products with the EPA-partnered WaterSense label.
15. Don’t throw out leftover ice cubes; use them to water a plant.
16. Never use running water to thaw meat or fish. Defrost overnight in the refrigerator.
17. Insulate water pipes to get hot water faster instead of running water through the faucet.
18. Install an instant water heater appliance under the sink to get hot water instantly rather than let the faucet run until the water gets hot.
19. When on vacation away from home, turn off the water softener to conserve water.
20. Recycle kitchen waste instead of putting it down the garbage disposal and running water. That recycled waste can become valuable compost for your garden and keeps it out of the septic system.
Garlic–A Staple of Any Kitchen Garden
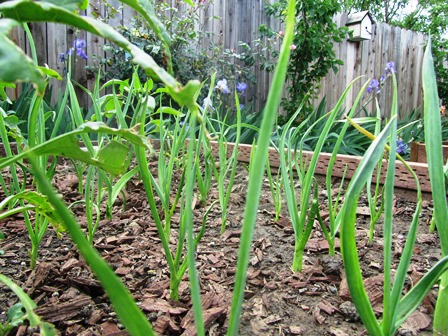
No proper kitchen garden would be without a section for onions (whether spring green onions, chives, or bulb onions) or garlic. Both kitchen staples are easy to grow. In several raised beds measuring four feet by six feet, I’ve planted garlic amidst a few jalapeno pepper plants. Garlic benefits other plants in the garden as well.
BEST TIME FOR PLANTING
In spring, after all danger of frost has passed, plant garlic cloves. Or, plant in late fall when you might be planting other types of bulbs. Some European gardeners swear that garlic must be planted on the shortest day of the year, the winter solstice.
I planted my garlic in late February/early March, long before my tomatoes, eggplant, pumpkin, and squash (the heat lovers) went in. The green garlic tops shoot out of the soil quickly and grow fast.
HOW TO PLANT GARLIC
Plant each clove from a bulb upright in soil roughly one-inch deep. Space the cloves four-inches apart. The growing site must receive full sun. Give the garlic a good watering each week. Garlic is a beneficial companion plant in the garden because of allicin (a property that acts as a fungicide and pesticide), especially when planted near lettuce and cabbage where it will deter aphids.
HOW TO HARVEST AND STORE GARLIC
When the tall green shoots of the garlic become dry and turn brown, it’s time to harvest the garlic bulbs. After you’ve pulled the bulbs out, shake off the dirt (never wash) and then hang the bulbs in a dark, dry place. Then when the bulbs are completely dry, you can braid the paper-dry tops to hang the garlic in the kitchen for easy access.
Propagating Plants from Rose Cuttings
Roses are among the most romantic flowers in a garden. I grow dozens of cultivars of rose bushes–climbers, hybrid teas, floribundas, and polyanthas. When I have an extra few dollars, I might spend it on a rose bush, but when money is tight, I simply start a new bush from one of my favorites that I’m currently growing.
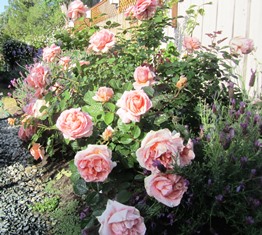
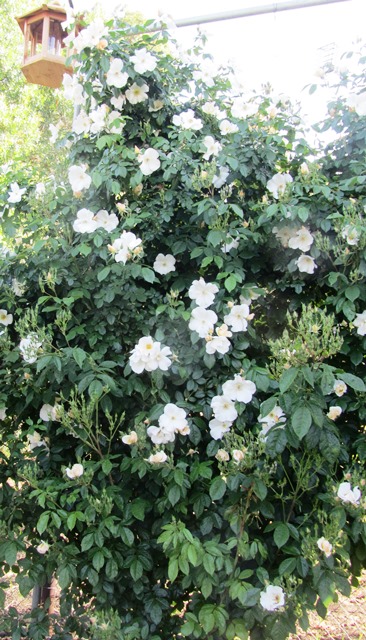
My husband and I love the climbers. We have tall fences (over six feet) around our property on all sides. Covering an entire fence is easy when you use a vigorous, virtually pest-free climber. Two roses that quickly adapt and grow to fantastic heights are Sally Holmes and Cecile Brunner.
Climbing roses need strong support, since some canes can reach forty feet or more as they scramble over a roof or stone wall, trellis, fence, or arbor.
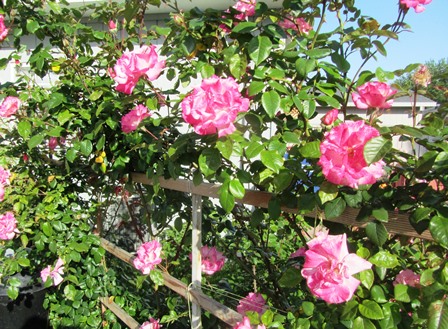
Last year, my husband created a rose arbor on wires strung from the fence along the north side of our house to the roof line. He planted the Cecile Brunner rose as his climber of choice. Its sage green leaves make a lovely foil for the tiny pink roses that permeate the air with a spicy-sweet scent throughout the spring. Cutting and feeding will render another bloom in summer.
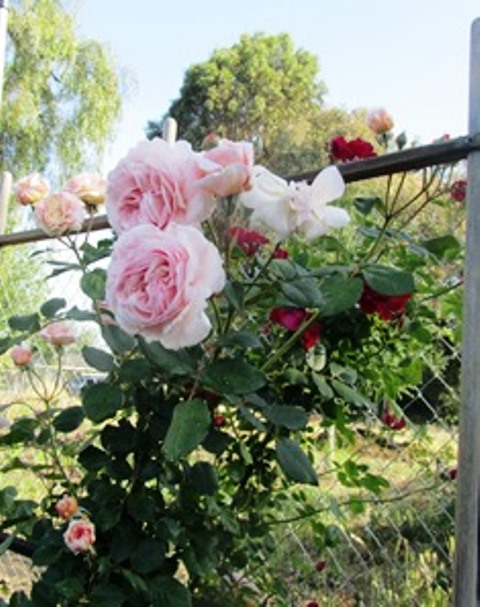
My garden has plenty of places where I could tuck in a new rose bush, and I’ve bought many over the years. I have some favorites that I’d like to start in other areas. They include A Shropshire Lad, Handel, Lady Banks (a thornless yellow rose), and Iceberg.
This is the perfect time to propagate roses from cuttings in the Bay Area since the rose bushes in many yards are beginning to awaken. Roses require water, something no longer plentiful in California. Thanks to a severe four-year drought, we now have mandatory water restrictions. That means we gardeners must consider how we can recycle water, use gray water, collect water, and otherwise find ways to reduce water usage.
To propagate a rose from your favorite bush, take a six-inch cutting from a healthy cane. Make the bottom cut a sharp angle cut, not straight across. Do not crush the stem. Remove the leaves.
Dip the angle cut into a jar of root hormone powder. This powder enables the cane to root more easily in the ground or pot.
Insert the prepared cutting in the soil. Water as needed when the soil is dry. The cutting will need one to two months to root and then, it will begin to leaf out.
Some people like to put a quart jar over their cutting to create a mini-green house climate. In mild climates like the Bay Area, this isn’t necessary. The best time to propagate cuttings from your favorite roses is in the spring and never in extremes of cold or heat.
Creating romance in the garden could start with a table and chairs, floral-motif linens, and a service of tea. But even before those accoutrements to romance are added, why not fill the space with roses? It’s so easy.
An Heirloom Selection of Old Varieties of Flowers
Mid-March to early April on the farmette brings the celebration of birthdays and the promise of new selections of flowers for our spring gardens. This year, our new plants are old varieties.
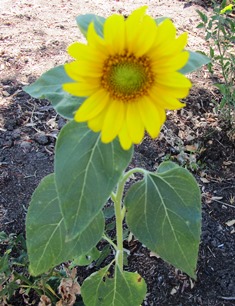
A fellow-gardener friend gave me a selection of antique flowers for pollinators that included Bee Balm, Sweet Alyssum, Prickly Poppy, Sunflowers, and Kiss-Me-Over-The-Garden-Gate. These will go in various flower beds around our property.
Pollinators include many species of bees. We want them in our gardens to pollinate our fruits, vegetables, berries, and nut crops. Planting open-pollinated flowers enable pollinators to forage for pollen and nectar (their sources of food). When we provide rich food sources for pollinators, our food crops will benefit.
At a time when bee populations are declining worldwide, gardeners everywhere can help the besieged bees by planting diverse, open-pollinated varieties of pollen- and nectar-rich flowers. The following flower selection are considered old garden mainstays.
Bee Balm–“Bergamo” Monarda hybrida
This perennial likes sun to light shade and soil that is moist, and well-drained. The plant will reach two feet tall and will bloom summer to fall. It attracts both hummingbirds and bees.
Sweet Alyssum–“Benthalmii” Lobularia maritima
Alyssum is an annual that likes full sun but part shade in the hottest areas of hte garden. Soil preferences is rich, moist, and well-drained. It reaches a height of ten inches and small white blooms form summer to fall. It will flower repeatedly if it is clipped back after flowering.
Prickly Poppy–“Busy Bee” Argemone platyceras
A sun lover like all poppies, this one is an annual that loves poor, dry, gravelly soil. It will grow to three feet and bloom throughout the summer into fall. It does have prickly spines, so care must be taken to avoid contact with the spines.
Sunflowers–“Pan,” Helianthus debilis, subspecies: cucumerifolius
Another sun lover, this annual thrives in rich, well-drained soil. Plants will reach three feet in height and bloom summer through the fall. These sunflowers make excellent cut flowers.
Kiss-Me-Over-The-Garden-Gate–” Polylgonum orientale
This annual will go at the back of the garden since it reaches a height of six to seven feet. It likes well-drained, moist, rich soil that is located in full sun. The plants bloom summer throughout the fall and self-sows.
Trying New Plants in the Garden
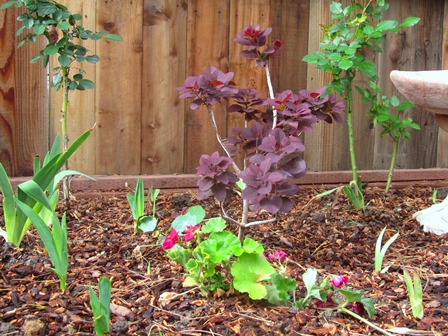
While some people might like to stick to tried-and-true types of plants in their gardens, I’ve always enjoyed experimenting with botanical specimens that are new to me. Recently, I purchased two smoke trees–plants I’ve never before cultivated.
The smoke tree’s value is in its satiny leaves that are blue-green or deep purple. In addition to the gorgeous round leaves (so very Feng Shui), the plant has very tiny flowers that appear in summer along feathery inflorescences that, in the purple variety, are nearly the same color as the leaves. The blue-green smoke trees have tiny yellow flowers.
The great thing about this plant is is adaptability to poor soil. That includes even rocky soil. The downside is that the plant requires pruning to achieve a denser tree since it tends to be open branching. The blooms appear when the wood of the tree is three years old. My trees are small, however, one already has sprouted the feathery inflorescences.
The smoke tree adds drama to shrub borders and mass plantings because of its dark color. I’ve placed it amid fuschia geraniums, purple and lavender irises, citrus trees, and Abbaye de Cluny roses. I also planted climbing Sally Holmes, which will cover the front fence with 3 1/2-inch creamy white blooms and dense green foliage.
The smoke tree tends to grow eighteen to twenty feet and its lovely purple color does not fade, even in intense summer heat. I look forward to many years of enjoyment, watching this tree take center stage in the long rectangular beds at the front of our farmette.
 Facebook
 Goodreads
 LinkedIn
 Meera Lester
 Twitter


