 Facebook
 Goodreads
 LinkedIn
 Meera Lester
 Twitter


Peace and Serenity . . . Just When You Need It
The mailman caught me by surprise yesterday. Standing and smiling at my gate, he hoisted up a box and balanced it on the wrought iron. I stopped painting the trellis supporting the bougainvillea clambering up the side of the house. I put the lid on the paint, laid aside my brush, and trotted over.
I actually welcomed a break; I’d been feeling a little stressed from the heat and wasp activity around a nest I’d pried from the porch ceiling. Opening the box, I examined the contents.

Cover of my just-released book
Tucked inside were copies of my new book from Adams Media/Simon & Schuster. The first thing I noticed was the silky-soft, lovely lavender cover. Like a cherished devotional book, the size of MY POCKET MEDITATIONS is just right . . . it will fit into almost any purse, briefcase, or lunch bag.
There’s a handy little elastic page marker, too, to indicate where you left off reading or to easily find a favorite guided meditation. Nice touch. I made a mental note to thank the design team.
Thumbing through the opening text on meditation, I smiled as I recalled having to restrain myself during the writing of the book. I’d been tempted to include aspects of my personal journey into meditation. However, I had kept the opening simple. Here, though, a glimpse of my background might be appropriate.
In my early twenties, I made a trip alone to India where I learned about meditation through intense practice–many hours each day under the tutelage of a holy man, who had a follower who spoke English. By then, I’d left Missouri farm life and college to live for a time in Hollywood (actually, I rented a place not far from the Self Realization Fellowship temple that was established in 1942 by the Indian saint Paramahansa Yogananda).
The hospital where I worked was within walking distance of my home and took me right by the temple. I liked walking past that quiet temple–an oasis in the bustling city–but otherwise, for a country girl like me, Hollywood in myriad ways was a culture shock.
A year later, I moved to Northern California and began a new job with a large county hospital, put down new roots, and made new friends. I joined a meditation group where I met someone who had recently returned from India. Seeing his pictures of that country and of a holy man he’d met ignited a spark of longing in me to go there. I wanted to see firsthand that land of intense colors, ancient architecture, cultural and religious diversity, and to meet that saintly person.
Within six months, I booked my trip. As lost as I felt in the city of Mumbai (formerly, Bombay) teeming with people, I found myself right at home in Gujarat (not a coastal town like Porbandar where Mohandas Gandhi was born but rather) in a farming village. There I learned meditation from the elderly Indian whom many locals considered an enlightened master of Kundalini Maha Yoga.
My yearning for spiritual awakening and evolution perhaps will resonate with others who similarly share a desire for self-exploration, whether their journey takes them out into our incredible world of diverse people, beliefs, and cultures or inward to the quiet places of the Self.
Meditation helps you focus, gain clarity, and generates many health benefits, too. Believing as I do that what blesses one blesses all, it is my sincerest desire for you to use this little book as a tool to find peace and serenity in your life.
To see more, click here: http://tinyurl.com/y9vfw2t9
Great Pie Begins with a Buttery, Flaky Crust
My stalwart Scots-Irish grandmother was thrifty and talented when it came to food preparation. She made delicious pies from cherry, rhubarb, peaches, apples, pears, and sweet berries of every kind, including gooseberries. Her pies were my childhood delight when I lived with her and my grandfather on their Boone County, Missouri farm.
She made delicious meat pies from meats she’d preserved by canning. Missouri winters could be harsh. Those meat pies nourished me when the snow piled up outside the windows, and it was too cold to make a trek to the smoke house where her prized Boone County hams hung from hooks.
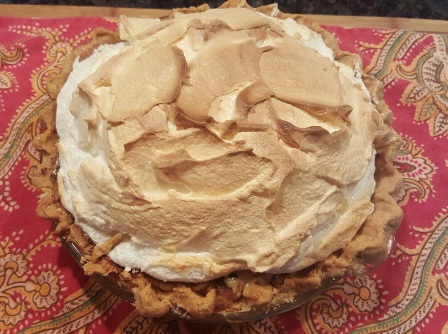
Flaky crust and tall meringue finish off this old-fashion vinegar pie.
Sometimes, my grandmother combined fruits or berries in a rustic pie (today, we call it a galette) and on other occasions, she made a raisin, pecan, pumpkin, coconut, or a custard pie. And meringue, if used, was high and sweet and just the right shade of golden brown. But it was the pie crust that I loved.
For the top of a peach pie, she’d cut in a large curve shaped like a branch. Then two or three other lines would curve from it. Lastly, she cut teardrop shapes along the arch lines so the top crust art would suggest a peach tree branch. When she worked crisscross strips atop a cherry pie, it was both beautiful and delicious.
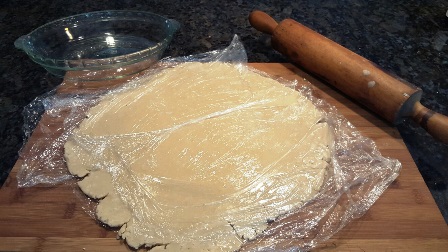
Storing or rolling the crust between sheets of plastic wraps is a good way to avoid handling the crust with your hands.
The secret to her buttery, flaky crust was not to handle it too much. Today, I make the same recipe but in my food processor. Like her, I use chilled or ice water, adding only drops at at time as the food processor is pulsing the dough–only enough to get the dough clinging together. The point is to move the dough from dry and crumbly to clumping into a ball.
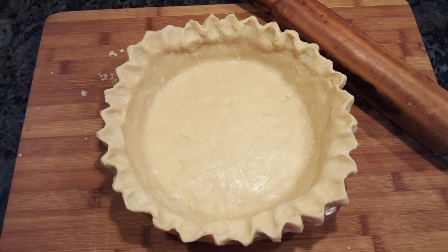
This fluted crust is ready for almost any kind of filling. I will prick the bottom and sides with a fork before filling and baking.
After the dough is made, I dump it from the food processor bowl onto aluminum foil or plastic wrap and work it into a ball (without touching it). The dough goes into the fridge for a chill over an hour and up to 24 hours. The recipe makes enough for a pie top and bottom or a couple of pies requiring only the bottom crust.
Ingredients:
2 1/2 cups flour
1/2 teaspoon salt
1 teaspoon granulated sugar
1 cup chilled unsalted butter, cut into pieces
1/4 (plus a few tablespoons more if necessary) cold or ice water
Directions:
Add the dry ingredients (flour, salt, and sugar) in the food processor bowl.
Cut the butter into small chunks and drop the pieces in. Pulse into a crumbly, dry meal.
Add ice water to the mixture in the bowl by dropping spoonfuls through the feeding tube and pulsing after each addition.
Remove the dough when it clings together–neither too wet nor too dry–by dumping it out on a large sheet of aluminum foil or plastic wrap.
Mold the dough into a ball and flatten into a thick disk to make it easier to roll out.
Chill for an hour or up to 24 hours.
Makes two buttery, flaky crusts.
* * *
If you enjoy reading about farmette topics (including gardening, beekeeping, and delicious recipes), check out my cozy mysteries A BEELINE TO MURDER and also THE MURDER OF A QUEEN BEE in the Henny Penny Farmette series (from Kensington Publishing).
These novels are available through online retailers such as Amazon, Barnes & Noble, Kobo Books, and Walmart as well as from traditional bookstores everywhere.

See, http://tinyurl.com/hxy3s8q
Now available in mass market paperback, this debut novel launched the Henny Penny Farmette series of mysteries and sold out its first press run.

See, http://tinyurl.com/h4kou4g
The second cozy mystery in the Henny Penny Farmette series, available Sept. 27, 2016, is now available on Net Galley (netgalley.com) for professionals and readers who write reviews.
How to Make Homemade Butter
A favorite memory of mine recalls my making butter with my grandmother in her farmhouse kitchen in Boone County, Missouri. All she needed was fresh cream and a jar with a lid.
My grandfather milked the cows and my grandmother would strain the liquid into galvanized cans. After the cream had risen to the top of the milk, she would skim off the cream into smaller cans, storing all of the cans in cool area at the back of the house until my grandfather could take the milk and cream to market. He always kept some back for Rosie’s homemade butter.
The buttermilk that was poured off the would then be chilled. It was his favorite drink after a long, hot day on the tractor working in the fields.
Rosie would hand me a glass jar with a screw top lid in which she’d poured a cup or two of cream and tell me to shake it. My energy and stamina would dictate how long the shaking would have to go on. She’d help. Eventually the butterfat solids and the butter milk would separate.
Rosie favored using a large glass jar with a metal lid that featured a beater and hand crank. Turning the crank beat the cream and amounted to less wear and tear on the arms. Either method worked by separating the liquid from the butterfat.
Today, beating heavy whipping cream (without additives) in a blender or mixer will accomplish the same result. The milk solids eventually become separated from the liquid, which can be poured off. The sweet creamy solid mass can then be salted and even colored if you wish, molded or shaped, chilled, and used. Also, you can leave out the yogurt and still make butter, but it won’t have that tangy flavor.
RECIPE: HOMEMADE CULTURED BUTTER
INGREDIENTS:
1 C heavy whipping cream (no additives)
1 Tablespoon natural, organic yogurt (no additives but with live cultures)
optional: 1/2 teaspoon fine sea salt
DIRECTIONS:
Pour the cream in a small to medium saucepan and warm over low heat to about 90 degrees Fahrenheit.
Stir in yogurt and remove from heat.
Cover and let rest for 24 hours on the kitchen counter to allow the mixture to thicken.
After the cream has thickened, chill in the refrigerator.
Pour chilled mixture into a blender jar or electric mixer bowl.
Beat on a low speed to reduce splatter.
Add salt, if desired.
Beat the liquid and solids separate into massive chunks.
Wrap the butter into a cheesecloth and squeeze over a large bowl to drain out the rest of the liquid. (The buttermilk makes a refreshing drink or can be used to make biscuits).
Mold by pressing the he butter into a plastic mold or an old-fashioned butter molding box. Alternatively, you can shape the butter into small balls using a melon ball scoop.
Hint: To make a flavored butter, add fresh wash, dried, and chopped herbs such as basil and garlic; or cranberries and orange zest. Or, add to the butter apricots or figs (peeled and chopped).