 Facebook
 Goodreads
 LinkedIn
 Meera Lester
 Twitter


How to Make Wild Plum Jam
A favorite breakfast on our farmette includes hot bread (like biscuits or popovers), slathered in butter and spread with homemade jam. We have many fruit trees from which to make jam but we love the sweet tartness of wild plums. These wild plums are smaller than regular plums or apricots, so you’ll need to pick enough to fill about a gallon-size bucket.
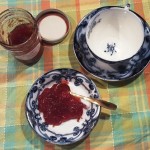
This sweet-tart jam makes the perfect accompaniment to croissants, toasts, muffins, and biscuits
You’ll love this delicious jam spread on almost any kind of bread, roll, or cracker. Serve it alongside some firm breakfast cheese or your favorite goat cheese. Because of the balance between sweet and tart flavors, it greatly enhances the taste of roast pork or chicken, too.
Making wild plum jam doesn’t require a lot of skill. But you will need some simple kitchen tools like a tall pan (like a soup pot), a large bowl, measuring spoons, a colander, long-handle wooden spoon (for stirring hot jam), and a paring knife.
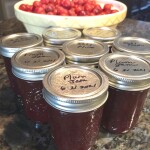
Pictured a jars with lids and rings–the type used in canning jellies and jams.
Required items include a hot-water canner, six or seven preserving jars with lids and rings, and a jar-filling cup, a jar lifter, a foam skimmer, and a magnetized ring lifter. If you don’t already have them, purchased these items in a hardware or diy store where canning jars and utensils are sold.

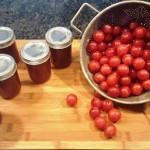
The smallest plums we picked have tart skin but sweet flesh
The PREP steps:
1. Start by picking the fruit and sorting out those plums with blemishes or bird pecked holes.
2. Wash the fruit.
3. Remove the stones. (I use a big bowl for this so I can save the pitted plums along with their juice to make the jam).
The JAM COOKING process.
1. Place 5 cups pitted plums with their juice in a large, deep pot.
2. Squeeze juice of one-half lemon into the pot.
3. Add 4 cups sugar. Stir to mix the ingredients.
4. Bring to a boil and stir constantly for 15 to 20 minutes or until the gel stage is reached. Skim off foam, if necessary.
5. Slowly and carefully stir in five tablespoons of Classic Pectin powder. Mix well. (You can test the gel consistency using a metal spoon chilled in the freezer. The jam should slowly roll to the edge and hang together instead of running off like water.) Remove jam pot from heat.
6. Ladle the hot jam into sterilized jars. Place a lid on each jar and then screw on the rings.
7. Place in the boiling water of a hot-water canner and process for 15 minutes.
8. Remove each jar of jam and listen for the pop of each lid. Let cool in a draft-free area. Label and store.
_____________________________________________________________________
Enjoy reading about country living and farm topics? Check out my cozy mystery novels that include tips and strategies for successful, country living or my nonfiction books on health and spiritual wholeness.
All are available with a search of my name–Meera Lester–on Amazon.com, barnesandnoble.com, and other online and brick-and-mortar bookstores everywhere.
Also, take a look at my wellness and spirituality books for living your best life now. All are available online and wherever books are sold.

All available online and in bookstores everywhere

Packed full of ideas for creating the life you want

More than 150 rituals for sound mind, strong body, and meaningful connections to the people around you
See, https://www.amazon.com/Rituals-Life-Meaning-Everyday-Moments/dp/1507205244
How to Make Kumquat Marmalade
Eating a fresh kumquat–the small relative to the sweet orange–is like getting a dose of Vitamin C in a single bite. Or, if you don’t like the tart fruit (the edible rind is sweet), then make your kumquats into a marmalade.

Kumquats make a lovely, sweet marmalade when coupled with juicy oranges, rinds included
My neighbor recently brought over several boxes of freshly-picked kumquats. We ate some fresh but I turned the rest into a sweet, spread that tastes quite like orange marmalade.

Kumquats and oranges are the perfect combo for marmalade
When fruit is available during the year, you can turn that fruit into a delicious conserve, jelly jam, marmalade, or fruit butter. When citrus is in season, oranges, kumquats, grapefruits, and lemons can be coverted to sweet spreads.
There are distinct differences between conserve, jam, jelly, marmalade, and fruit butter. Conserve is a jam made from fruit with other ingredients added, including raisins, coconut, and nuts. Jelly is made from the juice of the fruit while jam is made from the fruit pulp. Marmalade includes fruit, juice, and rind. A fruit butter utilizes the fruit pulp and sugar to make a thick, smooth spread.
Marmalade includes fruit pulp, rind, water, and sugar
KUMQUAT MARMALADE RECIPE
Ingredients:
2 cups thinly sliced kumquats
1.5 cups chopped orange pulp (2 medium oranges)
1.5 cups sliced orange peel (2 medium oranges)
1/3 cup lemon juice
1.5 quarts water
Sugar (the amount will depend on the amount of fruit/water mixture after 12 hours)
Directions:
Mix together all ingredients, except the sugar, in a deep large pot. Simmer for 5 minutes. Remove from heat and cover. In a cool place, allow the mixture to stand for 12 hours or overnight to soften the rind. Remove any large seeds. Cook rapidly until peel has softened. Measure out fruit and liquid mixture and then add 1 cup of sugar for each cup of the fruit mixture. Stir until the sugar is dissolved.
Rapidly bring the mixture to a boil over high heat. Stir as needed to prevent sticking, especially as the mixture thickens and reaches the gelling point. (Hint: You can check to see if the marmalade is gelling by dropping a spoonful of the hot marmalade onto a chilled or frozen saucer. If the marmalade is sheeting instead of running off the plate, it’s ready to can. Also, you can add Classic Pectin according to directions on container to ensure the marmalade properly thickens). Stir in carefully to avoid splattering on your skin. Remove from heat. If the mixture has foam, skim to remove it. And also remove any large seeds that may have been missed.
Ladle the hot fruit mixture into hot jars (run the jars through a hot rinse cycle as the jam is cooking). Leave 1/4-inch headspace. Tighten the ring around the flat, rubber-seal cap. Place the jars into a boiling-water canner. Bring to a boil and process 10 minutes. Remove jars from canner and let stand until cool. The caps will make a popping sound as they cool and seal.
__________________________________________________________________
- All of Meera Lester’s Henny Penny Farmette mysteries are available online and in bookstores everywhere. Also, check out Meera Lester’s self-help books on health, wellness, and spirituality on Amazon.com See: https://www.amazon.com/Meera-Lester/e/B001JP835E
Pie to Welcome Autumn, Plus a Few Apple Facts
Autumn officially arrives next Friday, September 22, 2017. That means peak apple season has begun and nothing says “fall” like an early-autumn apple pie.
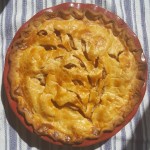
A little egg wash on the crust renders a beautiful golden color
Here’s my easiest apple pie recipe.
COUNTRY APPLE PIE
Ingredients:
6 cups apples, peeled, cored, and thinly sliced
3/4 cup granulated sugar
2 tablespoons butter
1/8 teaspoon salt
1 teaspoon cinnamon
1/2 teaspoon ground nutmeg
2 tablespoons flour
2 unbaked pie crusts (homemade or store-bought)
1 egg, beaten with 2 tablespoons water (to make an egg wash)
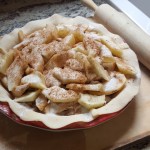
Pie ready for top crust
Directions:
Preheat oven to 450 degrees Fahrenheit
Combine sugar, flour, salt, cinnamon, and nutmegr in a large bowl and mix well. Stir in the apples. Spoon the apples into a pastry-lined baking dish or pan. Cut the butter into small pieces and distribute over the apples. Place the second rolled-out crust over the pie. Snip off the excess crust and cut a design into the top crust to create a steam vent. Flute crust edges. Use a pastry brush to apply the egg wash over the top crust.
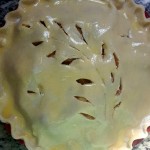
Pie with egg wash applied and vents cut in is ready to bake
Bake for 10 minutes. Cover crust edges with aluminum foil to keep them from burning. Reduce heat to 350 degrees and bake for 30 to 35 minutes. Crust will be golden brown and juices will be bubbling.
FACTS ABOUT APPLES
1. Apples were known in the ancient world; they’ve been around for 3,000 years.
2. Apples thrive in a temperate climate and are grown worldwide.
3. There are roughly 7,000 varieties of apples worldwide, all members of the rosaceae family.
4. Washington state produces half of all U.S. apples.
5. Science shows that apples are rich in antioxidants and vitamins A and C, are high in fiber, and and aid in lowering cholesterol and high blood pressure. They can help stabilize blood sugar levels.
6. Some of the best-loved apple varieties include: Braeburn, Red Delicious, Granny Smith, Gala, Fuji, Golden Delicious, Honeycrisp, and Rome.
If you want to know which apples are best for baking, eating fresh, making into sauces, or freezing, see, http://bestapples.com/varieties-information/varieties/
_____________________________________________________________
If you enjoy reading about delicious farm recipes, growing heirloom plants, or keeping bees and chickens and you like a mysteries, check out my Henny Penny Farmette series of cozy mysteries from Kensington Publishing in NY. They’re available online and in traditional bookstores everywhere.

Murders at a N. California winery are the catalyst for ex-cop turned farmette owner Abigail Mackenzie to search for a killer
Currently, A HIVE OF HOMICIDES is a featured title in Barnes & Noble’s September promotional BUY 3, GET 1 FREE sale.
WHAT IS THE BUY 3, GET 1 FREE OFFER?
Everyone who buys a Kensington cozy mystery from the B&N in-store display or any Kensington cozy mystery from BarnesandNoble.com between 9/5/17 – 10/5/17 and registers their purchase at http://sites.kensingtonbooks.com/kensingtoncozies/BN/ will:
— Automatically be entered into Kensington’s “Cozy Mystery Bonanza” sweepstakes for a chance to win a $300 value gift basket. One grand prize winner will be selected after the sale has concluded.
— Automatically receive a free Kensington Cozies recipe booklet plus a download code for the novel A STORY TO KILL by Lynn Cahoon after the sale has concluded.
* * *
DON’T FORGET TO ENTER THE FREE DRAWING AT GOODREADS.COM.
Win a signed copy of A Hive of Homicides along with a gorgeous reversible apron and a set of 2 chicken napkin rings. Enter before September 26 for a chance to win.
See, https://www.goodreads.com/book/show/33911114-a-hive-of-homicides?from_search=true

Reversible apron features a floral backside. Ties make it totally adjustable.
Great Pie Begins with a Buttery, Flaky Crust
My stalwart Scots-Irish grandmother was thrifty and talented when it came to food preparation. She made delicious pies from cherry, rhubarb, peaches, apples, pears, and sweet berries of every kind, including gooseberries. Her pies were my childhood delight when I lived with her and my grandfather on their Boone County, Missouri farm.
She made delicious meat pies from meats she’d preserved by canning. Missouri winters could be harsh. Those meat pies nourished me when the snow piled up outside the windows, and it was too cold to make a trek to the smoke house where her prized Boone County hams hung from hooks.
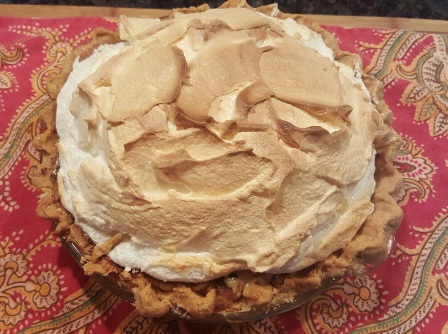
Flaky crust and tall meringue finish off this old-fashion vinegar pie.
Sometimes, my grandmother combined fruits or berries in a rustic pie (today, we call it a galette) and on other occasions, she made a raisin, pecan, pumpkin, coconut, or a custard pie. And meringue, if used, was high and sweet and just the right shade of golden brown. But it was the pie crust that I loved.
For the top of a peach pie, she’d cut in a large curve shaped like a branch. Then two or three other lines would curve from it. Lastly, she cut teardrop shapes along the arch lines so the top crust art would suggest a peach tree branch. When she worked crisscross strips atop a cherry pie, it was both beautiful and delicious.
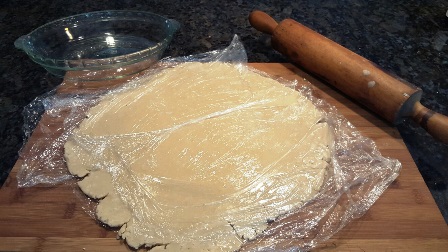
Storing or rolling the crust between sheets of plastic wraps is a good way to avoid handling the crust with your hands.
The secret to her buttery, flaky crust was not to handle it too much. Today, I make the same recipe but in my food processor. Like her, I use chilled or ice water, adding only drops at at time as the food processor is pulsing the dough–only enough to get the dough clinging together. The point is to move the dough from dry and crumbly to clumping into a ball.
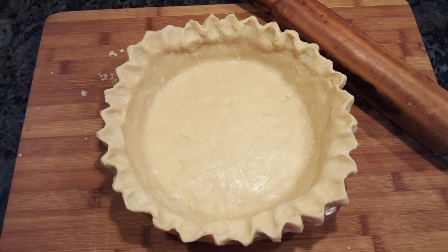
This fluted crust is ready for almost any kind of filling. I will prick the bottom and sides with a fork before filling and baking.
After the dough is made, I dump it from the food processor bowl onto aluminum foil or plastic wrap and work it into a ball (without touching it). The dough goes into the fridge for a chill over an hour and up to 24 hours. The recipe makes enough for a pie top and bottom or a couple of pies requiring only the bottom crust.
Ingredients:
2 1/2 cups flour
1/2 teaspoon salt
1 teaspoon granulated sugar
1 cup chilled unsalted butter, cut into pieces
1/4 (plus a few tablespoons more if necessary) cold or ice water
Directions:
Add the dry ingredients (flour, salt, and sugar) in the food processor bowl.
Cut the butter into small chunks and drop the pieces in. Pulse into a crumbly, dry meal.
Add ice water to the mixture in the bowl by dropping spoonfuls through the feeding tube and pulsing after each addition.
Remove the dough when it clings together–neither too wet nor too dry–by dumping it out on a large sheet of aluminum foil or plastic wrap.
Mold the dough into a ball and flatten into a thick disk to make it easier to roll out.
Chill for an hour or up to 24 hours.
Makes two buttery, flaky crusts.
* * *
If you enjoy reading about farmette topics (including gardening, beekeeping, and delicious recipes), check out my cozy mysteries A BEELINE TO MURDER and also THE MURDER OF A QUEEN BEE in the Henny Penny Farmette series (from Kensington Publishing).
These novels are available through online retailers such as Amazon, Barnes & Noble, Kobo Books, and Walmart as well as from traditional bookstores everywhere.

See, http://tinyurl.com/hxy3s8q
Now available in mass market paperback, this debut novel launched the Henny Penny Farmette series of mysteries and sold out its first press run.

See, http://tinyurl.com/h4kou4g
The second cozy mystery in the Henny Penny Farmette series, available Sept. 27, 2016, is now available on Net Galley (netgalley.com) for professionals and readers who write reviews.
Warm Pomegranate Sauce Dressing Dazzles on Spinach Salad
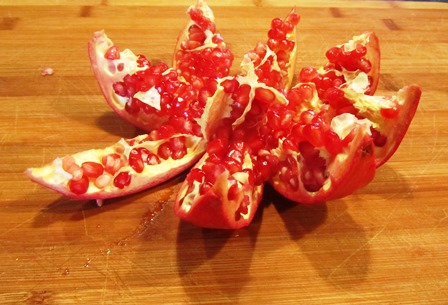
Pomegranate seeds add sweetness and crunch to salads but can eaten fresh, or you can extract the juice to make a lovely sauce.
Use fresh pomegranate juice if you would like a delicious sauce to use in salad dressing or other culinary creations. Pomegranate sauce made into a warm salad dressing dresses up a plain spinach salad like nothing else.
The warm pomegranate dressing is made by combining to blend 1/2 cup pomegranate sauce (recipe below), 1 Tablespoon of honey, 1 1/2 teaspoons minced fresh ginger, 1 cup California extra-virgin olive oil, and 1/2 cup coarsely chopped walnuts. Warm the dressing and pour over over a pound of freshly washed spinach leaves, 1/2 cup red onion, and 1 orange (peeled, seeded and with segments quartered).
Here’s how to make and preserve the pomegranate sauce.
INGREDIENTS:
5 cups of pomegranate juice (reamed from about 10 large fruits)
1/2 cup lemon juice
1 cup sugar
DIRECTIONS:
Wash thoroughly ten large pomegranates.
Cut in half and use a reamer to extract the juice from the seeds, discarding the membrane.
Strain the juice through cheesecloth several times to obtain 5 cups.
Combine the juice, lemon, and sugar in a large saucepan over medium-high heat.
Bring to a boil and then turn down the heat and simmer at 180 degrees Fahrenheit.
Reduce the sauce by half.
PROCESS:
Have ready 4 half-pint jam jars that have been washed on a hot cycle in the dishwasher and dried.
Fill the canner with water, place on heat, and bring to a simmer.
Simmer jar lids and rings.
Fill the jars with the pomegranate sauce, leaving 1/4 inch head space.
Affix hot lids to the jars and screw on the rings.
Lower the jars on the rack into the canner (water must cover the jars by at least an inch) and boil the water for 10 minutes.
Remove the jars of sauce and allow to cool.
Check seals, label, and then store until needed.
For more delicious recipes, farming tips, and beekeeping strategies as well as a cozy mystery, check out the first book in the Henny Penny Farmette series from Kensington Books in New York. Available on Amazon.com, Barnesandnoble.com, and in other online and traditional bookstores everywhere.

Traditional Banana-Walnut Bread
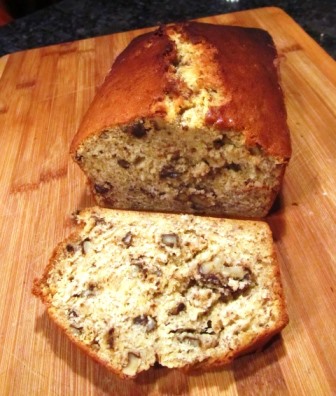
Warm, heavy, dense, and moist characterize this traditional loaf of banana-walnut bread
When the bananas on the kitchen counter become soft and the peels develop brown freckles, don’t toss them. Make a loaf of banana-walnut bread. This bread makes a lovely complement to a cup of steaming, fragrant Earl Grey tea.
The ingredient list for this bread is simple and the directions are easy. To start, you’ll need a 9 by 5-inch loaf pan, greased and floured; and, you’ll need to affix the paddle to your mixer. Set the oven to 350 degrees Fahrenheit. The recipe yields one loaf.
RECIPE: TRADITIONAL BANANA-WALNUT BREAD
Ingredients:
6 Tablespoons of softened, unsalted butter
1 cup sugar
1 1/2 cup mashed ripe bananas
3 large organic eggs
1/2 cup buttermilk (or 2 Tablespoons buttermilk powder dissolved in 1/2 cup warm water)
2 cups all-purpose flour
1 teaspoon baking powder
1 teaspoon baking soda
1 teaspoon ground nutmeg
1/2 teaspoon salt
1 cup walnuts, coarsely chopped
Directions:
Mix together in a large bowl the following–flour, baking powder, baking soda, nutmeg, salt, and chopped nuts. Set aside.
In the mixer bowl, cream the butter and sugar.
Add the bananas.
Add one egg at a time.
Add the buttermilk.
Pour the flour into the banana mixture and mix a little at time until the ingredients are all combined.
Fill the floured and greased loaf pan with batter until the pan is roughly 2/3 full.
Bake for approximately 55 minutes or until a toothpick inserted into the batter comes out clean.
*Tip: ripe bananas can be peeled and stored in a zip-lock freezer bag and frozen.
Not-So Spooky Halloween Cookies the Kids Will Love

Let the kids decorate these not-so scaredy cats, using colors they like. Add orange or black sprinkles to finish.
When you let the young ones in your family choose the cookie cutter shapes and icing colors, you’ll get plenty of helping hands making cookies for Halloween. I make these cookies a lot; they are perfect for any holiday and also for children’s tea parties. Just change the shape and bake and decorate.
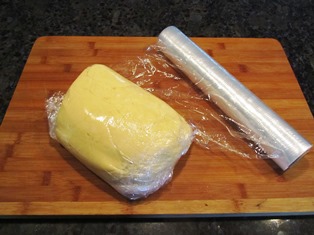
Wrap the dough ball before chilling
After making the dough, wrap in plastic and refrigerate for at least an hour to make the dough a bit firmer for rolling out.
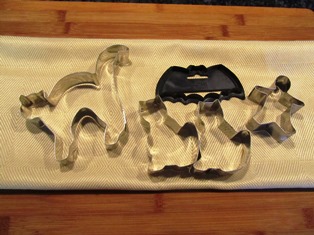
At my house, the favorite shapes for Halloween are cats and bats
Half the fun is dumping onto the counter an assortment of cookie cutters and letting the kids choose their favorites. For Halloween, they might like ghosts, cats, bats, witches, and pumpkins. Help them roll out the cookies and place them on the cookie sheet for baking.
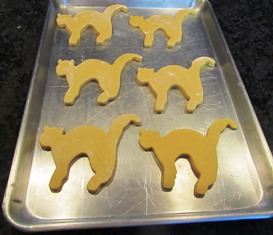
A tray of cat-shaped cookies ready for the oven
Sugar Cookie Recipe
Ingredients:
1.5 cups butter (softened if cold)
2 cups granulated sugar
4 large eggs
1 teaspoon vanilla
5 cups white all-purpose flour
2 teaspoons baking soda
1 teaspoon salt
Directions:
Cream butter and sugar together.
Slowly beat in eggs and vanilla.
Add flour, baking powder, and salt and mix together until thoroughly blended and dough can be shaped into a ball.
Cover with plastic wrap and chill in the refrigerator for at least one hour. You can also chill the dough overnight. If you don’t want to make the cookies all at once, then divide the dough into two balls to use when you want.
Preheat the oven to 400 degrees Fahrenheit.
Sprinkle flour onto a flat surface and roll out the dough to roughly 1/4 inch thickness.
Cut into shapes using your favorite cookie cutters. Arrange cookies on a baking sheet leaving 1 inch between cookies.
Bake 7 to 10 minutes.
Let cool before icing with your favorite sugar cookie icing.
A drop or two of food coloring can give you various colors of icing; , just be sure to put icing in separate bowls before adding the food coloring. Use a pastry bag with tips or even a toothpick to make designs on the iced cookie. Decorate with sprinkles.
Rustic Pluot or Plum Tart with Italian Crostata Crust
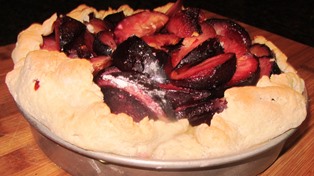
Pluots or plums are first drizzled in lemon juice and dusted with flour, then placed into the tart with bits of butter
The farmer’s market has the dark purple-black plums and pluots in abundance now, so I thought I’d buy a few and whip up a rustic summer tart, Italian style.
I like the rustic tarts with the Italian style crostata crust because they are easy to make and the tart tastes so buttery and flaky. This recipe uses butter and also cream cheese that gives the tart a special lightness. For the filling, I used pluots for this one, but you could also use ripe plums.
To make the dough, I find it easier to just put the ingredients into the food processor with a steel blade and pulse a few times, adding ice water as needed.
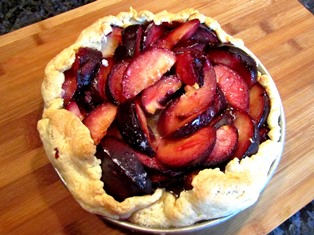
The finish tart is best served warm
Ingredients:
8 ounces cream cheese
2 sticks butter (1 cup)
2 cups flour
½ teaspoon salt
1 teaspoon cold water
6-7 large sweet pluots or dark plums
Juice from ½ medium lemon
2 Tablespoons butter
2 Tablespoons flour
Directions:
Preheat oven to 375 degrees Fahrenheit.
In a food processor with blade, process cream cheese, butter, flour, salt, and water into a ball.
*Roll out on a lightly floured surface in a circle to about ¼ inch thickness and 2-4 inches larger than your tart pan.
Place dough in a tart pan and pre-bake 10 minutes.
Wash, cut, stone, and cut pluots/plums into quarters.
Combine with lemon juice.
Toss with flour. If plums are juicy, you’ll need a bit more flour to absorb all that juice.
Cut butter into pieces and scatter around the plums as you layer the slices in the pan on top of the crostata dough.
Fold extra dough loosely back over the plums; it should not reach the center because you want a rustic look to the baked tart.
Bake for 30-45 minutes until pluots/plums are soft and dough is golden brown.
Serve warm with a dollop of whipping cream or a good vanilla ice cream.
*Avoid over-handling the dough as it will become tough.
Melt-in-Your-Mouth Scottish Shortbread
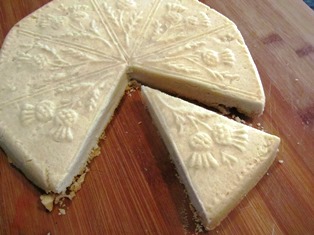
My Scottish shortbread bearing the traditional thistle pattern
Warm Scottish shortbread and tea are two of the simple pleasures of life.
Scottish shortbread, that buttery biscuitlike treat that Scottish cooks are famous for serving at teatime, doesn’t require a lot of ingredients; it’s basically flour, butter, and sugar. Of course, the dough can accommodate other additions, for example, bits of dried fruit, chocolate, caraway seeds, lemon zest, chopped dates, and nuts. I like it best plain.
I have many recipes for shortbread. Some are from magazines or books devoted to the subject of Irish or Scottish culinary traditions or foods of the British Isles, acquired during my travels to the lands of my ancestors, namely, Scotland, Wales, and Ireland.
With shortbread, more butter, less flour produces a richer biscuity cookie. It’s helpful to remember the basic 2-4-8 formula, that is: 2 ounces of sugar, 4 ounces of butter, 8 ounces of flour, plus a pinch of salt. Mix together, press into a mold, and bake 45-60 minutes in a 325-degree Fahrenheit oven until golden. Dust with sugar.
The following is my favorite recipe, slightly different. It is pictured above. Feel free to add to it your favorite ingredients.
Ingredients:
1/2 cup powdered sugar
1/3 cup rice flour
2 cups all-purpose flour
pinch of salt
pinch of baking powder
1 cup unsalted butter
Directions:
Preheat the oven to 350 degrees Fahrenheit
1. Put dry ingredients into a mixing bowl.
2. Add butter and cut in with a butter cutter or knives until it is thoroughly incorporated into the dough.
3. Knead the dough 2 minutes on a lightly floured surface.
4. Divide dough into two, roll into balls, and cover both in plastic wrap.
5. Chill for one hour.
6. Knead the dough balls back together to soften and then roll out to about 1/4 inch thickness.
7. Press into a shortbread mold or cut into shapes with a cookie cutter.
8. Bake for 15 to 20 minutes or until the dough is golden and cooked through, if using a mold. For cookies, bake on ungreased baking sheet.
9. Dust, if you like, with fine granulated sugar (also called castor sugar).
Apricot Linzer Cookies
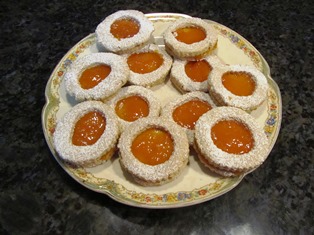
Fill these cookies with strawberry, raspberry, fig, or apricot jam or dulce de leche
I’m a self-professed cookie monster. I can’t imagine watching PBS’s MASTERPIECE MYSTERY! without a cup of my favorite Earl Grey tea and a cookie. Okay, maybe two cookies And my favorite is actually a two-layer, jam-filled cookie. These cookies are known as Linzer sablés and are the cookie version of the famous Austrian Linzertorte, dubbed the world’s oldest known cake (torte is Austrian for cake, Linzer is forLinz, a city in Austria).
The top cookie and bottom are made of the same nut-flour dough; it’s just that bottom cookie is solid, whereas the top has a hole in the center (to reveal the jam filling). The dusting of powdered sugar on top gives the cookie a lovely professional look.
They are easy to make and are pretty enough for a tea party. Choose different shapes of cookie cutters for the ring cutout. Some specialty shops carry Linzer cookie cutter sets. Use a heart shape cutter to make Linzer cookies for a wedding reception, anniversary party, or Valentine’s Day; a pumpkin or witch’s hat shape for Halloween; or, stars for the Fourth of July and also Christmas. The jewel jam color doesn’t just hold the cookie together; it emphasizes the cutout shape.
Ingredients:
9 Tablespoons unsalted butter (equivalent of 1/2 cup, plus 1 Tablespoon)
1/2 cup granulated sugar
2 egg yolks
1/4 teaspoon vanilla extract
3/4 cup almond flour
3/4 hazelnut flour
2 1/4 cups pastry flour
apricot jam for filling
powdered sugar to sift on top
Directions:
Set oven to 350 degrees Fahrenheit, but wait to do it until after you’ve made the dough and chilled it for one hour.
Combine butter and sugar in a mixing bowl and cream until light and fluffy.
Add one egg at a time and beat into the mixture.
Add vanilla (alternatively, bitter almond).
Add to the mixture the almond flour, hazelnut flour, and pastry flour and combine.
Cover and refrigerate for a minimum of one hour.
Roll the dough out on a lightly floured surface to 1/8 inch thickness.
Cut circles out of the dough using a three-inch round cookie cutter.
From half of the circles, take a one-inch round cookie cookie cutter and cut out a center hole, forming a ring.
Place rings and circles on an ungreased baking sheet.
Bake in the center of the oven for 7 to 10 minutes. They should appear golden brown.
Remove and allow the cookies to cool.
Assembly:
Spoon a dollop of jam on each solid circle and spread it evenly over the top.
Place a ring on top of each jam-coated circle.
Lightly dust the tops of each ring.
Makes approximately 4 dozen cookies