 Facebook
 Goodreads
 LinkedIn
 Meera Lester
 Twitter


Grow Seasonal Greens Now
The cool season of spring is the optimum time to grow seasonal greens for salads and healthy blended shakes. In my kitchen garden, I’ve planted a variety of lettuces, spinach, kale, and chard. Most salad greens are easy to grow also in containers, raised beds, and window boxes when gardening space is limited.
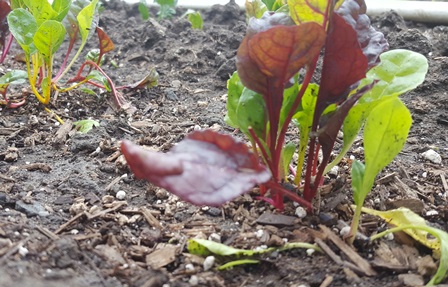
The newly planted Swiss chard shown here is a valuable source of Vitamins A, C, and K
Add compost and aged chicken manure to enrich the soil with nitrogen. Plant heirloom seeds about 1/2 inch in the soil, cover, and water. Within a week or 10 days, you should see the seedlings pop up. The greens will be ready to pick in about 25 days.
Water the plants to keep them hydrated but don’t drown the plants. When you are ready to make a salad, snip the leaves you want with kitchen scissors. New leaves will soon form if the roots are not disturbed and the plant continues to get nutrients and water.
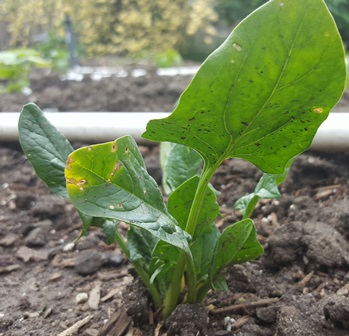
Spinach can be started in seed cell flats and then transplanted into your garden when all danger of frost has passed
SALAD OF FRESH GREENS
1. Snip a variety of greens in the early morning. Wash and thoroughly dry the leaves.
2. Place them in a bowl and crumble on some sharp cheese such as your favorite goat cheese or a Gargonzola (blue-veined, sharp tasting, and crumbly).
3. Add 1/2 cup sugared or candied walnuts.
4. Add some slice red onion and a handful of dried cranberries or chopped dried apricots.
5. Drop into the bowl some slices of a pear such as Bosc (considered the prince of pears).
6. Gently toss the salad and then spritz with red wine vinaigrette prior to plating on pretty salad serving dishes.
* * *
If you love reading about gardening and other farming topics, check out my Henny Penny Farmette series of cozy mysteries that include A BEELINE TO MURDER, THE MURDER OF A QUEEN BEE, and A HIVE OF HOMICIDES.

The newest mystery in the Henny Penny Farmette series
-
Delicious recipes
-
Farm quips and quotes
-
Tips for gardening and keeping chickens and bees
-
An exciting whodunnit mystery
Gardening Tasks for Late Autumn
Falling leaves, shorter days, and colder weather signal that winter is around the corner. With roughly a month left before winter officially begins, there are plenty of tasks for the home gardener. Don’t put away your boots, buckets, gloves, trowel, and spade just yet.
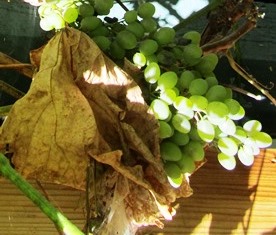
After the grape harvest, the leaves change from green to gold or brown and become dry
If you grow grapes and raspberries or blackberries, now would be the time to prune those back before mulching with compost, leaves, or sawdust. Composting suppresses weed growth.
Pick and pumpkins, apples, and winter squash. Store them in a dry area at temperature of about 50 degrees Fahrenheit.
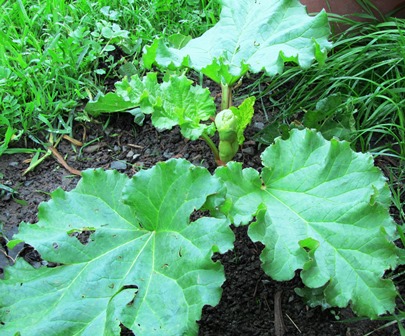
This young rhubarb flourishes in rich soil and some protection from intense, direct sun
Rhubarb plants can be divided now. Make sure there’s an eye on each new plant and tuck into rich soil and mulch.

This candy-stripe rose requires a good pruning in the fall to generate a large bush with beautiful blooms in the spring
Remove leaves and prune back roses to 12 to 18 inches. Add some bone meal to the base of the bush and work into the soil.
Plant bulbs that will flower in the spring such as daffodils, tulips, hyacinth, crocus, and scillas.
Prepare a bed for onion seedlings or sets and plant them now for spring harvesting.
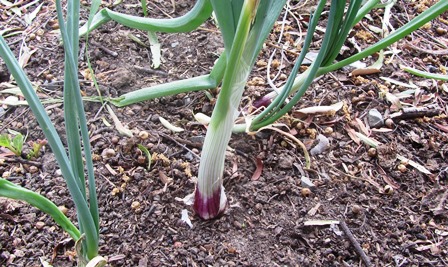
Plant red, yellow, or white onions in the fall for spring harvesting
Fill bird feeders, hang a warming light in your hen house for the freezing nights ahead, and put blankets around your bee hives.
Transfer potted mums into garden soil. Most are perennials and will return year after year.
Plant kale, ornamental cabbage, and winter-hardy plants such as pansies in the garden or window boxes for winter color.
Move cold-sensitive houseplants indoors.
A Potpourri of Tips and Tricks to Benefit Your Garden
Today’s blog is filled with miscellaneous tips and tricks that benefit the garden and also the environment.
1. Grow a cover crop–also known as green manure crop, planting a cover crop such as grasses or legumes after you’ve harvested your summer bounty can stop weeds from claiming the bed and also prevent soil erosion.
2. Mulch your garden paths–use pine needles, leaves, or old black-and-white newspapers, which are now often printed with soy ink.
3. Save empty jugs of tea, juice, milk–rinse and cut out the bottoms to use the jugs as hot-cap environments for tender seedlings.
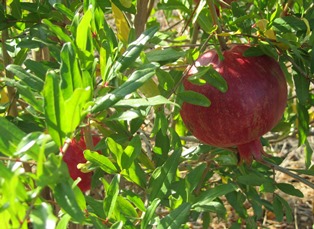
Pomegranates don’t need much water once established and gray water works just fine
4. Recycle gently used gray water–pour it on fruit trees and ornamental plants; but do not pour it on acid loving plants (gray water is naturally alkaline) so do not use it on leafy vegetables and root crops that are to be consumed uncooked.
5. Thin vegetable seedlings and hanging fruit–abundance has a down side since crowded plants don’t thrive as well or bulb as big (like onions). When fruit on fruit trees is thinned, the remaining fruit tends to grow larger.

Onions benefit from thinning; the remaining onion heads then have ample room to grow large
6. Recycle plastic tubs–whether they once held yogurt, margarine, or soup from the health food store, turn them upside down in the garden to keep melons off the ground (prevents them from rotting)
Harvesting Seeds from Onion Heads
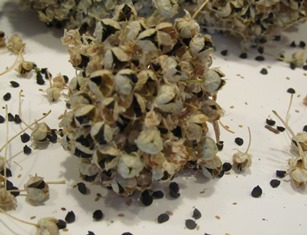
Closeup of the dried flower head of an onion with black seeds
The red and yellow onions I planted during winter here on the farmette have produced lots of fat bulbs. Now that warm weather has arrived, the plants have sent up spikes with a flower head in a process called bolting.
I’ve been using the onions in culinary creations. Now that they are bolting, I’m saving the seed heads for my next round of planting (when the weather gets cooler again).
When the seed heads I’ve collected have dried a bit, black seeds will spill out. I shake them onto paper and then store them in paper envelopes where they can dry out even more.

Newly flowered onion seed head with honeybee; see, upper right corner
The benefits of growing onions from seed rather than sets (also called seedlings) is that they perform better, are less susceptible to disease, bulb up somewhat quicker than seedlings, and store better. The seeds germinate quickly (7 to 10 days) and may be eaten in as early as 8 to 10 weeks.
Growing onions is easy. Broadcast your seed in a prepared bed when the weather is warm and all danger of frost has passed. Barely cover with soil (roughly 1/4 inch) and keep damp until seeds have germinated. If you prefer, start some onion seeds in flats to set out in the garden as seedlings.
Harvest bulbs throughout the growing season or wait until the tops flop over. Store onions in the refrigerator in a nylon stocking wrapped individually between onions to maintain freshness. The National Gardening Association has some good tips for harvesting and storing onions. See http://www.garden.org/foodguide/browse/veggie/onions_harvesting/501.
With so many onion types from which to choose, decide how you’ll use each in the kitchen and then grow various heirloom types, depending on purpose and flavor. And . . . don’t worry if next spring, you discover your onions bolting. It’s a good thing to have a seed source for such an important kitchen staple.
Germinating Seeds
On the property behind my farmette, a Sierra Live Oak tree drops acorns in abundance. The acorns sprout into seedlings, ensuring new generation of the tree.
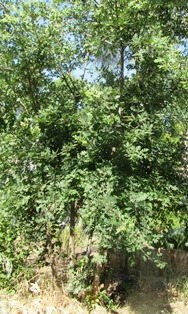
Four-year-old oak
The life cycle of the oak tree begins with acorn (the seed of the oak). As with all seeds, the acorn contains the genetic information for germinating and growing into the specific type of plant (in this case, a Sierra Live Oak).
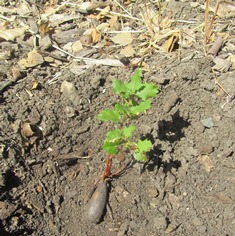
The acorn has sprouted a seedling
This is the secret of seeds, they are alive and many remain viable, able to germinate for 1-5 years. Seeds link one generation of a plant to the next. Seeds for woodlands as well as vegetable and flower gardens widely vary in size, shape, color, and the amount of time it takes for germination.
Seeds require moisture and warmth to germinate. Some–such as the flower garden varieties of columbine, petunia, begonia, and snapdragon–also require light to germinate. You would not plant those seeds under the soil, but rather scatter them on top of moistened soil or seed-starting mix.
Light, however, is not necessary for most seeds to germinate. Outside in the garden, seeds require soil and air temperatures to be warm (tomatoes need the ground’s night-time temperatures to be around 55 degrees Fahrenheit) before they’ll set up blossoms and fruit. Moisture is a requirement, too, but too much water destroys the seed.
Pre-sprouting is the process of sprouting seeds before they are planted in their permanent places in the garden. In cold climates, pre-sprouting can give plants (especially the heat lovers like tomatoes, peppers, and eggplant) a jumpstart in the spring since they are started indoors and put out when the warm days arrive.
Seed sown directly into the earth can take a week or more to germinate but seed pre-sprouted in your kitchen may take only a couple of days.
To sprout your seeds indoors, you’ll need to sprinkle them across a moistened (not dripping wet) paper towel and also cover them with moist paper towel. When inserted inside an unsealed plastic bag and placed in a warm area, your paper towel seed mat retains its moisture. Check it every day and spritz with water if necessary until the seeds germinate.
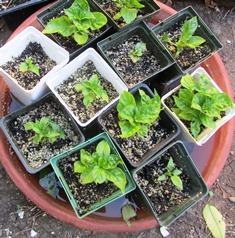
These bell pepper seedlings were pre-germinated and transferred to cells
The small plants of germinated seeds that have not yet been planted into the garden are called seedlings. Plants in cells (like the seed flats you see in nurseries) need to have two to four sets of leaves before they are ready to transplant into the garden.
Gardening becomes a fulfilling hobby when you start plants for your garden from seed and nurture the seed through the process of germination into seedlings. Flats of cell packs (usually six or eight cells to one pack) and commercially prepared potting/planting mixtures make starting seeds for your garden fuss-free and easy.