 Facebook
 Goodreads
 LinkedIn
 Meera Lester
 Twitter


Add a Secret Ingredient to Kick-start Your Compost Pile
The leaves of my plum and cherry trees are beginning to drop. The fig leaves have dried to a crisp and are also falling. I’ve got pumpkin and squash vines and stalks of corn pulled and lying in piles in the garden.
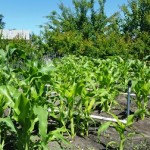
The corn (pictured here in spring) has been harvested and is now just a pile of dried stalks
This dead, particulate organic matter (detritus) in my garden is too good to throw in the green recycle bin for the city to compost. By composting it myself, I’ll save the money I might spend on buying compost next year.
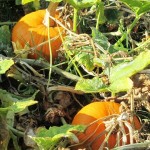
After harvesting pumpkins, throw the vines onto your compost pile
If your garden has a pile or two of of similar detritus but you’ve had trouble getting it to break down into compost, you might be missing a secret ingredient.
Add one to two cups of a nitrogen-rich garden product like blood meal, bone meal, or cottonseed meal–all are available from your local nursery or garden center.
Follow these simple steps.
1. Dump a wheelbarrow load of leaves where you will be composting this fall and winter. I use a rectangular raised bed.
2. From a cup of blood meal, generously sprinkle the meal onto the leaves.
3. Layer onto the pile grass clippings, pumpkin and squash vines, corn cobs, chicken house straw, dried oats, weeds, and other biomass material.
4. Add more blood meal, more leaves, and more organic material.
5. Sprinkle the remaining blood meal from your cup onto the compost pile and then wet it using a garden hose.
6. Cover with plastic sheeting.
The compost pile generates heat as the plant material breaks down. Thoroughly turn at two or three week intervals. Keep the pile moist (not drenched) and covered.
Using this method, you can expect to have lovely nutrient-rich compost to use on your spring flower and vegetable gardens.
___________________________________________________________________
If you enjoy reading about gardening topics and you are a mystery lover, check out my Henny Penny Farmette series of mysteries from Kensington Publishing. Each charming novel features a wholesome whodunnit along with delicious recipes and farming facts and tips.

This newest novel involves murder at a N. California winery
Click here to see more: http://tinyurl.com/ya5vhhpm
Join me for “Coffee and Conversation” at Towne Center Books in Pleasanton, The date is Wednesday, October 18, 2017, at 11:00 a.m. The address is: 555 Main Street, Pleasanton, California. Phone is (925) 846-8826.
I’ll be sharing information about my farmette, my mystery-writing process, and my newest novel, A HIVE OF HOMICIDES.
Grow Seasonal Greens Now
The cool season of spring is the optimum time to grow seasonal greens for salads and healthy blended shakes. In my kitchen garden, I’ve planted a variety of lettuces, spinach, kale, and chard. Most salad greens are easy to grow also in containers, raised beds, and window boxes when gardening space is limited.
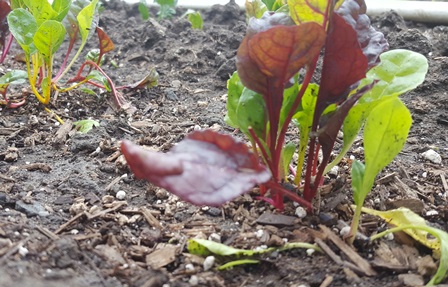
The newly planted Swiss chard shown here is a valuable source of Vitamins A, C, and K
Add compost and aged chicken manure to enrich the soil with nitrogen. Plant heirloom seeds about 1/2 inch in the soil, cover, and water. Within a week or 10 days, you should see the seedlings pop up. The greens will be ready to pick in about 25 days.
Water the plants to keep them hydrated but don’t drown the plants. When you are ready to make a salad, snip the leaves you want with kitchen scissors. New leaves will soon form if the roots are not disturbed and the plant continues to get nutrients and water.
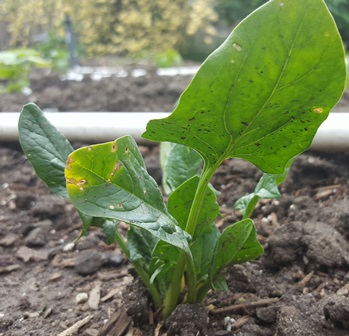
Spinach can be started in seed cell flats and then transplanted into your garden when all danger of frost has passed
SALAD OF FRESH GREENS
1. Snip a variety of greens in the early morning. Wash and thoroughly dry the leaves.
2. Place them in a bowl and crumble on some sharp cheese such as your favorite goat cheese or a Gargonzola (blue-veined, sharp tasting, and crumbly).
3. Add 1/2 cup sugared or candied walnuts.
4. Add some slice red onion and a handful of dried cranberries or chopped dried apricots.
5. Drop into the bowl some slices of a pear such as Bosc (considered the prince of pears).
6. Gently toss the salad and then spritz with red wine vinaigrette prior to plating on pretty salad serving dishes.
* * *
If you love reading about gardening and other farming topics, check out my Henny Penny Farmette series of cozy mysteries that include A BEELINE TO MURDER, THE MURDER OF A QUEEN BEE, and A HIVE OF HOMICIDES.

The newest mystery in the Henny Penny Farmette series
-
Delicious recipes
-
Farm quips and quotes
-
Tips for gardening and keeping chickens and bees
-
An exciting whodunnit mystery
Winter Solstice Day
It’s that time of the year when we mark the shortest day of the year, the beginning of winter, and the return of the light. I like to think of it as a day when I decide what I do and don’t want to take with me into the coming New Year.

The moon casts its cold light over the farmette through trees hanging onto their leaves.
We’ve had a run of cold nights with temperatures in the upper 20 degrees Fahrenheit. But the light will soon return and warm the Earth. Late January-early February marks the beginning of bare-root season. My work now includes pruning and spraying and clearing out the old to make way for rebirth and renewal.
Among the plants that renew are the fruit trees. The pruned branches, garden clippings, and old vines are being recycled into compost for next spring’s garden. Come late spring, I’ll have trees with gorgeous canopies and tons of fruit to make into jam.
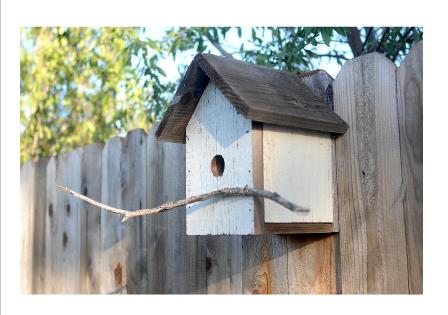
This DIY birdhouse is crafted from a repurposed fence board. Not all birds will take up residence in a house, but many will.
Garlic and onions are growing now and will through the winter months, thanks to our mild Mediterranean climate. But there is so much cleanup of the property that needs doing, I can only hope to start that today.
I’m putting out seed balls for the birds as well as refilling feeders and suet holders. Easy-to-find food keeps our feathered songsters around through spring when they start their families. For directions on making a birdhouse for your garden, check out https://hobbyreads.wordpress.com/category/crafts.
*******************************************************************************************************************************************************
Enjoy reading about farming topics? Check out my cozy mysteries–A BEELINE TO MURDER and also THE MURDER OF A QUEEN BEE (both in the Henny Penny Farmette series from Kensington Publishing).
JOIN THE CHRISTMAS EVE FUN–Read a short excerpt from my newest book, THE MURDER OF A QUEEN BEE and check out blogger Brooke Bumgardner’s interview of me at http://www.brookeblogs.com
My farmette and bee-based novels are chocked full of recipes, farming tips, chicken and beekeeping tips, sayings and, of course, a charming cozy mystery. For more info, click on the links under the pictures.
The books are available through online retailers such as Amazon, Barnes & Noble, Target, BAM, Kobo Books, and Walmart as well as from traditional bookstores everywhere.

See, http://tinyurl.com/hxy3s8q
This debut novel launched the Henny Penny Farmette series of mysteries and sold out its first press run. It’s now available in mass market paperback and other formats.

See, http://tinyurl.com/h4kou4g
NEWLY RELEASED! This, the second cozy mystery in the Henny Penny Farmette series, is garnering great reviews from readers and industry publications. Get your copy while you can. It’s sure to sell out like novel #1.
The Challenge of Dealing with Peach Leaf Curl
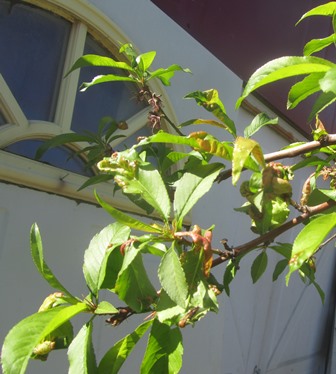
Peach leaf curl causes deformed leaf shape, blisters, and a reddish coloring in affected areas
The rains have turned Northern California hills and fields green with wild grasses and weeds. On my farmette, the fruit trees are blooming and the peaches have leafed out. The dreaded peach leaf curl is apparent on many leaves of my peach and nectarine trees.
The peach leaf curl disease is caused by a fungus, Taphrina deformans, according the integrated pest management information posted on the U.C. Davis site: http://www.ipm.ucdavis.edu/PMG/PESTNOTES/pn7426.html. This fungal infection can involve virtually every part of the tree, especially the new leaves, young twigs, new shoots, and fruits. It winters over, too, ready to infect the new growth in the spring.
Picking off the affected leaves and disposing of them in a garbage bag (never in the compost pile) seems intuitive as new the tree will produce new leaves. However, until it does, the tree is exposed to sunburn.
Many expert gardeners say the most effective treatment is prune in the fall to remove any affected branches and twigs. Spray the tree with a fixed copper fungicide after the leaves have fallen in November.
If the winter rains are heavy, you may need another round of spraying in the spring before the blossoms open. Failure to control this fungus can result in the decline of the of quality fruit and ultimately the death of the tree.
Copper fungicide, like any pesticide, is a poison. If you decide to use it, follow the directions on the packaging. Do not spray on a windy day or where the possibility of the spray can drift and contaminate areas where vegetables are ready to be picked.
Organic approaches are less effective but include the following:
1. Keep the plant healthy, but don’t over-fertilize it because that produces more tissue for potential infection.
2. Use good hygiene on and around the tree. Remove diseased leaves, twigs, and fallen leaves and discard (not in the compost pile).
3. Consider replacing the susceptible tree with a peach tree that is more resistant to peach leaf curl such as Redhaven or cultivars of Redhaven.
4. If you defoliate the tree, allow it to re-foliate in warm, dry weather when re-infection is less of a problem. Also thin the fruit crop in a season when there is a particularly severe infection because that will help keep the plant vigorous.
For more tips for farming, gardening, keeping bees and chickens, check out my Henny Penny Farmette series of cozy mysteries. Each chapter features almanac sayings and ends with farming tips or delicious recipes. The books are available through Amazon.com, Barnesandnoble.com, as well as other online and conventional bookstores everywhere.
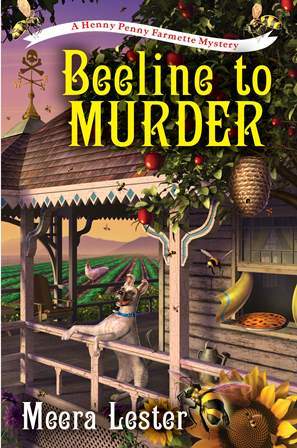
The first book in the Henny Penny Farmette series, Kensington Books 2015
The second cozy mystery in the Henny Penny Farmette series, available Sept. 29, 2016
A Potpourri of Tips and Tricks to Benefit Your Garden
Today’s blog is filled with miscellaneous tips and tricks that benefit the garden and also the environment.
1. Grow a cover crop–also known as green manure crop, planting a cover crop such as grasses or legumes after you’ve harvested your summer bounty can stop weeds from claiming the bed and also prevent soil erosion.
2. Mulch your garden paths–use pine needles, leaves, or old black-and-white newspapers, which are now often printed with soy ink.
3. Save empty jugs of tea, juice, milk–rinse and cut out the bottoms to use the jugs as hot-cap environments for tender seedlings.
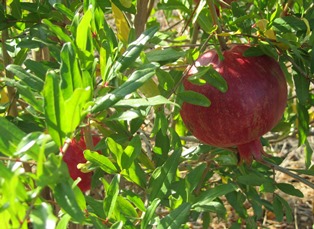
Pomegranates don’t need much water once established and gray water works just fine
4. Recycle gently used gray water–pour it on fruit trees and ornamental plants; but do not pour it on acid loving plants (gray water is naturally alkaline) so do not use it on leafy vegetables and root crops that are to be consumed uncooked.
5. Thin vegetable seedlings and hanging fruit–abundance has a down side since crowded plants don’t thrive as well or bulb as big (like onions). When fruit on fruit trees is thinned, the remaining fruit tends to grow larger.

Onions benefit from thinning; the remaining onion heads then have ample room to grow large
6. Recycle plastic tubs–whether they once held yogurt, margarine, or soup from the health food store, turn them upside down in the garden to keep melons off the ground (prevents them from rotting)
Rhubarb–That “Pie Plant”
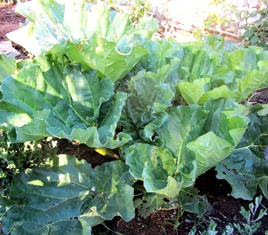
Rhubarb takes up a lot of space because of its big leaves
In my grandmother’s time, rhubarb’s moniker was the “pie plant” for the simple reason that the tart flavor of its canes nicely tempers the cloying sweetness of other fruits.
Rhubarb, long treated as a fruit, is actually a vegetable. In bygone days when tariffs on imported vegetables were higher than on fruit, a New York court decided in favor of labeling rhubarb as fruit for the purposes of taxation and tariff regulations.
One of the first edibles in the spring garden, rhubarb pushes up leaf stalks or canes (what botanists call petioles) with large leaves. The leaves are are high in oxalic acid and thus poisonous to consume (when harvesting, cut off the tops and discard; snap off the canes for cooking).
Rhubarb stalks or canes, when cooked with sugar or apples (to sweeten), are delicious in pies, jams, sauces and fruit tarts.
Rhubarb is easy to grow (in warm climates, it grows year-round). In cold climates, its leaves and canes will die but the rhizome root will generate new shoots come spring. But if it blooms, cut off the bloom to ensure the root continues to produce canes.
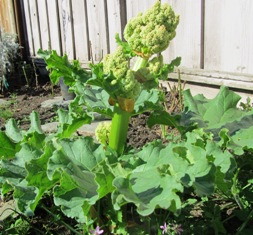
Do not allow the rhubarb to bloom; the plant will stop producing canes and may become weakened
The plant can also be grown in large containers or in greenhouses. It is not fussy about soil, produces new canes year after year, and loves sunlight.
Consumers love those red canes, but rhubarb canes, depending on the variety, aren’t always red–some are light green or pink speckled. The flavor of the light green canes, the type growing on our farmette, has the most robust flavor.
While creating a space for some new plants, we decided to dig out one of our rhubarb plants. That little rhizome I put in the ground four years ago had produced roots 20 inches into the earth. Above ground the plant had grown roughly three feet high and as wide. We will divide it and replant, since it’s a good idea anyway to divide every 3 to 4 years.
We grow Victoria, an old variety with a tendency to flower (or bolt). We prefer to remove those flower spikes in order to keep the plant producing new canes and leaves. Blooms tend to waste the plants resources, see http://www.gardeningknowhow.com/edible/vegetables/rhubarb/rhubarb-bolting.htm. Also see, http://www.hort.purdue.edu/ext/rhubarbflowers.html
In an upcoming posting, I’ll include some recipes for using rhubarb from your garden. In the meantime, consider the different varieties available and perhaps try planting a new and different cultivar. See, http://www.rhubarbinfo.com/varieties.
Divide Irises to Regenerate the Plant and Get Spectacular Blooms
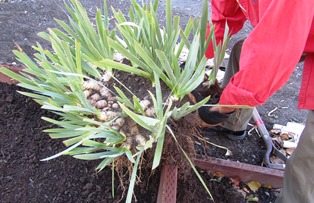
Such a large clump of bearded iris must be divided
Dividing the rhizomes of bearded iris plants is an easy and necessary process as the plant ages. The division process is best done during late summer or early fall, but we are doing this job now on our farmette.
The rhizome is a thick tuberous type of structure that sends up stems and leaves and also produces roots. Many gardeners divide their iris clumps every three to four years. Our beds of iris have become overcrowded with many new baby plants. It’s time to divide.

Good top soil with low-nitrogen fertilizer ensures the iris get off to a good start
Before we move our iris from the side garden to planter boxes made of pressure-treated redwood, we prepare the soil in those boxes. We amend it with low-nitrogen fertilizer and compost.
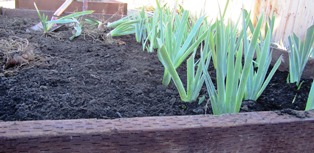
These iris are planted too close–they will be replanted to 16 inches apart for air to circulate and for growing room
We cut back the foliage and pull off any of the sword-shaped leaves that have dried. Then we gently pull apart the new growth from the old clump. Pruning and cutting back the leaves helps ensure that pests do not overwinter.
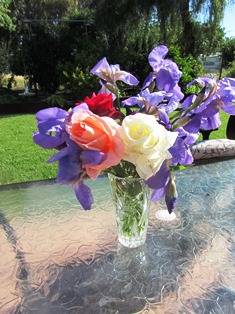
These purple iris bloom in our garden in spring, making a lovely arrangement with roses
The rhizome produces more rhizomes over time. Eventually the original rhizome will wither and die. Regularly dividing the clumps ensures new baby plants and blooms for years to come.
Early December Farmette Chores
I arose early today as I have for the last few months, eager to greet the rising sun even as the days grow shorter as we head toward the winter solstice. I stand with eyes closed facing east until the light blazes against my lids, almost lighting my being from the inside. Then I say prayers–my way to start the day off right.
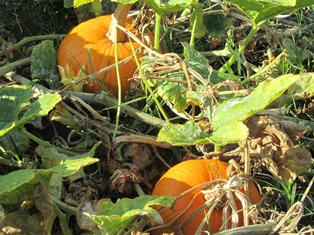
Pumpkins have been harvested now and the vines pulled and thrown into the compost pile
The fruit trees have changed leaf color and dropped most of their foliage. I helped them along today, collecting up all the fallen leaves and putting them in the green recycle bin. With the leaves gone, I can use an organic spray to prevent overwintering of fungi and pests. Similarly, I pluck the leaves from the tea roses and cut the canes to a height of between 12-18 inches.
With the spade, I turned the soil around the base of most of the fruit trees to aerate the soil in preparation for adding some amendments like compost. I twisted the remaining pumpkins off the vine and tossed the vines (which were still blooming and setting up fruit) into the compost pile. It’ll be freezing soon, so I’m just getting a head start.

Finches dining on small oily black Nyjer seeds
I put food in all the bird feeders and hung some suet for the woodpeckers. Finally, I raked an area under the pepper tree for the new, smaller hen house that Carlos will build sometime this month since we plan to acquire some new chickens in January. In all, it has been a very productive day . . . one of many scheduled for this month, the last month of the year.