 Facebook
 Goodreads
 LinkedIn
 Meera Lester
 Twitter


Carlos Lays a Beautiful Stone Floor Despite Some Surprises
My daughter knew my husband Carlos had an opening in his schedule and wanted him to create a carefree stone floor for her backyard. She wasn’t interested in grass or plants, given the California drought, and her husband came up with a design. Easy.
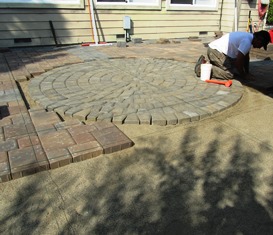
Sand is placed over gravel and raked before the stone is set in place, hammered down, and leveled
But as it turns out, the design was fairly complicated. It consisted of a cross with a circular medallion. The stones were four different sizes and two different colors. Maybe not so easy.
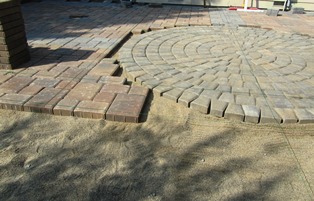
Green string, tightly strung provides a guide for correctly positioning the stones in the circle and in straight lines
Carlos, nevertheless, rose to the occasion and with a buddy got to work. My daughter swore that all the sand and rock Carlos would need were already there from the previous patio, but that turned out not to be the case.

The floor pattern emerges more clearly when you spray it with water
So imagine Carlos’s surprise when he realized he would have to pull out the dirt, level the ground, and do all that prep work before he could start laying stone.
Everyone put their stress aside, ordered sand and gravel, assemble the tools like the rake, mallet, and wheelbarrow, and enlisted one of our neighbors for additional help.
It took more than week. But the work is almost finished. My daughter loves the patio and she’s already planning a late summer party to show it off.
Carlos is thinking maybe we could use a floor like that on our farmette. With all the work we do, it’s nice to have a flat floor with a bench and table to sit a spell and catch your breath.
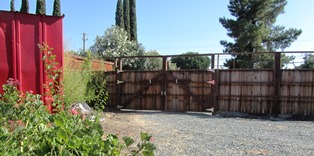
Building an Expensive Estate Fence for Next to Nothing
Over the last week, my husband build an eight-foot-tall estate fence across the front of our property. When I wasn’t writing or doing other chores, I helped. We’re big believers in recycling, so naturally, when it came to the fence, we found a way to build it without cutting down a single new tree and use lumber that might otherwise go into landfill.
The idea for the fence is to have something beautiful and functional. We now have a fence next to the street and an interior fence. Between the two fences is a spacious half circular driveway where our cars and trucks can enter, leave, or park.
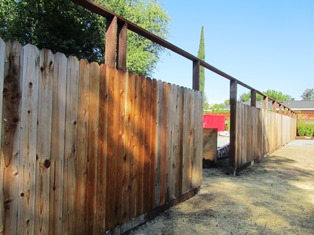
The new fence is 110 feet long with two gates, one opens for cars and the opens to the curved stone walkway
We were given some 6-by 6 posts (about 70 of them) by a friend working in demolition. A lot of useable pressure treated lumber came in the same delivery. We had saved fence boards we bought four years ago and, in an unbelievable stroke of luck, we had enough to cover the entire fence except for the very last 16-board section.
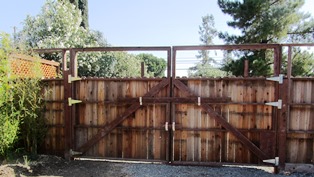
The wooden gate swings wide open to permit a vehicle or heavy machinery access (I’m thinking a boat would be nice)
Our plan is to add trellises on top of each fence section and install large wrought iron gates that will open electronically. For now, we just have an opening at one end of the fence for our curved stone path leading to the front door. The wooden gate at the far end of the fence will permit a truck or car to enter the back of the property.
The back side of the driveway
By stacking the 6-by-6 boards on top of each other and drilling them together in place, Carlos made what amounts to planter boxes for the bamboo that line the property.
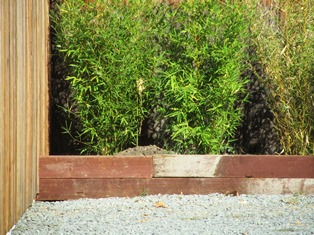
Stacked 6-by-6-foot lumber holds bamboo. Although one board needs staining, we don’t complain because the lumber was free
Gravel Paths Lend Elegance to a Garden

Gravel paths are well worth the work
Carlos, my husband, and I conceived our garden plan after we moved onto the farmette and realized the limitations of the land. The soil in this east bay valley in many places is compacted clay. Many areas around our farmette needed turning and aerating as well as nutrient amendments. If we wanted to plant fruit trees, berry vines, and flowers of all kinds, especially those attractive to honeybees, we needed good soil everywhere except under the gravel paths.
For a path, small size gravel looks best
Putting in gravel paths made economical sense after we decided to build some large boxes for raised beds. Between the boxes, we planted trees. We envisioned the paths running either behind the boxes or in front of them. Our master plan continues to evolve, even as we work on the land–developing it and renovating the farmhouse.
The first step was to prepare the path area. We pulled out weeds, removed rocks, and turned the earth with a rototiller. Then we raked and compacted the soil.
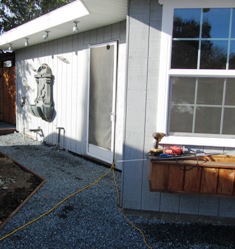
A gravel path wraps around the house
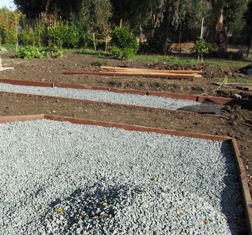
We laid out the rows for the paths and installed pressure-treated wood held in place with spikes to keep the paths where we wanted them. In some cases, we had to build retaining walls. Then, we put down black plastic weed barrier paper, and hauled in the gravel.
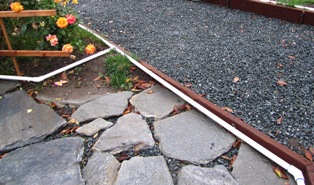
Gravel against a flagstone with sprinkler pipe (white)
Gravel comes in sizes ranging from rice grains all the way up to basketballs. Anything bigger than two feet is considered a boulder. We chose the pea-to-nickel size. We also created gravel walkways alongside the house and we used the same gravel in our large circular driveway.

The gravel path lies behind the planter boxes
A gravel path can lend an elegance to a landscaped space. On a trip to the United Kingdom, I visited country houses, castles, and gardens where I found gravel generously used on paths and in driveways. Here on the farmette, I really appreciate not getting my boots and shoes muddy during our Northern California rainy season. Our gravel paths make that possible.
Boxes To Grow Just about Anything

Carlos building a planting box
When we arrived at the Henny Penny Farmette our first summer here, the weeds on the property towered over our heads. We knew it would take a lot of work to change the wild, chaotic landscape into something beautiful. After we pulled more weeds than we ever want to remember, we planted a garden, started a bed of herbs, and (during the following bare root season in late January) put in an orchard. That rainy season we had 21 straight days of rain.
My husband Carlos had left to visit his family in the Dominican Republic. The rains didn’t let up. I feared the septic would overflow, take down the young trees, and destroy our herb beds. Near the end of that rainy period, the water level rose high enough to threaten the door into the house. Then the rain stopped.
When Carlos returned, he hired some workers to help us reconfigure the landscape, move dirt, and create a level backyard. We put in a small lawn and gravel paths that defined the entire space at the back of our property. We also raised one area of the yard where the septic could drain in a different direction than the house if it rained like that again.
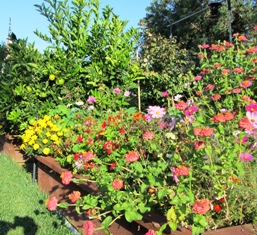
Planting boxes line the lawn
Carlos incorporated into the overall landscape design several planting boxes in which to grow our berries as well as flowers. The soil here is heavy clay that turns to concrete in the summer. Planting boxes allows us to control the soil, enriching it with nutrients and compost as needed. The gravel paths enable us to move around the acreage during the rainy season, inspecting the boxes of plants, without getting getting mired in mud. The cost to build each box is about $125.00.
Planting boxes allow us to meet each each plant’s needs, for example, acid-soil for blueberries, or great drainage for roses. I first observed raised beds in massive planting boxes during a trip to Russia in the late 1990s. In a centuries-old village along the Volga, I saw vegetables and herbs flourishing under an apple tree planted in the center of a massive box. Our Henny Penny Farmette planting boxes are 4 ft. by 6 ft., so we wouldn’t grow trees in the boxes. However, we have planted a citrus or fruit tree between the boxes. These raised beds in frames truly make it possible to grow almost anything and create a sense of order out of the wild chaos of nature.